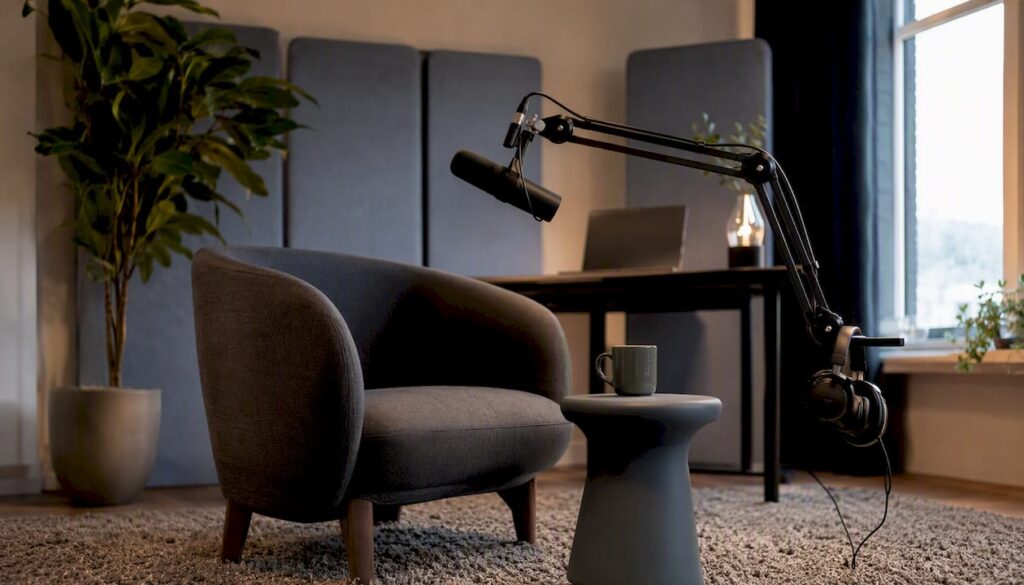
You can set up a functional podcast studio in just one day by following five steps: choosing the right space, treating the acoustics, connecting the basic equipment, setting up a recording workflow, and making a test recording. That’s the order that matters, and that order also serves as your priority list.
Do this first:
- Choose a small, furnished room with soft surfaces (carpet, curtains, sofa)
- Do the clapping test: clap your hands and listen to the reverberation
- Address the first reflection points to the side of and above your speaking position
- Connect your microphone, adjust the gain, and make a 60-second test recording
- Listen to that recording on your phone, laptop, and headphones
Only once you’re satisfied with the space and the acoustics should you invest in more expensive equipment. That’s not a rule of thumb; it’s the order of things that makes all the difference.
Key insights
Setting up a functional podcast studio always starts with the space and acoustics, not with the most expensive microphone.
| Item | Details |
|---|---|
| Space and Acoustics First | Address primary reflection points and corners before investing in expensive equipment. |
| Fifty-fifty budget allocation | Divide your budget roughly equally between equipment and acoustic treatment for the best results. |
| USB or XLR, depending on your workflow | Choose USB for solo use and a quick start; choose XLR for multi-host setups and a clear upgrade path. |
| Test before each session | Check the gain, phase, and headphone bleed, and make a 60-second test recording. |
| I4studio for Custom Solutions | I4studio supplies acoustic panels, studio gear, and custom-built studio PCs for every budget. |
Table of contents
- How do you choose the best space for your podcast studio?
- Tackling Acoustics: Where Do You Start, and What Really Works?
- What equipment do you need: USB, XLR, or hybrid?
- How do you set up a reliable recording workflow?
- Basics of Video and Lighting for Video Podcasts
- Ergonomics and guest experience: how do you make the studio inviting?
- How much does a podcast studio cost, and how do you allocate your budget?
- How do you test and set up your studio for your first recording?
- Acoustics always come before hardware
- I4studio can help you with customization and acoustics
- Sources
- Frequently Asked Questions
How do you choose the best space for your podcast studio?
The room matters more than the microphone you buy. A room with hard floors, large windows, and bare walls will always sound mediocre, no matter what equipment you use. A small, well-furnished room with carpet and curtains gives you an immediate advantage.
Good criteria for a recording studio in a Dutch home or office:
- Size: A small to medium-sized room works well. Larger rooms require more treatment.
- Shape: Avoid perfect squares; rectangular rooms with irregular shapes are less prone to standing waves.
- Floor: Carpet or a large rug immediately dampens reflections.
- Windows: Large windows are acoustically problematic. Hang heavy curtains or treat the side walls.
- HVAC and ventilation: Air conditioning and fans are the most underestimated sources of noise. Always test with the ventilation on.
- Outdoor noise: Test during the busiest time of day. Street noise, trains, or neighbors cannot be mixed out.
Ideally, place the host’s position in the center of the room, away from the walls. Walls cause reflections and bass buildup. If there are two or more speakers, position the microphones opposite each other so that each speaker has their own acoustic space.
Perform a clap test:
- Stand in the recording position
- Clap your hands loudly once
- Listen: Do you hear a long reverberation or a fluttering echo? If so, treatment is needed.
- Then make a short test recording and listen to it on headphones
Pro tip: Don’t have a suitable room? A large closet full of clothes works surprisingly well as a workaround. The clothes absorb reflections, and the small space minimizes room resonance. Ideal for solo recordings when you want to get started quickly.
Small rooms can work very well if you handle placement, microphone distance, and soft materials correctly. Close-miking and portable treatment quickly yield measurable improvements in confined spaces.
Tackling Acoustics: Where Do You Start, and What Really Works?
Acoustics affect your recording more than even the most expensive microphone. An untreated room sounds hollow and unprofessional, and that can’t be fixed in post-production. Treat the room first.
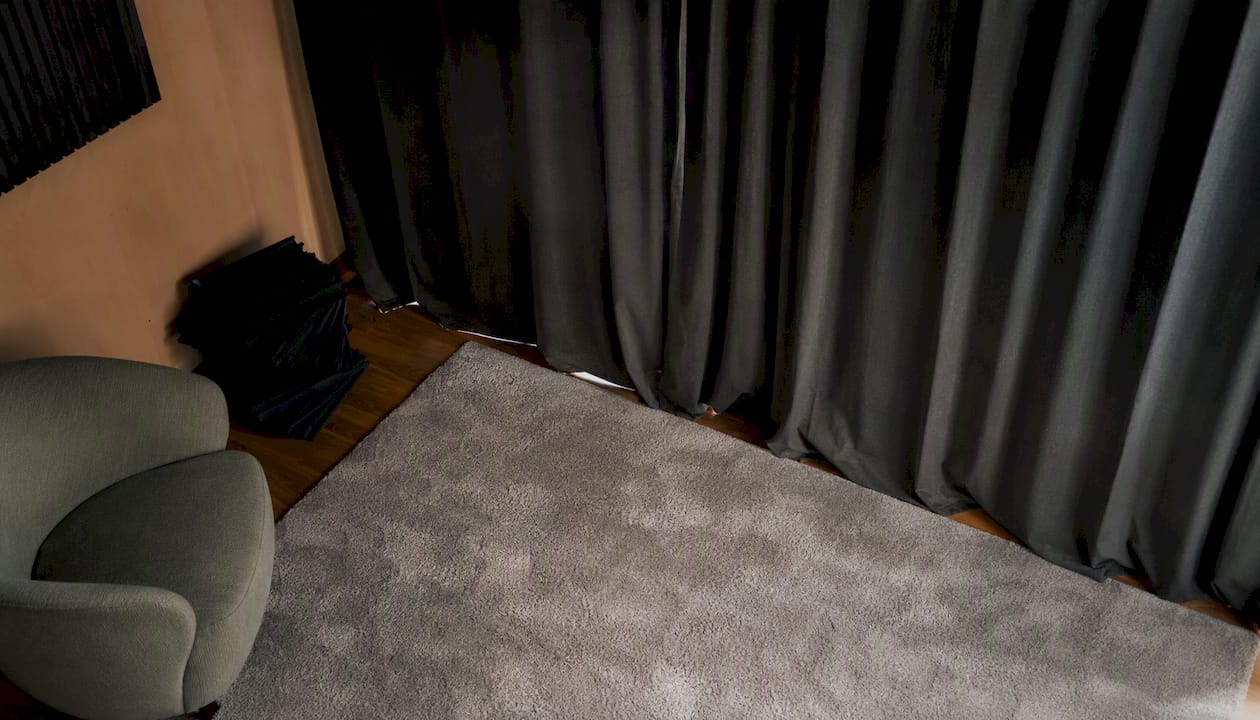
The quickest improvements come from the first reflection points: the walls immediately next to and above your speaking position. Treat approximately 30% of the wall surfaces surrounding the speaking position to significantly reduce flutter and reflections. Next, treat the corners to enhance bass response, and finally, use diffusion to achieve a lively yet controlled sound.
Practical treatment sequence:
- Initial considerations (side walls and ceiling next to the microphone): absorption panels or thick curtains
- Corners (bass traps): foam rubber, heavy furniture, or special bass absorbers
- Back wall (diffusion): a bookshelf full of books or an acoustic diffuser
- Ceiling (ceiling cloud): absorption panel above the speaking position
DIY options work well as a starting point: a sofa, a stack of comforters, bookshelves, and rugs already provide a lot of sound absorption. But for a consistent, professional sound, targeted acoustic panels are more effective. The Mini Artic wall panels from I4studio are compact and suitable for small spaces, while the Diffuser Serious provides controlled diffusion without making the room sound dead.
Soft materials such as carpet, curtains, and furniture perform better acoustically than bare floors and windows. A room with upholstery and furniture immediately gives you a better starting point. You can find more technical information about absorption and diffusion in the complete guide to designing studio acoustics.
Pro tip: Place a thick rug under the table and hang a blanket behind your speaking position if you don’t have panels yet. This costs nothing and noticeably reduces the most distracting reflections.
What equipment do you need: USB, XLR, or hybrid?
The core of your signal path consists of three components: a microphone, an interface or mixer, and a computer or recorder. Everything beyond that is an extension.
USB or XLR: When Should You Choose Which?
USB microphones are plug-and-play, require no additional interface, and are generally affordable. They’re ideal for solo creators who want to publish quickly. USB mics offer good sound quality for beginners and can be used right away on a PC or Mac, but they don’t scale as well when using multiple microphones at once.
XLR microphones require an audio interface or mixer, but offer greater flexibility and a clear path for upgrades. XLR setups are modular and better suited for studios with multiple users. The line between the two is blurring: hybrid microphones with both USB and XLR connections are available, giving you the best of both worlds.
| Feature | USB microphone | XLR microphone |
|---|---|---|
| Connection | Directly to PC/Mac | Via audio interface or mixer |
| Expandability | Limited (one mic per USB port) | High (multiple channels via mixer) |
| Price range | Affordable | slightly more expensive, requires an interface |
| Use Case | Solo, quick start | Multi-host, professional growth |
| Sound Quality | Good to very good | Excellent with a good interface |
Recommended base chains by tier
Base:
USB condenser microphone or dynamic USB mic
No interface required
Closed-back headphones
Pop filter and microphone arm
XLR microphone with audio interface
Closed-back studio headphones
Accessories such as a shock mount and pop filter
Multiple XLR microphones with a mixer or audio interface
Headphone amplifier for multiple speakers
Backup recorder
Extensive acoustic treatment
Accessories are often underestimated: a shock mount eliminates table vibrations, a pop filter reduces plosives, and a microphone arm keeps the position consistent. Position the microphone 6–30 cm away and tilt it slightly off-axis to avoid plosives and clipping.
Pro tip: Start with USB if your publishing schedule is more important than future expansion options. You can always switch to XLR later without having to rebuild your workflow.
How do you set up a reliable recording workflow?
A good workflow prevents you from discovering after a two-hour session that you recorded on the wrong channel. The signal chain is simple: microphone to interface or mixer, interface to computer, DAW or recorder captures the signal, and you monitor through closed-back headphones.
Gain staging in three steps:
- Set the gain so that your speech peaks at approximately -12 dBFS at normal speaking volumes
- Make sure no red light is on (clipping)
- Turn on direct monitoring on your interface so you can hear yourself without latency
Record in WAV format; 24-bit, 44.1 or 48 kHz sampling rates are recommended for sufficient dynamic range and broad compatibility. Use MP3 only for the final export.
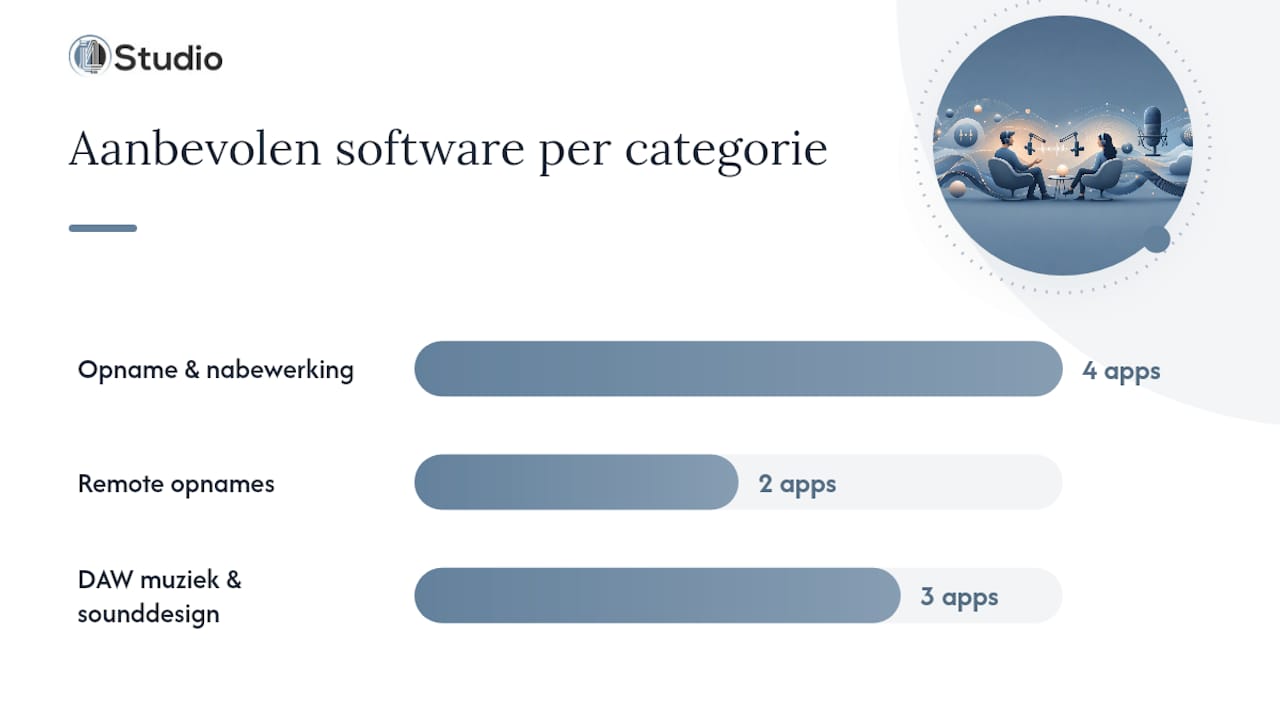
Recommended software:
- Recording and post-production: Audacity (free, Windows/Mac/Linux), Adobe Audition, Reaper, or Logic Pro (Mac)
- Remote recording: Riverside.fm or Zencastr for high-quality remote recording
- DAW for music and sound design: Ableton Live, FL Studio, or Cubase
Checklist for backups and file names:
- Use a consistent naming convention:
JJJJ-MM-DD_afleveringnummer_gastnaam - Save raw recordings in two locations (local + cloud storage)
- Always export a backup of the raw tracks before post-production
A custom studio PC from I4studio is configured for low latency and stable DAW performance, which is immediately noticeable during longer recording sessions.
Video and Lighting Basics for Video Podcasts
Sound always takes precedence over visuals. But simple improvements in lighting and framing yield great results with little effort.
Exposure Priorities:
- Keylight: a softbox or large window to your side provides soft, flattering light
- Fill light: A small reflector or a second light on the other side fills in shadows
- Background: Use a neutral background or a bookshelf that also serves as sound absorption
Smartphones and webcams work well in sufficient light. Position your camera at eye level and make sure your face fills the top third of the frame. A cluttered or distracting background draws attention away from the content.
Audio-Video Synchronization Checklist:
- Use a clapperboard or clap your hands at the start of each take
- Check lip-sync during the first edit by looking for a distinct plosive sound
- Always record audio through your audio interface, not through the camera’s microphone
Pro tip: Choose LED panels over halogen lamps. They produce no heat and no additional fan noise, which won’t compromise your acoustic treatment.
Ergonomics and Guest Experience: How Do You Make the Studio Inviting?
Comfort is a factor in productivity. An uncomfortable or cramped studio shortens sessions and affects the energy in your recordings. Guests who feel at ease speak more freely and give better interviews.
Practical design tips:
- Choose an ergonomic chair that also complements the studio’s aesthetic
- Keep the temperature pleasant: 19–21 °C is comfortable for longer sessions
- Ventilate the room before recording, not during (fan noise)
- Tuck away cables using cable channels or Velcro; loose cables are a tripping hazard and look unprofessional
- Have a glass of water ready for each speaker
Send your guests a brief message before the session: explain how the headphones work, what the correct microphone distance is (a fist’s width), and that they can speak at a normal volume. This will save you from having to make corrections afterward. For creative professionals who also work with external guests or musicians, NOWJOBS offers information on hiring part-time performers in the performing arts if you want to bring in additional talent on a flexible basis.
Pro tip: Avoid cramped setups where guests can hear each other’s microphones through their headphones. Adjust headphone volumes individually, or use a small headphone amp with separate volume controls for each channel.
How much does a podcast studio cost, and how do you allocate your budget?
The most common rule of thumb: split your budget roughly fifty-fifty between equipment and acoustic treatment. In practice, this means that with a budget of €600, you shouldn’t spend €500 on a microphone and €100 on foam. Acoustics have a greater impact per euro than hardware, especially in the early stages.
When should you deviate from the fifty-fifty rule? If your space already has good acoustics (lots of furniture, carpet, curtains), you can focus more on equipment. If you’re recording in a bare office space, invest in acoustic treatment first.
Order of purchase:
- Acoustic treatment (panels, curtains, rugs)
- Microphone that fits your workflow (USB or XLR)
- Audio interface and headphones (if you choose XLR)
- Accessories (arm, shock mount, pop filter)
- Computer or upgrade to a custom studio PC
I4studio offers acoustic panels and studio gear for beginners as a starting point for every budget range. The core equipment for a functional studio consists of a computer, an audio interface or mixer, and a microphone, supplemented by monitoring speakers and basic acoustic treatment.
How do you test and set up your studio for the first recording?
Testing is not an optional step. A brief testing procedure before each session prevents surprises during post-processing.
Step-by-step test checklist:
- Check all cable connections (XLR, USB, power)
- Adjust the gain: speak at a normal volume and check that the meter peaks around -12 dBFS
- Listen through headphones for headphone bleed: can you hear the other microphone in your channel?
- Check phase when using multiple microphones: set the channels to mono and listen to see if the sound becomes thinner (phase issues)
- Clap your hands in the room and listen for reverberation
- Make a 60-second test recording using a reference script
- Listen to the recording on your phone, laptop, and headphones
Common Problems and Quick Fixes:
- Plosives (p and b sounds): Add a pop filter or tilt the microphone slightly off-axis
- Hum or buzz: check grounding, use a DI box or power conditioner, avoid sharing power circuits with lighting
- Latency: Enable direct monitoring on the interface; reduce the buffer size in your DAW
- Echo or reverberation: Add absorption panels to the first reflection points
Power infrastructure is often underestimated. A power conditioner or UPS for critical workflows, along with neat cable routing, significantly reduces hum and interference. Preferably, use a separate outlet for your audio equipment, isolated from lighting and other electronics.
Acoustics Always Come Before Hardware
Anyone who has spent years helping set up studios sees the same pattern over and over again: creators spend their initial budget on an expensive microphone and then record in a bare office space with laminate flooring. The result sounds hollow and unpolished, regardless of the microphone.
The priority is always the same: treat the room first, then the hardware. A well-treated room with a mid-range microphone sounds better than an untreated room with top-of-the-line equipment. That’s not just an opinion; it’s what you hear when you compare the recordings side by side.
Another factor that’s often underestimated: a consistent workflow. Start every session the same way—with the same gain settings and the same microphone placement. Consistency in your recording process gives you more control during post-production and fewer surprises per episode. A professional studio that delivers top-notch sound always combines both: treated acoustics and a stable, repeatable technical setup.
I4studio can help you with custom solutions and acoustics
You now have a concrete plan. The next step is to choose the right products that suit your space and workflow. I4studio offers studio gear for beginners and custom studio PCs configured for low latency and stable DAW performance. For acoustics, I4studio offers the Diffuser Serious for controlled diffusion and compact wall panels for small spaces.

Want to know which configuration is right for your studio? Check out the studio PC examples and configurations, or go directly to the full selection on I4studio for an overview of equipment, acoustic panels, and accessories by budget range.
Sources
- Master Your Podcast Room Design for Professional Sound | SparkPod
- How to Set Up a Professional Podcast Studio – The Podcast Consultant
- What Is a Suitable Space for Recording a Podcast?
- Small Room Podcast Setup: Complete Home Studio Layout (2026)
Frequently Asked Questions
What’s the minimum you need for a podcast studio?
The three core components are a microphone, a computer, and an audio interface or mixer, along with closed-back headphones and basic acoustic treatment. With a USB microphone, you can skip the interface and get started right away.
When should you choose USB and when should you choose XLR?
Choose USB if you’re recording solo and want to get started quickly; choose XLR if you’re working with multiple speakers or plan to expand later to a more complete studio setup with more channels and greater flexibility.
How much should you budget for a basic studio?
A functional basic studio costs around €200, including a microphone, headphones, accessories, and simple acoustic treatment. Divide this budget roughly equally between equipment and acoustics.
How do you organize a podcast efficiently?
Use a consistent file-naming structure, save raw recordings in two locations, and use a short test checklist for each session. This helps you avoid technical surprises and keeps the production process consistent.
Recommendation
- Setting Up a Music Studio: Step-by-Step Guide to the Best Sound
- Studio Design Tips: A Practical Guide for Audio and Video Studios – https://i4studio.nl/
- Practical Home Studio Setup Ideas for Musicians and Producers – https://i4studio.nl/
- Home Studio Setup Tips: Complete Guide to a Professional Home Studio – https://i4studio.nl/