TL;DR:
- A good home studio requires proper hardware, software and acoustic treatment.
- The layout and placement of monitors and acoustic solutions are critical to sound quality.
- Customization and targeted investments deliver better results and long-term job satisfaction.
Achieving professional sound quality at home is no longer a luxury; it is a realistic goal for any musician or audio professional. Yet many people run into the same obstacles: a bad space, the wrong equipment or a budget that quickly runs out. A well-thought-out home studio makes the difference between recordings that sound like a demo and recordings that sound like a finished product. In this guide, you’ll learn step-by-step how to set up a home studio, from initial equipment selection to optimal acoustic treatment and a workflow that really works.
Table of contents
- What do you need for a home studio?
- The ideal space and acoustics
- The layout: from layout to workflow
- Common errors and solutions
- Our vision for custom home studios
- Your next step: custom studio solutions
- Frequently asked questions about building a home studio
Key Insights
| Item | Details |
|---|---|
| Essential studio supplies | A good foundation starts with the right hardware, software and space. |
| Acoustics are crucial | Sound quality is greatly influenced by smart acoustic treatment. |
| Customization pays off | A matched layout and selection of equipment ensures an optimal workflow. |
| Avoid common mistakes | Save time and money by learning from the most common home studio pitfalls. |
What do you need for a home studio?
Now that you know why a home studio is valuable, let’s first look at what you need to get started. Home studio supplies can be divided into three categories: hardware, software and space.
Hardware: the foundation of your studio
Without the right hardware, you won’t get anywhere. The essential components are:
- Computer: The core of your setup. Choose adequate processor power and RAM, at least 16 GB, so that your DAW runs smoothly.
- Audio interface: This device converts analog sound to digital. A good interface ensures low latency and clear preamps.
- Microphone: For vocals and instruments. A condenser microphone is versatile for studio recording.
- Studio monitors: Active monitors provide a fair, flat frequency spectrum so your mixes are right on any playback system.
- Headphones: Indispensable for monitoring during recordings.
Software: DAW and plugins
Your Digital Audio Workstation (DAW) is your digital workstation. Popular choices are Ableton Live, Logic Pro and Pro Tools. Plugins add effects and instruments. Start with the included plugins and expand later.
Comparison: simple vs. advanced setup
| Section | Entry level | Professional level |
|---|---|---|
| Computer | Budget laptop, 8 GB RAM | Custom studio PC, 32+ GB RAM |
| Audio Interface | 2-channel, stereo I/O | Multi-channel, low-latency |
| Microphone | Dynamic microphone | Large-diaphragm condenser |
| Monitors | Passive bookshelf speakers | Active studio monitors |
| DAW | Free version (GarageBand) | Full license of Pro Tools |
The essential equipment for a good home studio depends greatly on your goals. Do you want to record only demos or deliver commercial productions? That will determine how much you invest. Check out our home studio budget overview to get a realistic idea of the cost per level.
The ideal space and acoustics
Now that the hardware and software have been discussed, the room itself is the next focus. Acoustics are crucial to recording quality and are severely underestimated by many beginners.

Room selection: dimensions and insulation
Not every room is suitable as a studio. Small square rooms create standing waves, resulting in inaccurate bass reproduction. A rectangular room with dimensions that are not in a simple ratio, such as 4 x 5 x 2.5 meters, works better. Avoid rooms with lots of glass or bare concrete walls.
Insulation and acoustics are two different things. Insulation keeps sound out or in. Acoustic treatment improves sound inside the room. Both are important, but for most home studios, acoustic treatment is the first priority.
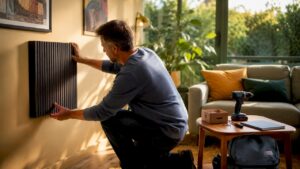
Acoustic treatment: what solutions work?
| Treatment | Function | Placement |
|---|---|---|
| Absorbent panels | Damp reflections and reverberation | First reflection points, corners |
| Bass traps | Absorb low frequencies | Corners of the room |
| Diffusers | Diffuse sound for a living sound | Back wall |
| Ceiling Cloud | Dampens early reflections from above | Above the mix position |
Common mistakes in acoustic treatment:
- Only use egg cartons. This only absorbs high frequencies and does not solve the real problem.
- Apply too little treatment. A room needs at least 20 to 30 percent wall area with treatment.
- Forgot to treat the corners. That is precisely where low frequencies accumulate.
Check out our studio acoustics tips and available home studio acoustic solutions for concrete products and placement recommendations.
Pro-tip: Clap your hands once in the empty room and listen to the aftertone. Do you hear a distinct echo or metallic tone? If so, acoustic treatment is needed. Then use a measurement microphone with software such as Room EQ Wizard to objectively measure your results.
The layout: from layout to workflow
The space is now optimal; time to look at an efficient layout and workflow. A smart layout allows for better workflow and less frustration during sessions.

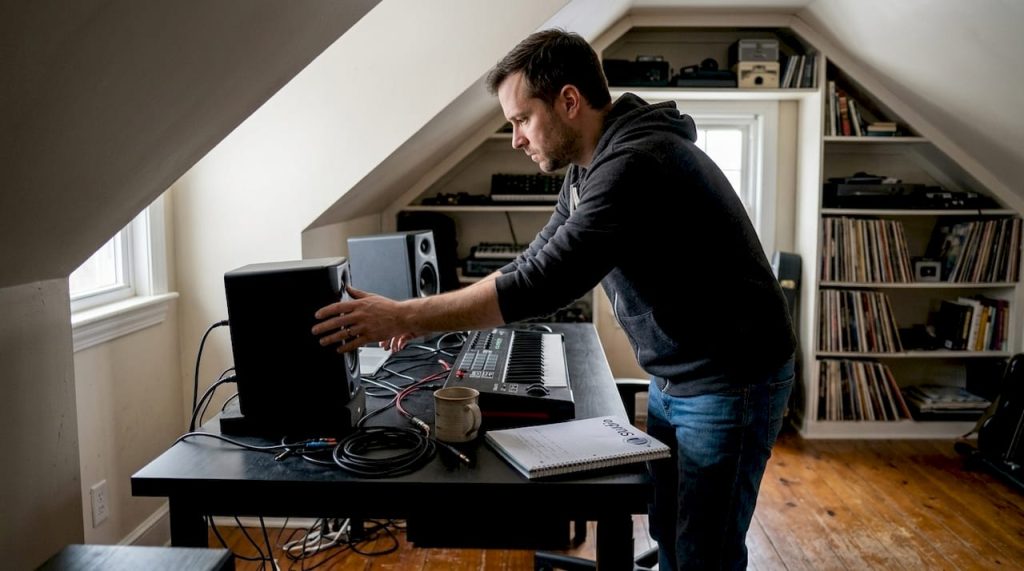
Position of monitors and workstation
Place your studio monitors level with your ears and equidistant from the side walls. The ideal arrangement forms an equilateral triangle between you and the two monitors. This way you will hear an accurate stereo image reproduction. Place your monitors on isolation pads to prevent vibrations through the desk.
Your workstation should preferably be a third of the room length from the front wall. This minimizes the influence of standing waves on your listening position.
Step-by-step design of your studio
- Determine the listening position at one-third of the room length.
- Place your desk and chair in that position, centered widthwise.
- Position the monitors in an equilateral triangle with your head.
- Install acoustic treatment at the first reflection points on the left, right and top.
- Organize cables with cable trays or Velcro to keep a tidy workstation.
- Test the setup with a measuring microphone before final setup.
Pro-tip: Use colored cable ties or labels by category, power, audio, MIDI, so you never lose time searching for the right cable during a session. An organized studio works faster and more inspiring.
From idea to production: a working workflow
A good workflow starts with a set order. Open your DAW, load a project template with your standard plugins and routing, and start recording or programming right away. In between, save and create versions. That way you never lose work and you can always go back to an earlier stage. Check out home studio setup and practice studio layout examples for concrete inspiration.
Common errors and solutions
By knowing the optimal setup, you can avoid many mistakes. Let’s cover the most common pitfalls.
The pitfalls like poor acoustics or the wrong equipment occur to almost every beginning studio owner. Recognition is the first step to improvement.
Common mistakes in a row:
- Poor budgeting: Many people spend everything on expensive microphones but forget about a quality audio interface. Divide your budget evenly among all components.
- Wrong equipment choice: A condenser microphone in an untreated room sounds worse than a dynamic microphone in a well-treated room. Tune your equipment to your situation.
- Insufficient acoustic treatment: This is by far the most common mistake made. People invest thousands of dollars in equipment but leave the room untreated. The result is that even the best microphone picks up poor acoustics.
- Don’t use reference mixes: Always compare your mixes with commercial songs in the same genre. That way you can quickly hear where your mix falls short.
- Monitor at too high a volume: Long-term loud monitoring tires your ears and leads to poor mixing decisions. Work at a comfortable volume and take frequent breaks.
“Acoustics are often underestimated, but are at least as important as equipment. The best microphone in the world sounds bad in an untreated room.”
A concrete solution to budget problems: work with a priority list. Buy a solid computer and audio interface first, then add acoustic treatment and invest in premium microphones or monitors only later. Also check out the step-by-step studio setup for a structured approach and set-up tips home studio for additional advice.
Our vision for custom home studios
After discussing the pitfalls, we like to share our own take on building home studios. The most common misconception we encounter is that an expensive standard solution automatically works better than a cheaper custom solution. That’s not true.
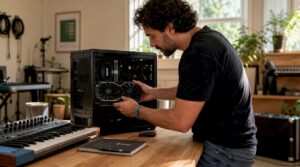
A generic studio PC from an electronics store might run your DAW, but produce cooling noise that interferes with your recordings. A custom-built, low-noise studio PC with the right components for your specific DAW and workflow delivers measurably better results immediately. The same goes for acoustics: standard foam panels from a hardware store won’t solve the problem, targeted treatment based on your room measurements will.
From our customer projects, we see time and again that investing in customization pays for itself. Not only in sound quality, but also in time savings and job satisfaction. A studio that fits your workflow feels like an extension of your creativity. Learn more about what you need through our home recording studio consultation for a more personalized starting point.
Your next step: custom studio solutions
Our vision of customization has been discussed; here you will find the products and services to make your ideal studio a reality.

At i4studio.co.uk we supply studio computer for music production built specifically for audio and video production. No unnecessary components, no annoying cooling noise, but maximum performance for your DAW. We also offer high-quality studio acoustics diffusers and other acoustic solutions that really improve your room. Want to know which combination best suits your situation and budget? Visit i4studio.nl for personal advice and a complete overview of our custom home studio solutions.
Frequently asked questions about building a home studio
What are the minimum requirements for a home studio?
A good computer, audio interface, microphone, monitors and basic acoustics are essential. Check out the complete studio basic supplies for a detailed list by budget.
How do I improve the acoustics in my home studio?
Place diffusers and absorbent panels at first reflection points and in corners, and avoid large bare walls for balanced sound reproduction. Find more concrete steps at home acoustic solutions.
What does it cost to build a professional home studio?
Costs range from a few hundred to several thousand euros, depending on equipment and acoustics. Our home studio budget advice provides a clear overview for each level.
What should I look for when buying studio computers?
Pay attention to processor, RAM memory, cooling noise level and compatibility with your DAW. Our overview of computers for music production will help you make the right choice.
Recommendation
- Home Studio Setup Tips: Complete Guide To A Professional Studio At Home – https://i4studio.nl/
- Practical Home Studio Setup Ideas For Musicians And Producers – https://i4studio.nl/
- Music studio setup: step by step the best sound
- Recording Equipment For Home: Complete Guide For The Home Studio – https://i4studio.nl/