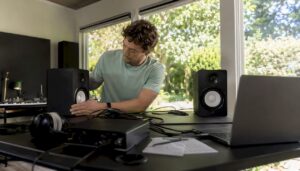
Recording equipment for the home doesn’t start with the most expensive microphone, but with a clear plan: what does the home producer want to record, what space is available and what budget is available? This guide helps professionals, musicians and content creators step by step with choices, practical examples and concrete setup-so that one can work more efficiently and creatively in one’s home.
Why a thoughtful home studio delivers more
Many people think that good recordings depend only on expensive gear. That’s a misconception. A smart combination of appropriate home recording equipment, a reliable computer and decent acoustic treatment often yields better results than expensive, inappropriate hardware in a poor space. For those who want to sound professional-or simply get more out of their own recordings-knowledge of the full chain is essential: room, signal path, conversion, monitoring and workflow.
Start with the goal: What recordings are they making?
Equipment and setup vary widely depending on the purpose. A singer-songwriter recording vocals and guitar has different priorities than a podcast maker, beat producer or filmmaker editing videos. Therefore, first a short checklist that will determine when purchasing home recording equipment:
- Type of recordings: vocals, acoustic instruments, electronic production, podcasts, voice-over, video.
- Space: bedroom, hobby room, small studio, living room. Is insulation possible?
- Budget: entry level, semi-pro, full pro.
- Workflow: mobile recording with laptop or fixed desktop setup for mixing and rendering.
- Future plans: expansion with more channels, live streaming, surround or ADR.
Essential home recording equipment: the basics
This section covers the core components found in almost every home studio. With these items, one is able to make professional recordings without too much fuss.
Audio Interface
The audio interface is the heart of the recording chain. It converts analog to digital (and back), provides preamps and ensures low latency. Important features to watch out for:
- Number of inputs: at least two mic/line inputs for voice + instrument; five or more for tape recording.
- Converter quality: 24-bit/96 kHz is standard; higher specs useful in professional video and high-res audio.
- Latency and drivers: stable ASIO or Core Audio drivers are crucial.
- Connectivity: USB-C, Thunderbolt or PCIe for high bandwidth; ADAT or S/PDIF for expansion.
For home setups, compact, bus-powered interfaces are often sufficient. Those who want to record a lot at once or want real-time monitoring without delay opt for Thunderbolt or a desktop interface with dedicated power supplies.
Microphones: types and uses
Microphones are the expression source of the recording. Choosing between dynamic or condenser depends on source and room.
- Dynamic microphones (e.g., for drums, guitar amps, raw vocals) are robust and less space sensitive.
- Large-diaphragm capacitors (for vocals, acoustic guitars, piano) give a lot of detail but require a quiet, well-treated room.
- Small-diaphragm capacitors (for acoustic instruments, overheads) offer fast transient response.
- Ribbon mics often give a warm, natural sound ideal for vintage keys and soft vocals, but are more fragile.
Tip: With one good large-diaphragm condenser, one dynamic microphone and a simple instrument mic, a home studio can already handle a wide range of recordings.
Headphones and studio monitors
Monitoring is where a recording is reviewed. For home recording equipment, two forms of monitoring are essential:
- Closed headphones for recording (leak-avoidance).
- Open or semi-open headphones for mix reference (more natural stereo image).
- Studio monitors (nearfields) for accurate mixing decisions. Smaller monitors (5″-8″) are often sufficient in small spaces; for serious bass monitoring, subwoofers are a consideration.
A common workflow is to record through closed headphones and mix on studio monitors, possibly accompanied by regular consumer speakers to test translation.
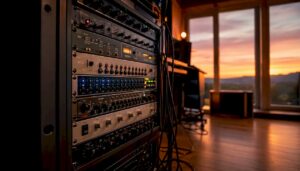
Preamps and outboard
Many interfaces have built-in preamps that can be fine to good. Still, some producers choose external preamps or channel strips for character and coloring.
- Transparent preamps: neutral, emphasizes clear playback.
- Coloring preamps: give warmth or saturation-handy for vocals and snares.
- Compressors/eq: outboard processing during recording can be inspiring, but one must be careful not to process irreversibly.
Accessories: mic stands, pop filters, cables
Little things are often underestimated. Solid mic stands, quality XLR cables and a pop filter for vocals prevent a lot of frustration and noise. Investing in cable management and sturdy stands quickly pays for itself in workflow and reliability.
Computer and storage: why a specialized machine counts
For audio and video editing, the computer is hardly less important than microphones and monitors. Latency, buffer settings, number of plug-ins and rendering times depend directly on the PC or Mac.
Important specifications
- CPU: high single-core performance and multiple cores help with real-time tracking and mixing. Modern DAWs utilize multi-core efficiently for offline renders and sum-buses.
- RAM: at least 16 GB for basic work; 32-64 GB or more for large sample libraries and large sessions in instrumental productions.
- Storage: SSD (NVMe) for OS and DAW, plus additional SSD/HDD for projects and libraries. Fast scratch disks speed up streaming of samples.
- IO and expansion options: Thunderbolt/USB-C and plenty of USB ports for interface, controllers and external drives.
I4studio provides specialized workstations optimized for audio, video and rendering tasks. For professionals who run a lot of plug-ins or render high-resolution video, a custom-built audio or rendering PC offers a distinct performance edge and better reliability than standard consumer PCs.
DAW selection and plug-ins
The Digital Audio Workstation (DAW) is the hub. Popular options include Pro Tools, Ableton Live, Logic Pro (Mac), Cubase, Studio One and Reaper. The choice is often related to workflow preference and plug-ins used. Reaper is lightweight and affordable; Pro Tools dominates in broadcast and film; Ableton Live is a favorite of electronic producers and live performers.
Acoustic treatment: the silent hero
Good acoustics is perhaps the most cost-effective upgrade. Even with excellent home recording equipment, a reverberant room produces unusable references. Basics:
Absorption versus diffusion
- Absorption reduces reflections and reverberation. Usually applied at first reflection points, behind the listening position and in corners (bass traps).
- Diffusion preserves vibrancy without sharp reflections; useful on backgrounds.
A simple approach for small rooms: place absorption panels at first reflection points (sides, ceiling) and put bass traps in the corners. For mixing, it helps to cover two opposite surfaces to get decent stereo perspectives.
Practical tips for home
- Use bookcases, curtains and carpets as temporary diffusers/absorbers.
- Do not place the listening position against the back wall; ideally 1/3 from the longitudinal axis of the room.
- Invest in decoupling (monitor stands or pads) to reduce vibrations and resonances.
- Use measurement software (Room EQ Wizard) and a measurement microphone to visually identify problematic frequencies.
I4studio offers custom acoustic solutions and consultations-handy for those who want to optimize a difficult space without unnecessary investment.
Signal chain and gain staging
A correct signal chain is crucial. Gain-staging prevents clipping and keeps noise low. Ground rules:
- Start with clean sources: proper microphone placement and instrument level.
- Set preamp and interface gain so that peaks are around -12 dBFS during recording (with headroom for peaks).
- Avoid digital clipping; if compression or saturation is desired, it can be added later or with analog outboard.
A useful trick is to test with long tones and transients (for vocals: singing loudly, for drums: full sticks) to optimize gain settings before the real session begins.
Recording scenarios: concrete setups
Here are sample setups for common home recordings.
Solo singer-songwriter (vocal + acoustic guitar)
- Microphones: 1 large-diaphragm condenser on vocals, 1 small-diaphragm or instrument mic on guitar (or combination with pickup).
- Interface: 2 inputs (mic + instrument), 24-bit/48-96 kHz.
- Monitoring: closed headphones for recording, monitors for mix.
- Acoustics: freestanding reflection screens behind the microphone and a carpet under the guitarist can do a lot.
Podcasting and voice-over
- Microphone: dynamic mic (e.g. Shure SM7B-like classic) for less room sensitivity.
- Preamps/Interface: good gain (sometimes extra gain boost or a cloudlifter), one or two channel interface.
- Treatment: much smaller space is fine, but a reflection screen and absorption panels depress room-tone.
Band recording (drums, multiple guitars, vocals)
- Interface: multiple inputs or ADAT expansion; 8+ channels recommended.
- Microphones: kick, snare, overheads, guitar cabinet mics, vocal mics.
- Workflow: click track for tightness, pre-production for arrangements.
Beatmaking and electronic production
- Computer: lots of RAM and fast SSDs to load sample libraries.
- MIDI controller, low latency audio interface.
- Low frequency check: subwoofer or reference listener to check bass balance.
Workflow and productivity: tips that make a difference
A good workflow saves hours. A few practical habits:
- Templates: settings and routing for different types of sessions (podcast, vocal, band).
- Labeling and color-coding of tracks in the DAW for quick navigation.
- Backups and version control: automatic backups and external storage; avoid fatigue by taking regular snapshots.
- Latency test: always check how monitoring feels when tracking, and increase buffer during mixing.
Here it pays off that in addition to hardware, I4studio also offers support for setting up an optimal workflow tailored to the software and machines used.
Budget versus pro setup: examples
A practical overview helps with planning.
Entry-level (up to €1,000)
- Audio interface 2-in/2-out
- One condenser microphone + one dynamic microphone
- Closed headphones
- Basic monitors or good reference front sets
- DAW: free or affordable license
With this set one can do professional podcasts, singer-songwriter tracks and basic production.
Semi-pro (about €1,000-€5,000)
- Interface with multiple inputs and ADAT
- 2-3 quality microphones
- Studio monitors + subwoofer
- Solid computer (min. 16 GB RAM, SSD)
- Basic acoustic treatment
Pro (from €5,000)
- High-end converters and preamps, multiple microphone sets
- Custom-built workstations (e.g., I4studio render or audio PC)
- Advanced acoustics with diffusion and multiple listening positions
- Redundant backup and professional control panels
For those doing a lot of render work (video, batch rendering), a specialized render computer from I4studio can save time and stress through shorter render times and reliable stability.
Maintenance and troubleshooting
Some common problems and solutions:
- Interference/ground hum: check grounding and cable quality; use balanced XLR cables.
- Latency or crackles: update drivers, use low buffer during tracking, increase buffer during mixing.
- Unnatural room-tone: place temporary absorbers or use close-miking techniques.
- Data loss: turn on automatic backups and use external storage with redundancy.
Regular firmware and driver updates, combined with periodic cleaning of connectors and vents, significantly extend the life of home recording equipment.
Case Study: From bedroom to release-ready single
A practical case study makes choices tangible. Suppose a singer-songwriter wants to record a release-ready song in a bedroom:
- Establish purpose: single, 2-3 instruments, dry vocals.
- Gear selection: 1x large-diaphragm condenser (vocal), 1x small-diaphragm (guitar), 2-in/2-out audio interface, closed headphones, monitors.
- Room: place curtains and carpet; reflex screen behind vocal-mic. Basstraps in corners if possible.
- Recording: guitar direct + mic, clicktrack, vocals multiple takes comping.
- Mix: use references (Spotify / commercial tracks), light EQ, compression, reverb; mastering via external service or a specialized plugin.
With attention to mic-placement and gain-staging, such a project can produce professional-looking and sounding results in a single weekend.
Where to buy and when to seek professional advice
Cheap web shops are attractive, but for critical purchases such as interfaces, monitors and specialized computers, advice is golden. I4studio combines product offerings with expertise: customized audio and rendering workstations, streaming and broadcast solutions, and acoustic consulting. For those unsure about compatibility, driver issues or spatial challenges, a consultation is often faster and cheaper than wrong purchases.
Future-proof choices
When buying home recording equipment, it’s smart to think ahead:
- Choose expandable interfaces (ADAT, multiple inputs).
- Set a budget for acoustics-this is scalable and often more effective than buying even more gear.
- Invest in a computer with upgrade capabilities: additional RAM slots, free M.2 slots, better cooling.
- Note standards: Thunderbolt is becoming more common, especially for high-trackcount and low-latency setups.
Conclusion
Home recording equipment is more than individual components; it is a system that begins with the goal and ends with a reliable workflow. One gets the most out of investment by looking at the combination of interface, microphones, monitoring, computer and-often decisively-acoustic treatment. For professionals and serious hobbyists, it pays to opt for specialized hardware and advice: custom-built audio and rendering PCs, stable interfaces and acoustic solutions reduce technical obstacles and give room for creativity.
I4studio supports this with custom workstations and professional studio solutions, plus advice on acoustics and workflow. This allows you to focus on what really matters: creating music, podcasts and videos that sound the way they were intended.
Frequently Asked Questions
What minimum equipment is needed to record professional sound at home?
For professional sounding recordings, at a minimum, a decent audio interface (2-in/2-out), one quality microphone for vocals, closed headphones for recording and a pair of monitors for mix are required. In addition, basic acoustic treatment is highly recommended.
Is an external preamp necessary?
Not necessarily. Many modern interfaces have good quality preamps. External preamps provide color and character, which may be desirable for certain vocal or instrumental sounds, but they are not a requirement for professional recording.
How important is acoustic treatment compared to better equipment?
Acoustic treatment is often more effective than upgrading gear. A good room makes even affordable microphones and monitors perform much better. It prevents wasting time with misleading mix decisions due to room reflexes.
What is a good computer configuration for audio and video?
A strong CPU with good single-core performance, 32 GB RAM (minimum 16 GB), NVMe SSD for OS/DAW and additional SSDs for samples and projects. For many tracks and video renders, a multi-core CPU and fast storage is essential. Specialized workstations from I4studio are geared for this.
When should one consider professional advice or customization?
In case of ambiguities about compatibility, for heavy projects (many tracks, video render), or when the room is acoustically problematic. Customization prevents wrong purchases and often solves performance and stability problems.