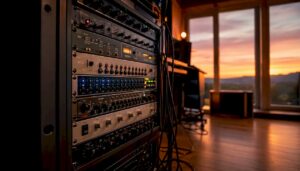
You’ve bought good studio monitors, set up your room and still your mix sounds flat, inaccurate or full of unwanted bass. This is a common problem. Despite good equipment, a mix often doesn’t sound professional because of a suboptimal monitor setup. The position of your monitors affects your sound as much as the quality of the monitors themselves. In this article you’ll find a practical list of proven studio monitor setups, from classic nearfield setups to flex setups for multi-purpose rooms, so you can get started right away.
Table of contents
- Key criteria for studio monitor setups
- Placement along the short versus long wall
- Distances from walls and optimal listening point
- List of proven studio monitor setups
- Comparison of commonly used setups
- Adjustments based on space and budget
- Instantly improve your studio monitor setup?
- Frequently Asked Questions
Key Insights
| Item | Details |
|---|---|
| Space and setup determine results | The size and shape of your studio determine which monitor setup works best. |
| Short wall often ideal | Placement along the short wall minimizes distracting reflections in compact spaces. |
| Distance from walls is crucial | Keeping at least half a meter between monitors and walls improves low frequencies. |
| Calibration and positioning together optimal | Correct calibration and positioning of monitors ensures professional sound. |
| Adapt to space and budget | With small adjustments and the right setup, you can improve the sound even in a modest home studio. |
Key criteria for studio monitor setups
Before choosing a setup, it’s smart to know what factors make the most difference. Not every space is the same, and a setup that works in a large control room may backfire in a small home studio.
The key factors for good monitor placement are:
- Room dimensions and wall selection: Small rooms require a different approach than large studios.
- Distance from rear and side walls: Too close to a wall amplifies low frequencies undesirably.
- Equilateral triangle arrangement: The distance between the two monitors and your head should be equal.
- Height and slope: Tweeters aimed at ear level for neutral reproduction.
- Acoustics and reflections: Hard surfaces cause early reflections that cloud your mix.
The basics of acoustics play a big role in any choice you make. If you want to go deeper into how to optimize your space acoustically, it helps to look at studio acoustics improvement as well.
Place monitors near the short wall in small rooms to reduce early reflections and achieve greater accuracy.
This is the foundation. With these criteria in mind, you can evaluate each setup for suitability for your situation.
Placement along the short versus long wall
One of the first choices you make is: do I put my monitors along the short or long wall? This seems like a small decision, but the effect on your sound is significant.

| Feature | Short wall | Long wall |
|---|---|---|
| Reflections | Less early reflections | More side reflections |
| Stereo image | Wider and more accurate | Smaller for small rooms |
| Bass structure | Less problematic | More chance of standing waves |
| Suitable for | Small to medium sized rooms | Large studios with treatment |
The layout of your studio acoustics helps determine which choice works best. In small home studios, the short wall is almost always the better option.
- Short wall benefits: Less distance from listening position, better stereo imaging, less chance of standing waves.
- Long wall disadvantages: Greater chance of comb filtering (where direct and reflected sounds interfere with each other) and a narrower stereo window.
- Practice tip: Listen to a familiar reference track at both positions and compare. Your ears don’t lie.
Contrasting views on wall placement show that there is no absolute rule. Testing in your own space remains the most reliable method. Also check out studio design tips for more context when decorating your workspace.
Measurement is knowledge: use a measurement microphone and software such as Room EQ Wizard to map your room’s acoustic response before making final choices.
Distances from walls and optimal listening point
Now that you know which wall you are placing along, the next step is to determine the exact distances. This directly affects your bass response and the neutrality of your mix.
- Distance from rear wall: Maintain a minimum of 0.5 meters. Monitors 0.5 to 1 meter from the rear wall give the most neutral bass response. For bass-reflex monitors (with a port at the rear), less than 0.6 meters is not recommended.
- Distance from side walls: At least 1 meter on each side to reduce side reflections.
- Height of the tweeter: At ear level when seated in your listening position.
- Equilateral triangle: The distance between the two monitors is equal to the distance from each monitor to your head. Typically 1 to 1.5 meters per side.
| Parameter | Recommended value |
|---|---|
| Distance to back wall | 0.5 to 1 meter |
| Distance to side wall | At least 1 meter |
| Triangle side | 1 to 1.5 meters |
| Tweeter height | At ear height |
Pro-tip: Use a tape measure and stick pieces of tape on the floor to mark the exact position of your monitors and chair. That way you reproduce your listening position every session without guessing.
A good studio equipment checklist will help you not overlook anything when setting up your space. Also, don’t forget soundproofing in your studio to complement correct positioning.
List of proven studio monitor setups
Processed all the input? Then here is the list of concrete setups that you can test immediately in your studio.
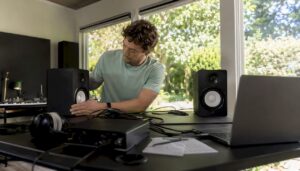
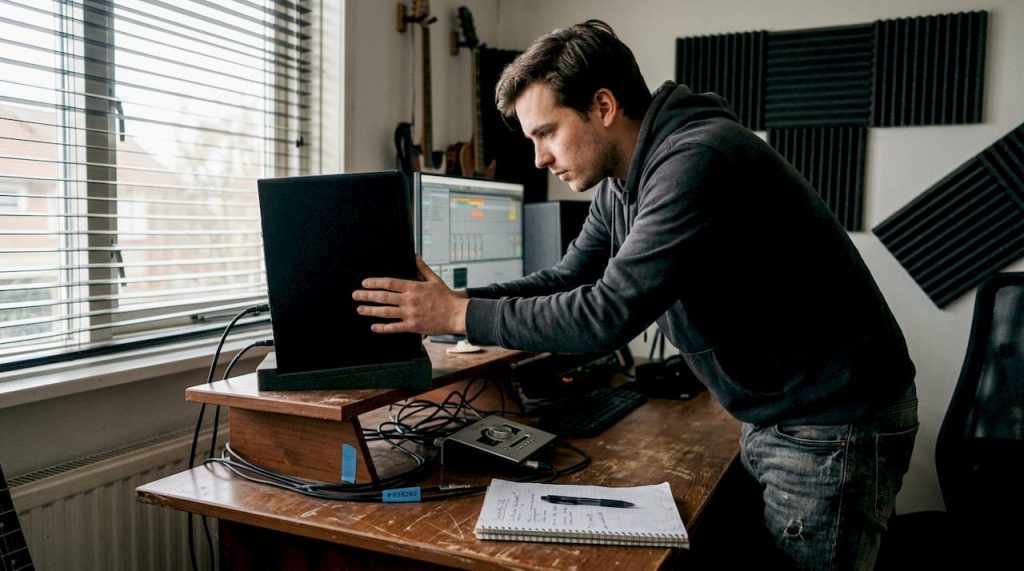
Classic nearfield triangle
- Monitors at 1 to 1.2 meters from the listening position
- Equilateral triangle, ear-level tweeters
- Ideal for small home studios and production spaces
- Little acoustic treatment required
Midfield setup
- Monitors 1.5 to 2.5 meters from the listening position
- Larger triangle, more room for sound to develop
- Suitable for medium-sized rooms with basic acoustics
- Gives a more realistic picture of how music sounds on larger systems
Longest distance setup (farfield)
- Monitors more than 2.5 meters away
- Requires extensive acoustic treatment
- Used in professional control rooms
- Not suitable for untreated home studios
Setup with acoustic correction
- Nearfield or midfield position combined with DSP correction (digital signal processing)
- Use software such as Sonarworks or IK Multimedia ARC
- Compensates for spatial problems you cannot physically solve
- Effective in irregular or small rooms
Flex setup for multi-purpose rooms
- Monitors on tripod or adjustable stands
- Quick to move for different use situations
- Combine with acoustic panels use for better results
- Less ideal for critical listening, but practical for versatile spaces
Pro-tip: Calibrate your monitors to 85 dB SPL at the listening position for a balanced output consistent with professional standards. Use an SPL meter or an app on your phone as a starting point.
For more practical advice on recording at home, also check out sound recording tips for home studio.
Comparison of commonly used setups
To keep an overview, below is a comparison of the setups discussed.
| Setup | Room size | Acoustic requirements | For whom |
|---|---|---|---|
| Nearfield triangle | Small to medium | Low | Home producers, beginners |
| Midfield | Medium | Medium | Semi-professional studios |
| Farfield | Large | High | Professional control rooms |
| With DSP correction | Any size | Low to medium | Untreated rooms |
| Flex setup | Any size | Low | Multi-purpose spaces |
Quick selection help:
- Small room, limited budget: Nearfield triangle along the short wall
- Medium room, more budget: Midfield setup with basic acoustics
- Irregular space: Nearfield with DSP correction
- Alternate usage: Flex setup on tripod
85 dB SPL is the reference volume that professional engineers use for consistent and reliable eavesdropping. This is not an arbitrary number, but a proven standard that ensures balanced perception of all frequencies.
For inspiration in setting up your workspace, check out studio design inspiration and set-up tips for your home studio.
Adjustments based on space and budget
Now that you’ve seen the options and comparison, you can customize the setup to fit your unique situation. Not everyone has a perfectly treated room or an unlimited budget, and they don’t have to.
- Small room, limited budget: Focus on the short wall, use DIY absorption panels behind the listening position and at the first reflection points on the side walls. A nearfield setup gives the most control here.
- Medium room, bigger budget: Combine a midfield setup with a professional acoustic analysis. Invest in wideband absorbers and diffusers for a neutral room.
- Irregular or shared space: choose a flex setup with DSP correction. Adding acoustic panels at strategic points makes a big difference in this situation as well.
Even small interventions such as correct distance from walls or adjusting the bass reflex position help considerably. You don’t have to do everything at once.
Pro-tip: Move your monitors step by step, a few inches each time, and listen to the effect on the bass. Small shifts can give surprisingly large differences. Also check out recommended acoustics products for affordable solutions that give immediate results.
Instantly improve your studio monitor setup?
A good monitor setup is the foundation of any professional mix. But setup alone is not enough: the right equipment and acoustic treatment make the difference between a good studio and a great one. At i4studio, you’ll find everything you need to take that next step.

Whether you’re just starting out or want to optimize your existing setup: check out our buy complete studio set for an instantly deployable bundle, or visit our page on studio acoustics improvement for targeted acoustics solutions. Want to take care of everything at once? The studio set and recording bundle gives you a complete foundation for professional home recording.
Frequently Asked Questions
What is the ideal distance between studio monitors and the back wall?
Ideally, place monitors between 0.5 and 1 meter from the rear wall for neutral bass response. For bass-reflex monitors, less than 0.6 meters is not recommended because of low-frequency problems.
Is the short or long wall better for monitor setup in a small home studio?
For small studios, the short wall is preferable. Short wall positioning reduces early reflections and gives a more accurate stereo image.
What is the best listening position in a studio?
The ideal position is at an equilateral triangle between both monitors and your head, with the tweeters aimed at ear level for the most neutral reproduction.
Why is calibrating monitors at 85 dB SPL important?
Calibrating at 85 dB SPL provides a balanced and realistic eavesdrop consistent with professional standards, making your mix more transferable to other systems.
Recommendation
- DAW Setup Tips: Practical Guide For An Efficient Studio – https://i4studio.nl/
- Studio Acoustics Improvement: Practical Guide For Professional Sound Spaces – https://i4studio.nl/
- Studio Design Tips: Practical Guide For Audio and Video Studios – https://i4studio.nl/
- Music studio equipment checklist for optimal creativity