TL;DR:
- Correct microphone setup and spacing are crucial for professional sound quality.
- Wrong angle, phase problems and poor room acoustics can negatively affect the recording.
- Experiment and listen constantly to achieve optimal results in your home studio.
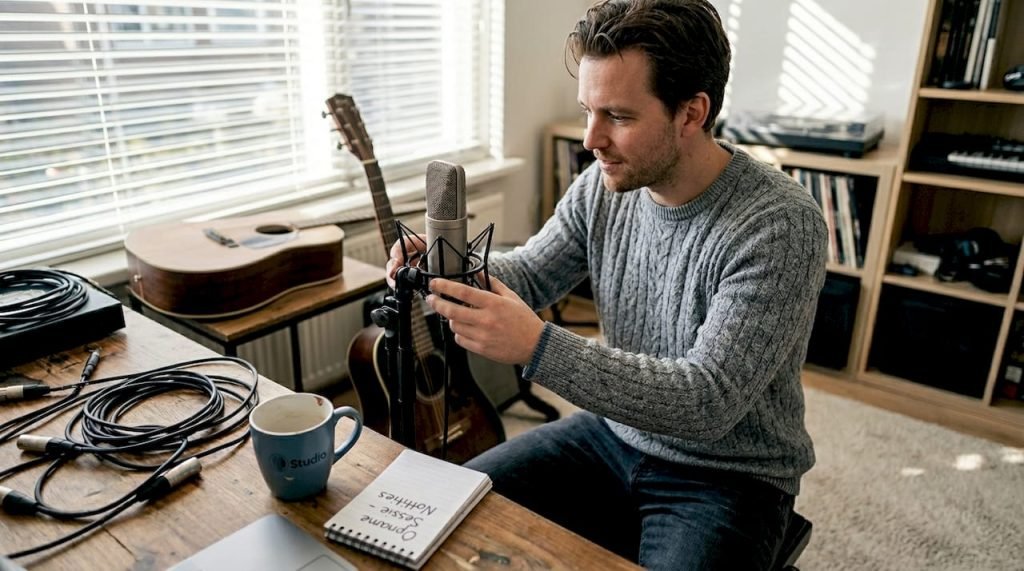
Every home studio owner knows the frustration of a recording that sounds dull or flat despite good equipment. Often the problem is not in the microphone itself, but in the setup. A shift of a few inches or a different angle can make the difference between an amateurish and a professional recording. In this article we explain step by step what microphone setups there are, what you need, what mistakes to avoid and how to measure your results. After reading, you can immediately apply the techniques in your own studio.
Table of contents
- What do you need for optimal microphone setups?
- Step-by-step tutorial: common microphone setups
- Common mistakes and how to avoid them
- Monitor and optimize your recording: measuring results
- Our vision: why experimentation remains essential
- Getting started with the best studio solutions
- Frequently Asked Questions
Key Insights
| Item | Details |
|---|---|
| Perfect positioning | Accurate metering prevents phase problems and enhances the quality of your recording. |
| Choose appropriate technique | The right microphone setup matches the instrument and your recording goal. |
| Keep experimenting | Combining your own experience with guidelines often produces the best sound. |
| Always check in mono | Mono loading reveals any phase errors quickly. |
What do you need for optimal microphone setups?
Now that you know why microphone setups are important, let’s first look at what you need anyway. Without the right foundation, you won’t get very far, no matter how good your technique.
Basic recording equipment consists of a number of fixed components:
- Microphones (condenser or dynamic, depending on the application)
- Microphone stands with flexible arm or boom
- High-quality XLR cables of at least 3 meters in length
- Audio interface with enough inputs for multi-mic setups
- DAW (Digital Audio Workstation) for recording and analysis
- Tape measure or laser meter for precise distance measurement
- Reference monitors or headphones for listening back
One distinction you need to know well is the polar pattern of a microphone. This is the pattern within which a microphone picks up sound. A cardioid microphone picks up sound from the front and suppresses sound from the back. A figure-8 pattern picks up sound from two sides. An omnidirectional microphone picks up sound from all sides evenly. Which pattern you choose strongly determines how your setup sounds.
In addition, the difference between condenser and dynamic microphones is relevant. Condenser microphones are more sensitive and capture more detail, ideal for vocals and acoustic instruments. Dynamic microphones are more robust and less sensitive to ambient noise, making them suitable for live situations and loud instruments such as electric guitar amps.
| Microphone type | Sensitivity | Best application |
|---|---|---|
| Capacitor | High | Vocals, acoustic guitar, overhead drums |
| Dynamic | Low to medium | Electric guitar, drums (close mic), live |
| Ribbon | Medium | Copper, strings, vintage sound |
A crucial technical issue is phase coherence in multi-mic setups. When two microphones pick up the same sound at different times, phase coherence occurs. This sounds like a thin or hollow sound. Therefore, always measure the distances between microphones accurately.

Also see our home studio microphone guide for a comprehensive overview of which microphone is right for your situation.
Pro-tip: Use a laser meter instead of a tape measure for the most accurate placement, especially for drum recordings with multiple microphones.
Step-by-step tutorial: common microphone setups
With the right gear on hand, you can put these setups into practice. Below we discuss step by step the most popular techniques.
The stereo microphone setups most commonly used are X-Y, Spaced Pair, ORTF and Mid-Side. Each has its own character and application.

| Technique | Distance/angle | Mono compatible | Best for |
|---|---|---|---|
| X-Y | 90°, mics close together | Excellent | Drums, choir, solo instrument |
| Spaced Pair | 0.5 to 3 meters apart | Moderate | Orchestra, large rooms |
| ORTF | 17 cm, 110° | Good | Acoustic guitar, choir |
| Mid-Side | Cardioid + figure-8 | Excellent | Broadcast, field recording, studio |
This is how you set up an X-Y arrangement:
- Put two identical microphones on one stand with a stereo bracket.
- Orient the capsules at 90° to each other, as close together as possible.
- Point the center of the setup toward the sound source.
- Listen back in mono to check phase.
For an ORTF setup:
- Use two cardioid microphones on a stereo mount.
- Set the capsules at 17 cm spacing and 110° angle.
- Point the setup toward the sound source at a distance of 1 to 2 meters.
- Check the stereo image on your monitors.
Mid-Side works differently than the other techniques. You combine a cardioid microphone (the Mid) with a figure-8 microphone (the Side). In your DAW you process this with an MS decoder: the Mid goes directly to the center, the Side is split into left and right. The result is a stereo image that you can adjust in width afterwards, making it a versatile choice for studio productions.
For sound recording tips by instrument, please refer to our comprehensive guide.
Pro-tip: Experiment with polar patterns on your condenser microphone. An omni mode on an acoustic guitar can add surprising depth compared to a standard cardioid setup.
Common mistakes and how to avoid them
Now that you know different techniques, it is important to know where things often go wrong and how you prevent them.
The most common errors in microphone setups are:
- Wrong distance from the source: Too close gives excessive bass response due to the proximity effect. Too far, the microphone picks up too much room noise.
- Incorrect angle setting: Even a few degrees difference significantly changes the stereo image.
- No attention to phase: With two or more microphones, phase cancellation is a real risk.
- Poor room acoustics: Hard walls and ceilings cause reflections that obscure the recording.
- Inconsistent placement on multiple takes: If you move the microphone between takes, the recordings are unmixable.
Room acoustics is an underestimated problem. Many home studios have inadequate treatment, so reflections mask the direct sound. This does not solve any microphone setup. If you want to know how to reduce sound reflection, acoustic treatment is the first step.
“Precision is key: a deviation of 5 mm can already cause phase problems in close-mic setups.”
This is especially true with drum recordings. Phase coherence in drum recording is crucial: measure distances precisely to avoid phase cancellation. A snare drum that sounds like it’s in a bucket is almost always a phase issue.
If you find that your microphone is not giving a good signal at all, first check the technical side via our guide on microphone doesn’t work troubleshooting. Sometimes the problem is simply in a loose cable or wrong phantom power supply.
Short checklist to avoid mistakes:
- Always measure distances with a tape measure or laser
- Mark microphone positions with tape on the floor
- Always check in mono after each placement change
- Treat your space acoustically before recording
- Record your settings per session
Monitor and optimize your recording: measuring results
After correcting errors, it’s time to measure and improve your results.
You judge a good recording not only with your ears, but also with your eyes and tools in your DAW. Follow this roadmap:
- Take a 30- to 60-second test shot with your current setup.
- Switch to mono in your DAW and listen. Do instruments disappear or sound hollow, then there are phase problems.
- Check the levels of all microphones individually. Are they equivalent or is there a big discrepancy?
- Analyze the frequency spectrum with a spectrum analyzer. Look for unwanted peaks or dips.
- Adjust distances in increments of up to 0.5 cm and repeat the mono-check.
- Compare several recordings side by side in your DAW to find the best position.
One statistic every recording engineer should know is the 3:1 rule. Keeping overhead distance more than 3x the close-mic distance prevents phase problems with multiple mics. With drums, this means specifically: if your snare drum mic is 10 inches away, your overhead should be at least 30 inches from the snare.
For drum overheads, in addition, both microphones should hang equidistant from the snare, with a precision of plus or minus 5 mm. A height of 100 to 180 cm works well in most spaces. A laser gauge makes this much easier.
Also, optimize your monitor position for a fair assessment. A misplaced monitor will give you a distorted view of your recording. Read more about studio monitor setups for optimal listening results.
If you want to better understand the acoustics of your space, our page on improving studio acoustics provides a solid starting point.
Our vision: why experimentation remains essential
Now that you know how to measure and improve, we share one last important lesson from practice.
All the diagrams, tables and rules of thumb in this article are helpful. But they are a starting point, not an end point. Every room sounds different. Every guitar, voice or drum kit has its own character. What is perfectly correct in theory may just not be right in your specific situation.
Our best recordings are rarely the result of blindly following a manual. They came about through systematic experimentation, listening and daring to deviate. A microphone half a meter further than theory dictates, or an unexpected angle, can produce exactly the sound you were looking for.
Technology is a tool, not a straitjacket. Use the rules to understand what’s happening, but let your ears have the final say. Also read our practical recording tips for more real-world inspiration.
Pro-tip: Keep a notebook or spreadsheet with your microphone setups, distances, angles and the results. After a few sessions, you’ll see patterns and learn faster what works in your space.
Getting started with the best studio solutions
Do you want to get hands-on and really hear the difference? Then you’ll find everything you need to perfect your setup at i4studio.

Whether you’re looking for the complete studio overview of necessary equipment, a custom-built audio PC that runs your DAW flawlessly, or acoustic diffusers that make your space sound like a real studio: at i4studio you’ll find it all. Our specialists will gladly think with you about the best setup for your specific space and budget. Contact us or view our offer online and take the next step today.
Frequently Asked Questions
What is the difference between ORTF and X-Y arrangement?
ORTF uses 17 cm spacing and 110°, while X-Y places the microphones close together at 90°. ORTF gives a wider stereo image, but X-Y is better mono compatible.
Why is phase coherence so important in drum recording?
When microphones are out of phase, frequencies partially cancel each other out. The result is a thin or floaty drum sound that is difficult to mix. Measure distances precisely to avoid this.
How do I check if my microphone setup is working?
Switch your mix to mono and listen critically. If instruments partially disappear or the sound sounds hollow, there are phase problems due to cancelation. Adjust distances and angles until the problem disappears.
What is the 3:1 rule in microphone placement?
Each additional microphone must be at least three times farther from the sound source than the nearest microphone. The 3:1 rule effectively prevents phase cancellation in multi-mic recordings.
Recommendation
- Microphone For Home Studio: The Complete Guide To Choosing, Placing And Recording – https://i4studio.nl/
- Home Studio Recording Microphone Choosing: A Practical and Complete Guide – https://i4studio.nl/
- Home Studio Sound Recording Tips: From Space to Mix – https://i4studio.nl/
- Home Studio Setup Tips: Complete Guide To A Professional Studio At Home – https://i4studio.nl/


