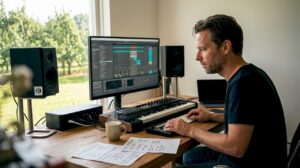
A good microphone for home studio is often the most important step toward professional sounds. Whether for vocals, acoustic guitar, voice-over, podcasting or recording amplifiers, the choice of microphone, placement and associated equipment greatly determine the end result. This guide helps producers, musicians and content creators step by step in choosing the right microphone and using it optimally in a home studio environment.
Why the right microphone is so important
A microphone is not just a transducer that converts sound into an electrical signal: it forms the characteristic of a recording. Two different microphones can turn the exact same voice into two completely different results – warm and close, or clear and distant. In a home studio, where space and acoustics often impose limitations, microphone choice has extra impact. A microphone that works well with the space and the recording chain (preamp, interface, DAW) immediately results in less editing work later.
Key microphone features explained
Microphone type: dynamic, condenser and ribbon
Microphones fall roughly into three categories:
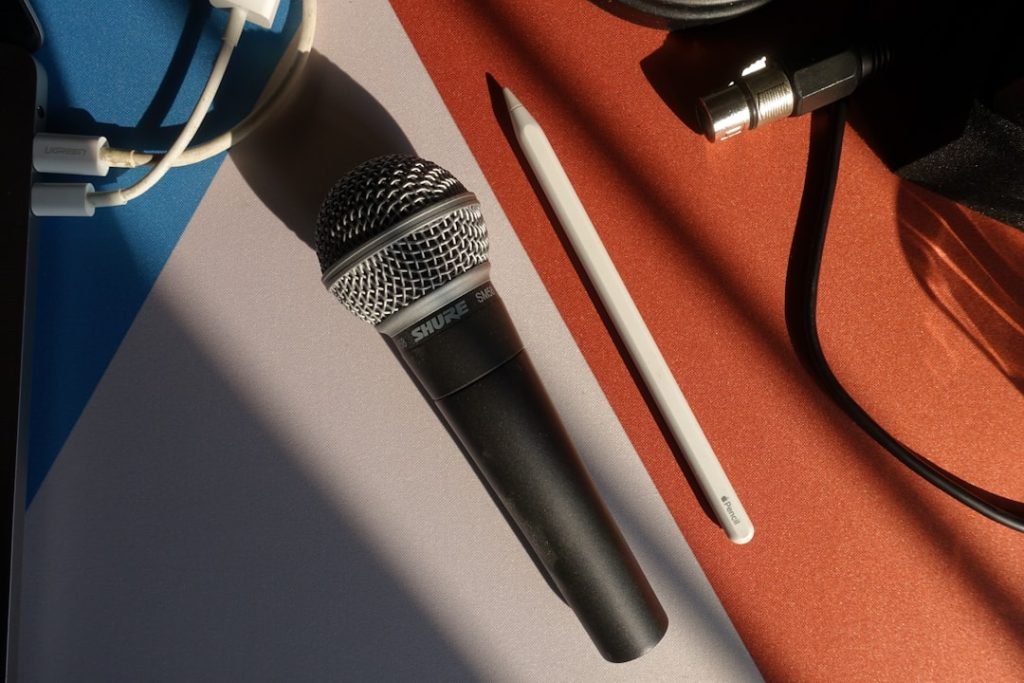
- Dynamic microphones: Rugged, low-sensitivity and ideal for loud sources such as amplifiers and drums. For voices in non-perfect spaces, they are often a safe choice (e.g., Shure SM7B, SM57).
- Condenser microphones: Higher efficiency, more detailed frequency range; widely used for vocals and acoustic instruments. Usually require phantom power (+48V) (e.g., Rode NT1-A, Neumann TLM 102).
- Ribbon microphones: Natural, warm reproduction, often fine for guitar amps and some vocal techniques. Are more sensitive and expensive; some vintage ribbons require extra caution.
Polar patterns (directional characteristic)
The polar pattern determines from which direction sound is picked up:
- Cardioid: Most common; picks up sound mainly from the front and suppresses side and background noise.
- Omnidirectional: picks up sound evenly all around; useful in good rooms for natural sound or in ensemble recordings.
- Figure-8 (bidirectional): Picks up front and back, useful for face-to-face interviews or living room vocals with natural reflection.
- Switchable patterns: Flexible for multiple applications within a single microphone.
Frequency response, sensitivity and self-noise
Frequency response tells which frequencies are amplified or attenuated – important when choosing vocals or instruments. Self-noise is relevant for quiet sources; condenser mics often have lower noise floor than dynamic ones. Sensitivity determines how much signal a microphone produces at a given sound pressure level; high sensitivity works well for quiet sources but can overload in loud situations.
Impedance and output
Most professional microphones are low impedance and provide balanced XLR outputs. USB microphones include proprietary conversion and are convenient but less flexible in professional chains.
XLR vs USB: when do you choose what?
For those who want to record professionally, XLR is usually the preferred choice. XLR microphones connect to an audio interface or mic preamp, giving the user control over gain, A/D conversion and monitoring. USB microphones are plug-and-play and ideal for quick podcasting, streaming or mobile recording, but they offer fewer routing and upgrade options.
- Advantages XLR: Higher quality, better preamps, flexibility, upgrade possibilities.
- Cons XLR: Requires interface/preamp, more cables and setup.
- Advantages USB: Simple, direct to computer, often built-in headphone monitoring.
- Disadvantages USB: Less customization options, fixed or lower A/D quality on some models.
Microphone selections by application
singing
For vocals, a large-diaphragm condenser microphone is often the first choice because of its full low and detailed highs. In unfavorable rooms, however, a dynamic microphone can pick up fewer unwanted reflections, giving a cleaner result.
- Home studio with limited acoustics: dynamic – Shure SM7B or Heil PR40. These suppress room noise and deliver a warm, thick vocal tone.
- Treated home studio: Large-diaphragm condenser – Red NT1-A, sE Electronics sE2200, Audio-Technica AT4040 for clarity and detail.
- High-end projects: Neumann TLM 103/TLM 102 or similar studio classics for extra presence and low self-noise.
Acoustic guitar
For guitar, small- or large-diaphragm condensers work well; often one uses a combination: one microphone at the soundstage and a second at the neck for balance.
- Small-diaphragm condensers for transient accuracy.
- Large-diaphragm for warmth and body.
- Alternative: dynamic microphone on amplifier for electric-acoustic sound variations.
Electric guitar and amplifiers
Dynamic mics such as the Shure SM57 are classic on guitar amps. For a fuller, rounder sound, a remote condenser may be useful. Ribbon mics give a soft high-frequency roll-off and a natural body – excellent when combined with dynamic mics for co-mixing.
Podcasting and streaming
Here the focus is often on voices that need to sound consistent, clear and free of background noise. USB microphones such as the Blue Yeti or Rode NT-USB are popular for simplicity. For more professional setups, combine dynamic XLR microphones (SM7B, Electro-Voice RE20) with an interface or podcast mixer.
Drums and percussion
Drums are a case in point: multiple mics for kick, snare, overheads and room. Dynamics for kick/snare, condensers for overheads. For a home studio, you can often still get a full sound with fewer mics and smart placement.
Practical purchase checklist
- What will you include? Voice, acoustic instrument, amplifier, or multiple sources?
- What is room acoustics? Is there treatment? Is there a lot of background noise?
- Budget: Microphones range from budget-friendly (<€100) to high-end (>€1000).
- Connectivity: Do you have an audio interface, or do you want USB?
- Accessories: Does the microphone need a shockmount, pop filter, or case?
- Upgradability: Want to invest in better preamps or converters later?
Examples of microphones by price range and usage
Here are concrete suggestions – listed with common home studio situations in mind. It is not a complete list, but a practical starting point.
Entry level (budget-friendly)
- Audio-Technica AT2020 – inexpensive condenser for vocals and instruments with reasonably low self-noise.
- Red NT-USB – USB option for direct podcasting/streaming.
- Shure SM57 – dynamic workhorse, also affordable and very versatile (amps, snare).
Mid-range (versatile choice)
- Rode NT1-A – warm, quiet condenser, popular in home recording.
- Shure SM7B – dynamic, ideal for vocals and spoken word in non-perfect rooms.
- AKG C214 – condenser with solid performance for vocals and instruments.
Professional (top quality)
- Neumann TLM 103 / U87 – reference for vocals and high-end projects.
- Royer R-121 – ribbon for guitaramps and vintage-like sound; expensive but characterful.
- AEA Ribbons – premium choices for engineers seeking warmth.
Mic Placement: simple techniques that make a lot of difference
The way a microphone is placed is often more important than the price of the microphone itself. Here are some proven techniques:
Vocals
- Start with 10-20 cm distance and use a pop filter. Hold the microphone slightly below or next to the mouth to reduce “p” and “b” pops.
- Note proximity effect with cardioid dynamic mics: positioning close gives more low frequencies.
Acoustic guitar
- Place one capacitor at 12th fret at 20-30 cm for balance between body and brightness.
- If necessary, combine with a second mic at the soundstage for extra low end.
Electric guitar amp
- Place dynamic microphone directly against speaker cone for attack; shift toward edge of cone for more body.
- Combine with a ribbon or condenser further away for ambiance.
Drums
- Kick: dynamic at the edge of the resonance gap; experiment with internal vs external positioning.
- Overheads: equilateral spacing and distance for stereo perspective.
Gain Staging, Preamps and Preamplification
Much of the sound is made before recording at the preamp. Clean, properly set gain is essential: too low and noise becomes audible; too high and the signal clips. Some dynamic microphones (such as SM7B) need a lot of gain – a quality preamp or inline booster (e.g., Cloudlifter) can help then.
- Set the gain so that peaks sit around -6 dBFS in your DAW for adequate headroom.
- Use pad switches if a microphone overrides loud sources.
Acoustics and treatment of the home studio
Even the best microphone sounds bad in a poorly treated room. Basic principles of acoustic treatment allow for tremendous improvement:
- Bassstraps at corners reduce low resonances.
- Absorbent panels at reflection points reduce flutter and aftermath.
- Diffusion at rear of recording spot provides natural sound without lifeless dryness.
As a supplier of studio equipment and acoustic solutions, I4studio often recommends a combination of targeted treatment and smart microphone selection. For those seeking help with acoustics design and implementation or selecting an audio PC suitable for recording and mixing, I4studio offers customized advice and systems that ensure real-time performance and sparse latencies.
Accessories and how they affect sound
- Pop filter: Reduces pop sounds in vocals.
- Shockmount: Reduces mechanical vibration through the microphone stand.
- Microphone stand: Ensures stable and consistent placement.
- Cables: Use decent quality balanced XLR cables; poor cables can cause noise and interference.
Testing and comparing microphones
A simple testing strategy prevents mis-selling:
- Record the same source with different microphones in exactly the same position.
- Listen critically to low, mid and high; also assess transients and noise floor.
- Test in context: place the mic in the mix and not just solo – sometimes a mic works beautifully solo but clashes with other elements.
Maintenance and longevity
- Store microphones in dry, dust-free environment and preferably use a case or pouch.
- Avoid moisture and extreme temperatures – capacitors are more sensitive to moisture.
- Clean pop filters and windshields regularly and check cable connections for wear.
Common mistakes and how to avoid them
- Direct blaming of microphone: Often the problem lies with room acoustics or gain staging, not the microphone.
- No consideration of polar pattern: This leads to unintended reflections, feedback or nasal sound.
- Wrong expectations of USB microphones: They are convenient, but not always the best choice for complex multi-microphone projects.
How I4studio can help
A good microphone is part of a wider chain: the microphone, preamp, audio interface, computer and acoustics work together. I4studio supplies not only microphones and accessories, but also specialist audio and video PCs, advice on preamps and interfaces, and custom acoustic treatment. For example, for those considering a Shure SM7B, I4studio can advise which preamp or audio PC is the best combination to achieve sufficient gain and low latency. Their advice is especially useful for professionals and semi-professionals looking to build a reliable, future-proof home studio.
Summary: choices that make a difference
Choosing a microphone for home studio depends on source, room and workflow. Dynamic mics are forgiving in poor spaces; condensers deliver finesse in well-treated rooms; ribbon mics add character in special applications. XLR offers flexibility and professional quality; USB offers immediacy and simplicity. Take time for testing and pay more attention to placement and acoustics than to models alone – often an average mic in a good room is better than a high-end mic in a bad room.
For those serious about recording, an integrated approach to microphone selection, pre-amplification, interface, computer and acoustic treatment offers the best results. I4studio can support this with products, advice and custom solutions for both audio and video workflows.
Frequently Asked Questions
Which microphone is best for vocals in a small home studio?
If the room is not treated, a dynamic microphone such as the Shure SM7B can be an excellent choice because of its ability to ignore room noise. If there is acoustic treatment, a large-diaphragm condenser (Rode NT1-A, Neumann TLM 102) is often best for detail and clarity.
Is a USB microphone sufficient for professional recording?
USB microphones are great for podcasting, streaming and quick demos. For professional multi-mic sessions, high-quality mixing and future-proofing, an XLR mic with a good interface and preamps is usually the better choice.
How much does a good microphone cost for a home studio?
Good options start around €100 for entry-level models. Many serious home producers find ideal between €200-€700. High-end studio microphones can range from €1000 to several thousand euros.
Do I need special preamps for certain microphones?
Some microphones, especially certain dynamic models such as the SM7B, require a lot of gain. A quality preamplifier or inline gain booster (Cloudlifter) may then be necessary to achieve sufficiently clean levels without noise.
Can I4studio help set up my home studio?
Yes. I4studio offers advice and products in audio/hardware, studio computers and acoustic solutions. They help choose the right microphones, preamps, interfaces and design acoustic treatment to fit production needs.