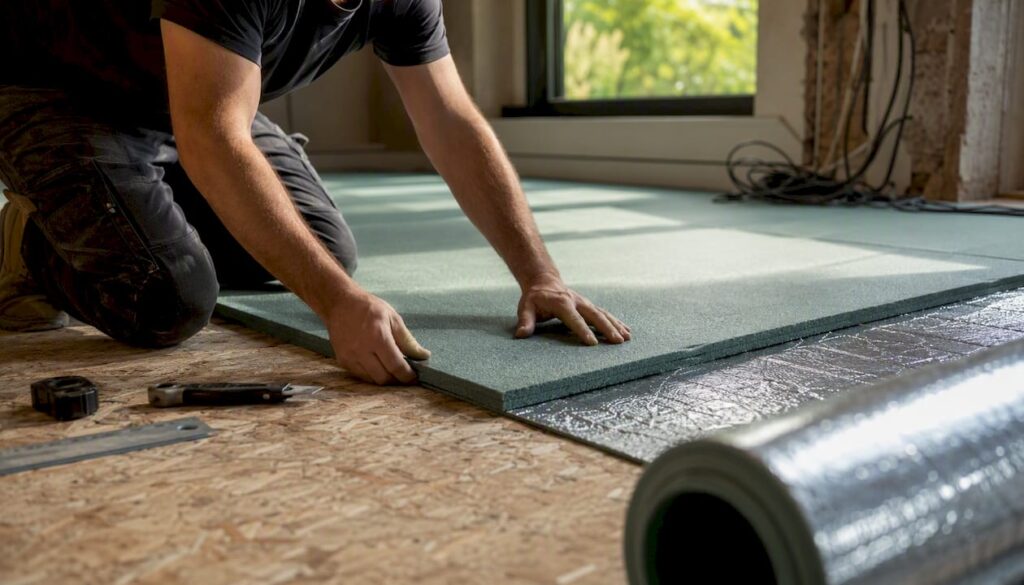
For a recording studio in the Netherlands, it is best to choose a prefabricated spring-mounted floating floor system or a surface-mounted floating screed with a mass-spring-mass decoupling and a natural frequency below ~60 Hz. Both systems effectively reduce impact noise, isolate low frequencies, and ensure a stable recording environment. The difference lies in speed and customization: prefabricated systems such as Stravifloor can be installed quickly and offer predictable performance; a custom-built floating screed provides greater design flexibility for complex spaces.
- Prefabricated suspension system: quick installation, fixed resonance frequency (4–15 Hz), suitable for most studio sizes
- Floating screed construction: greater flexibility in thickness and mass, ideal for uneven subfloors or specific acoustic requirements
- Always: perimeter insulation, vapor barrier, and a final measurement after installation
Pro tip: Before construction begins, request a no-obligation measurement consultation from I4studio. An early acoustic analysis will save you from costly repairs down the road.
Key insights
A floating floor for a recording studio will only work properly if the natural frequency is below ~60 Hz, the mass per square meter is sufficient, and edge insulation is properly installed along all walls.
| Item | Details |
|---|---|
| System Selection | Prefabricated spring system (4–15 Hz) for rapid installation; screed installation for custom solutions in complex spaces. |
| Resonance Frequency | Aim for less than 60 Hz for studios; preferably 4–15 Hz for complete low-frequency isolation. |
| Permit and Measurement Report | In the event of a change of use or a division of a dwelling, municipalities require an acoustic report showing LnT,A ≤ 54 dB and DnT,A ≥ 52 dB. |
| Cost Estimate | A professional survey costs €300–€1,500; a complete permitting report can cost up to approximately €2,480, excluding VAT. |
| I4studio as the Next Step | I4studio offers measurement consulting, custom design, and final measurements for floating floors in Dutch studios. |
Table of contents
- What is a floating floor, and how does it work from a technical standpoint?
- Why choose a floating floor for a recording studio?
- What systems and materials are available?
- What design parameters determine your floor’s performance?
- What acoustic requirements apply in the Netherlands?
- How much does a floating floor cost, and how long does installation take?
- Can you install a floating floor yourself?
- Specification Checklist and I4studio’s Approach
- The Truth About Floating Floors
- Here’s how I4studio can help you: from consultation to final inspection
- Sources
- Frequently Asked Questions
What is a floating floor, and how does it work from a technical standpoint?
A floating floor is separate from the supporting structure. Between the subfloor and the finish floor is a resilient intermediate layer that breaks the direct mechanical connection. That sounds simple, but the technical mechanism involved goes beyond simply “placing something soft underneath.”
This principle is called the mass-spring-mass principle: two masses (the supporting floor and the floating screed) are separated from each other by a spring-like layer. Sound vibrations that reach one mass are absorbed by the spring before they reach the other mass. The lower the resonance frequency of that system, the better the isolation at low frequencies.
The layers of a floating floor in a studio
A typical structure looks like this, from bottom to top:
- Supporting floor (concrete or wood): the existing structure
- Vapor barrier: protects the insulation layer from moisture
- Perimeter insulation: runs along all walls to prevent flanking sound transmission
- Spring layer: elastomers, steel springs, or mineral wool on spring dampers
- Mass plate or screed: gypsum fiber, concrete, or composite panels to provide sufficient mass
- Finishing layer: hardwood, vinyl, or another floor finish
The order of these layers is not arbitrary. Material thickness and the order in which they are placed directly determine the system’s resonance frequency. Adding more mass to the top layer lowers that frequency; a softer spring does the same, but also requires more vertical space.
Pro tip: Your system’s resonance frequency must be well below the lowest frequency you want to isolate. For a recording studio with bass instruments, that typically means a target value of less than 60 Hz, as described by Mavotrans.
Why choose a floating floor for a recording studio?
A floating floor solves a specific problem that other acoustic measures do not address: structure-borne noise. Footsteps, falling objects, and vibrations from subwoofers travel through the building’s structure and cannot be stopped by standard wall panels or ceiling absorbers. A decoupled floor interrupts that path.
Benefits for Studios
- Less impact noise: footsteps and instrument vibrations no longer reach the neighbors through the floor
- Better isolation of low frequencies: bass and kick drum are the hardest frequencies to isolate; mass-spring-mass works best here
- A more stable recording environment: less incoming structure-borne noise from the rest of the building
- Professional appearance: a well-designed floating floor enhances the value of the space
Limitations and Trade-offs
Every floating floor takes up height. Depending on the system, you lose a significant amount of floor height. This is a serious limitation in rooms with low ceilings. In addition, a solid floating screed weighs a considerable amount, and not every support structure is suitable for it.
Furthermore, around the system’s resonance frequency, there is a temporary reduction in insulation performance. A poorly designed system with a resonance frequency of 80 Hz actually provides worse insulation at that frequency than no floor at all. That is the risk of using a spring that is too soft without sufficient mass.
A floating floor is the right choice if you want to address structure-borne noise in a room with sufficient headroom and a support structure that can handle the weight. Always combine the floor with wall and ceiling measures for a comprehensive solution: the floor alone is rarely enough.
Pro tip: Have the support structure assessed before you choose a system. A structural engineer or acoustic consultant can determine in a single visit whether additional reinforcement is needed.
What systems and materials are available?
There are four common types of floating floor systems for a studio, each with its own advantages and disadvantages.
System Types
Prefabricated resilient floor systems come ready-to-install from the manufacturer, including design drawings and specified resonance frequency. One example is Stravifloor Prefab from Delta-L: a system with 18 mm sheathing, 40 mm mineral wool, and a natural frequency of 4–15 Hz, available with steel springs or natural rubber. Performance is predictable, and installation is quick.
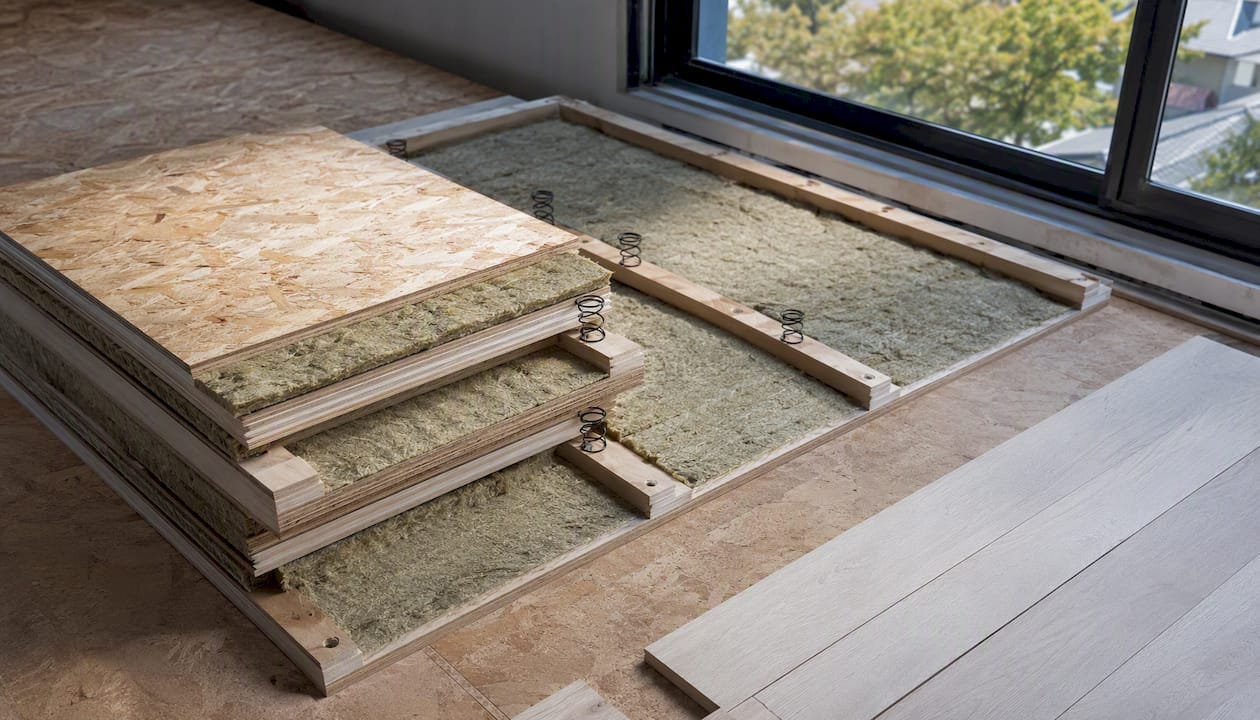
A floating screed system is assembledon-site from individual components: spring dampers or elastomeric strips, insulation boards, and a solid screed. This system requires more technical expertise but offers greater flexibility in terms of thickness, mass, and natural frequency.
A floating wooden floor on spring dampers is a lighter option, often used in rehearsal spaces and dance studios. Its insulation values are lower than those of a solid screed, but the system is lighter and easier to install.
Floating panel constructions consist of multiple layers of gypsum fiber or plywood on elastomeric pads. Suitable for smaller spaces or situations with limited headroom.
Materials
- Natural rubber and elastomers: durable, good damping properties, versatile
- Steel springs: lower natural frequency possible, suitable for heavy loads
- Mineral wool: thermal and acoustic insulation, combined with spring dampers
- PUR/PE foam: lighter applications, lower performance at low frequencies
- Gypsum fiber boards and solid screeds: provide the necessary mass for the mass-spring-mass system
- Perimeter insulation and sheeting: essential for preventing flanking transmission and moisture problems
Prefab vs. Custom-Built: When Should You Choose Which?
| Criterion | Prefab system | On-site assembly |
|---|---|---|
| Installation time | Short (1–3 days) | Longer (3–7 days or more) |
| Design Flexibility | Limited to supplier options | Fully customizable |
| Performance Prediction | High (manufacturer specifications) | Depends on model |
| Material Costs | Higher per square meter | Lower, but more labor |
| Suitable for | Project-based studios, rapid implementation | Complex spaces, specific requirements |
For most Dutch recording studios, a prefabricated suspension system is preferred when the room is rectangular and the timeline is tight. Custom on-site solutions are worthwhile for irregular floor plans, low ceilings, or when a specific suspension frequency is required that falls outside the standard range.
When installing, always follow these guidelines: install edge insulation along all walls before laying the floor, place a vapor barrier under the insulation layer, and ensure that pipe penetrations are decoupled so they do not form a sound bridge.
Which design parameters determine your floor’s performance?
The three parameters that most directly determine the insulation performance are the resonance frequency, the mass per square meter, and the minimum thickness of the system.
Resonance frequency
The spring frequency is the frequency at which the mass-spring-mass system resonates. Above that frequency, the system provides isolation; below it, it does not. An attenuation occurs around the resonance frequency itself. Good design tolerances keep that frequency well below the room’s operating range.
| Spring Frequency | Expected behavior | Recommended for |
|---|---|---|
| 4–15 Hz | Excellent isolation at low frequencies, no resonance dip in the operating range | Recording studios, music studios |
| 15–30 Hz | Good sound insulation, suitable for most applications | Rehearsal rooms, performance halls |
| 30–60 Hz | Acceptable for speech and mid-frequencies | Office spaces, light-duty applications |
| Above 60 Hz | Risk of resonance dip in the operating range; not suitable for studios | Not recommended for recording |
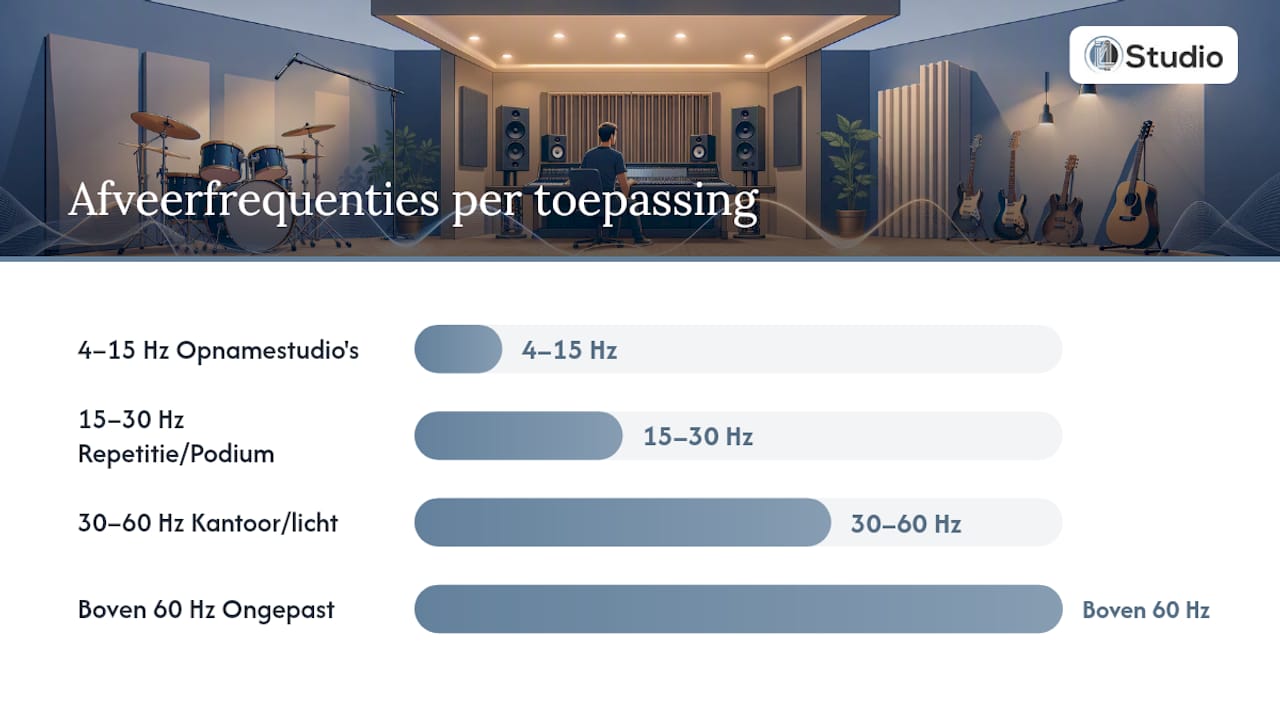
For recording studios, you should aim for a roll-off frequency of less than 60 Hz, preferably in the range of 4–15 Hz, as is the case with professional prefabricated systems.
Mass per m²
Greater mass lowers the resonance frequency and improves low-frequency insulation. A solid concrete subfloor weighing 80–120 kg/m² performs significantly better than a lightweight wooden structure weighing 20–30 kg/m². For studios with bass instruments or electronic music, a higher mass per m² is a deliberate design choice.
Minimum thickness and edge insulation
- Prefabricated systems: typically 6–10 cm total installation height
- Screed assembly: 10–20 cm depending on the spring layer and mass plate
- Perimeter insulation: at least 10 mm along all walls, over the full height of the subfloor
Edge insulation is not a minor detail. Without proper edge insulation, sound travels through the walls around the floor, which drastically reduces the insulation performance.
This ensures you stay safely outside the resonance dip, even if the actual mass or spring characteristics deviate slightly from the calculation. Mavotrans describes this as an essential design tolerance for mass-spring-mass systems.*
What acoustic requirements apply in the Netherlands?
Dutch municipalities often require an acoustic report when a residence is subdivided, converted into rental units, or the use of a building is changed. Without this report, a permit is generally not granted. The limit values used by municipalities are generally: impact sound LnT,A ≤ 54 dB and airborne sound DnT,A ≥ 52 dB, in accordance with the new construction requirements of the Building Decree.
According to KGI Group, all new-construction requirements apply to home subdivisions and conversions into rental units. An acoustic report must generally include:
- Measurement of impact noise and airborne noise in the current situation
- Calculation or measurement of the expected situation after the intervention
- Comparison with applicable limit values
- Recommendations for additional measures, if necessary
For a recording studio located in a residential building or mixed-use property, an acoustic report is almost always required when there is a change in use. Even if you don’t need a permit, a measurement report is valuable: it demonstrates that your floor actually performs as designed.
Practical implication for the design: document your system’s spring frequency, mass per square meter, and edge insulation. Municipalities and consultants request this information during the assessment. A prefabricated system with factory specifications makes this documentation easier than a fully custom-built structure.
Pro tip: Start the acoustic consulting process before applying for a permit, not after. That way, a consultant can still influence the design rather than simply noting that it doesn’t meet the requirements.
How much does a floating floor cost, and how long does installation take?
The cost of a floating floor for a studio varies widely, depending on the system, the size of the space, and the complexity of the subfloor.
Cost estimates per m²
- Prefabricated floating system (materials + installation): approximately €150–€350 per m², depending on the system and supplier
- On-site installation of a floating screed: approximately €120–€280 per m² for materials; labor costs are additional
- Factors that increase costs: limited accessibility, demolition of existing floor, additional mass required, pipe penetrations, debris removal
An acoustic measurement typically costs between €300 and €1,500, depending on the size of the space and the level of detail in the analysis. For permitting processes or comprehensive reports, a complete acoustic study can cost up to approximately €2,480, excluding VAT, depending on the scope.
Timeline
- Measurement appointment and design phase: 1–3 weeks
- Quotation process and material delivery: 2–4 weeks (prefab systems may have delivery times)
- Subfloor preparation: 1–2 days (cleaning, leveling, demolition work if necessary)
- Installation of floating floor: 1–3 days (prefab) or 3–7 days (overlay)
- Curing of the screed (for wet systems): 4–6 weeks
- Finishing layer and final measurement: 1–2 days
Checklist for Quotes
- Specified natural frequency (Hz) and mass per m²
- Minimum and maximum system load
- Edge insulation: thickness, material, and installation instructions
- Vapor barrier: type and overlap
- Warranty period on materials and workmanship
- Includes or excludes demolition and removal
- Final measurement: included or quoted separately
Can you install a floating floor yourself?
An experienced DIYer can install a simple floating floor using elastomeric strips or a springy subfloor. The basic steps are straightforward, the materials are readily available, and the installation doesn’t require heavy-duty tools. However, there are clear limits to what you can do on your own without risking a poor result.
What is relatively suitable for DIYers
- Installing a prefabricated system with clear installation instructions
- Installing perimeter insulation along walls
- Installing a vapor barrier
- Installing a lightweight floating wooden floor on spring dampers
What Is Considered Specialized
- Calculating the correct natural frequency for your specific mass and space
- Decoupling pipes, ventilation ducts, and penetrations
- Designing a system for low-frequency isolation below 60 Hz
- Carrying out work requiring a permit for which a measurement report is required
The risks of amateur installation are very real: an excessively high resonance frequency, insufficient edge insulation that allows sound to leak through the walls, or pipe penetrations that act as sound bridges. These mistakes are costly to correct after the fact.
When should you always consult a specialist?
- If the space is subject to a change of use requiring a permit
- If you need a measurement report for the municipality
- If the natural frequency must be below 30 Hz for low-frequency insulation
- If the structural support has not been assessed for the additional weight
- If there are pipes or ventilation ducts running through the floor
Pro tip: Combine DIY work with a professional final inspection. Install the floor yourself, but have a specialist perform the final measurement. A professional acoustic measurement costs less than the repair costs if the floor doesn’t perform as expected.
Specification Checklist and I4studio’s Approach
A good request for proposal starts with a complete list of specifications. Without that list, you’re comparing apples to oranges and missing the parameters that make all the difference.
Specification Checklist for Your Request for Proposal
- Performance requirements: target values for impact sound (LnT,A, in dB) and airborne sound (DnT,A, in dB)
- Resonance frequency: maximum value in Hz (for studios: < 60 Hz, preferably 4–15 Hz)
- Mass per square meter: minimum value for the screed
- Minimum installation height: available space in cm
- Perimeter Insulation: Thickness and Material Type
- Preferred flooring: hardwood, vinyl, concrete, or other
- Test method: final measurement before and after finishing
- Pipe Penetrations: Locations and Disconnection Method
I4studio’s Approach
I4studio follows a set sequence of steps for studio flooring projects:
- Site survey: assessment of the existing conditions, evaluation of the supporting structure and height
- Design proposal: selection of system, spring frequency, mass, and material specifications
- Installation schedule: planning of preparation, installation, and curing
- Final measurement: verification of impact sound and airborne sound after installation
For studio owners who also want to tackle the rest of their space, I4studio offers additional advice on soundproofing for studios and the combination of floor, wall, and ceiling solutions.
Pro tip: Schedule the final inspection before you install the finish layer. That way, if the subfloor doesn’t meet the requirements, you can still make adjustments without having to tear up the finish.
A Frank Word About Raised Floors
In the studio world, floating floors are sometimes presented as the solution to every sound problem. That’s too simplistic. A floating floor addresses structure-borne noise, but does nothing to improve the room’s acoustics: it won’t solve problems like standing waves, flutter echoes, or excessive reverberation time. Anyone who simply installs a floating floor and does nothing else will have a quieter floor but still face an acoustic problem.
What I consistently see at I4studio is that the best results come from projects in which the floor is part of a comprehensive plan: decoupled walls, a suspended ceiling, and acoustic treatment of the interior. The floor is the foundation—literally and figuratively—but the building around it must work in harmony with it.
Measurement data are central to every recommendation. Not because measurement is mandatory, but because a design without measurement is a guess. A system’s resonance frequency depends on its actual mass and actual spring characteristics, not on theoretical values on paper. A before-and-after measurement makes the difference visible and gives you the assurance that your investment is paying off.
Here’s how I4studio can help you: from consultation to final assessment
A raised floor for your studio is a technical investment where the details make all the difference. I4studio offers acoustic consulting, custom design, and installation coordination for recording and music studios in the Netherlands—from the initial site survey to the final inspection after installation.

For studio owners who want to completely revamp their space, acoustic panels and diffusers are also available to complement the floor treatments. Those who are also considering equipment will find studio gear for beginners and custom-built studio PCs for audio and video at I4studio.
Please contact us to schedule a no-obligation site visit or request a quote. Describe your space, your goals, and your timeline, and we’ll put together a detailed proposal.
Sources
Below is a selection of resources you can consult when designing, obtaining permits for, or having a floating floor installed in your studio.
- Acoustic Assessment for Permitting — KGI Group
- Stravifloor Prefab — Delta-L
- Mass-spring-mass — Eurabo
- Mass-spring-mass principle — Mavotrans
- How much does a professional acoustic measurement cost? — TUP
- Acoustic testing costs — DB Brothers
Frequently Asked Questions
What are the disadvantages of a floating screed?
A floating screed takes up a significant amount of floor height (10–20 cm or more), is quite heavy (80–120 kilograms per square meter), and experiences a temporary drop in sound insulation performance around its resonance frequency. In a poorly designed system, that resonance dip may fall within the studio’s operating range.
How do you build a floating floor yourself?
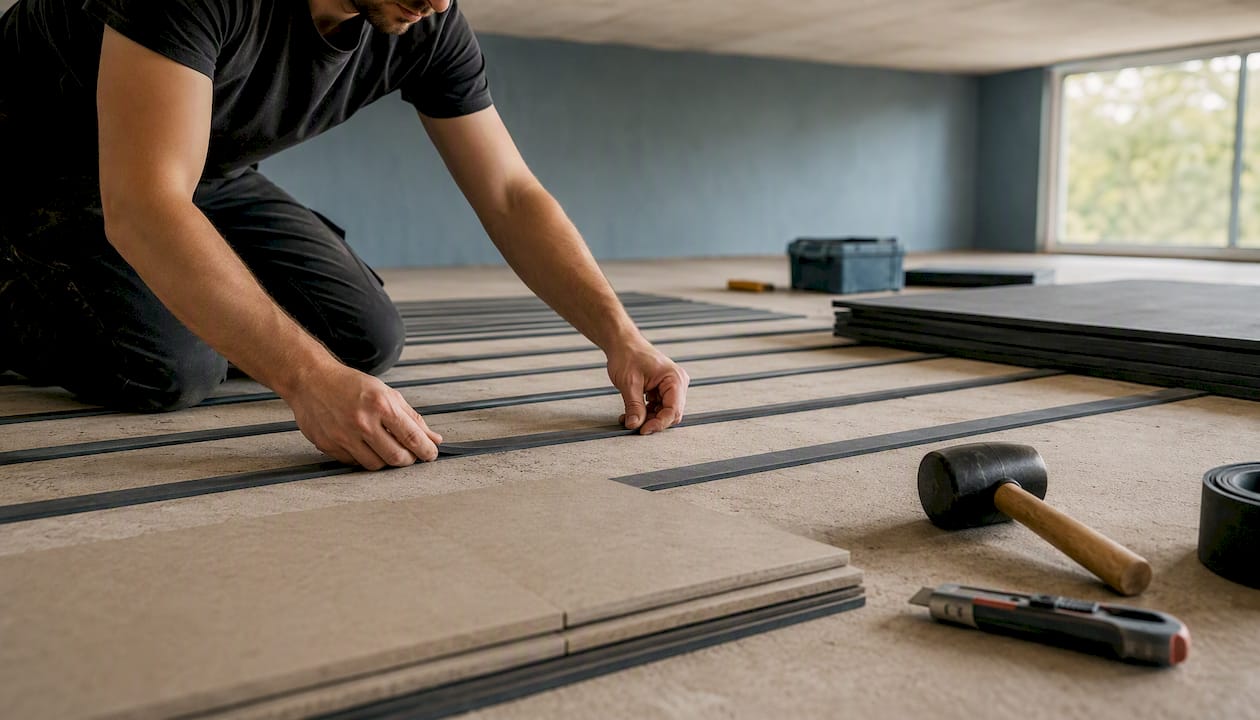
An experienced DIYer can install a simple floating floor using elastomeric strips or spring dampers: edge insulation along the walls, foil on the subfloor, a springy layer, and a mass plate. Always have a specialist calculate and verify the natural frequency and check for pipe penetrations.
What is the minimum thickness of a floating floor?
Prefab systems start at approximately 6 centimeters in total installation height. Floating screed installations are typically 10–20 centimeters thick, depending on the spring layer and the mass plate. Edge insulation along the walls is always at least 10 millimeters.
How much does it cost to install a floating floor?
Material and installation costs range from approximately €120 to €350 per square meter, depending on the system and its complexity. A professional acoustic measurement costs €300–€1,500; a complete permitting report can cost up to approximately €2,480, excluding VAT. I4studio can provide a customized quote based on your space and target values.
When is an acoustic report required in the Netherlands?
When dividing a home, converting it into rental units, or changing its use, municipalities typically require an acoustic report. The limit values are impact sound LnT,A ≤ 54 dB and airborne sound DnT,A ≥ 52 dB. In most cases, a permit will not be granted without an approved report.