Calibrate your studio monitors using a calibrated measurement microphone and a short calibration routine: first, ensure optimal placement and acoustics; only then apply subtle software correction. With a measurement microphone, an SPL meter or app, and calibration software, you can achieve a much more neutral sound in your studio within a few hours. The result: mixing decisions you can trust, even outside your own room.
Briefly:
- Calibration takes two to four hours, including determining the correct placement and acoustic treatment to ensure reliable measurement results.
- Use a calibrated measurement microphone and a reference level of 79 to 85 dB SPL to ensure consistent and accurate measurements.
- Avoid adjustments greater than 6 to 10 dB, as deep dips usually indicate physical placement issues that are best resolved by changing the monitor or listening position.
- A good setup consists of an equilateral triangle with the tweeter at ear level and monitors angled slightly inward, at least 0.5 meters away from the walls.
- Repeat the calibration periodically and document your setups to maintain your ability to make accurate assessments and to identify changes in the room or equipment in a timely manner.
Table of Contents
- Why Calibration Improves Your Mixing Decisions
- What You Need: From Affordable to Professional
- How to Set Up Your Monitors and Listening Position for Optimal Results
- Step by step: the measurement procedure with a reference level
- What your measurement results tell you and what mistakes to avoid
- Practical experience and support with calibration
- i4studio as a practical next step
- An experienced perspective on calibration in practice
- Frequently Asked Questions
- Sources
Why Calibration Improves Your Mixing Decisions
Every room colors the sound. A corner full of low frequencies forces you to mix the bass softer than necessary, while a hard wall can make the highs sound excessively sharp. You end up correcting for a problem that isn’t in the music, but in the room. That leads to revisions and results in mixes that sound different on other systems than you intended.
A calibration session solves that by measuring how your monitors actually perform in your space, not just in theory.
- Spend less time on unnecessary revisions because you no longer confuse the space with the mix.
- More reliable playback on a car stereo, headphones, or a customer’s laptop.
- A clearer point of reference you can fall back on when in doubt.
Plan for a full session, including placement and remeasurements, to take two to four hours.
What You Need: From Affordable to Professional
You don’t need an expensive studio to take accurate measurements, but you do need the right foundation. A measurement microphone with its own calibration file is the starting point: the UMIK-1 is considered an accurate and affordable choice, while the Behringer ECM8000 is a more affordable alternative for those just starting out. Always use your microphone’s unique, serial-number-specific calibration file: these files are not interchangeable between units.
To check your level, you’ll need an SPL meter or a reliable measurement app to verify your reference level. A hardware meter is more accurate and worth the investment once you make calibration a regular part of your workflow.
When it comes to software, there are clear choices:
- REW is free and powerful, but takes a little more time to get used to.
- Sonarworks or Genelec’s GLM software are more user-friendly, though they come at a higher price.
- IK Multimedia’s ARC is a comparable alternative for those who prefer a guided measurement wizard.
Always combine your measurements with some basic acoustic treatment: a panel, a bass trap, and some isolation pads under the monitors often make more of a difference than expensive software. Check out our acoustic panels for studios.
How do you set up your monitors and listening position for optimal results?
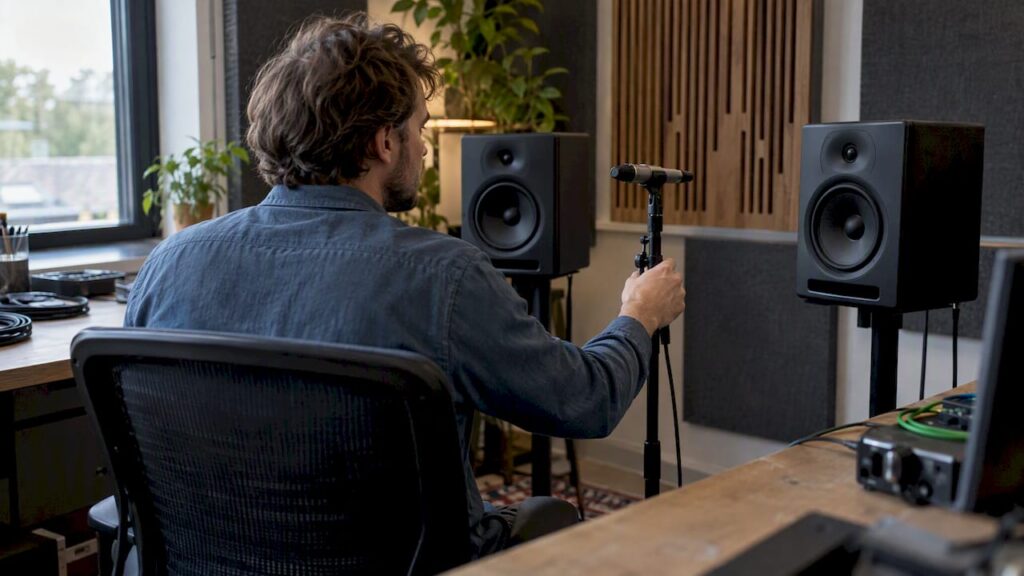
A measurement is only meaningful if the setup is correct. Start with the basics: form an equilateral triangle between your two monitors and your head, with each side approximately the same length.
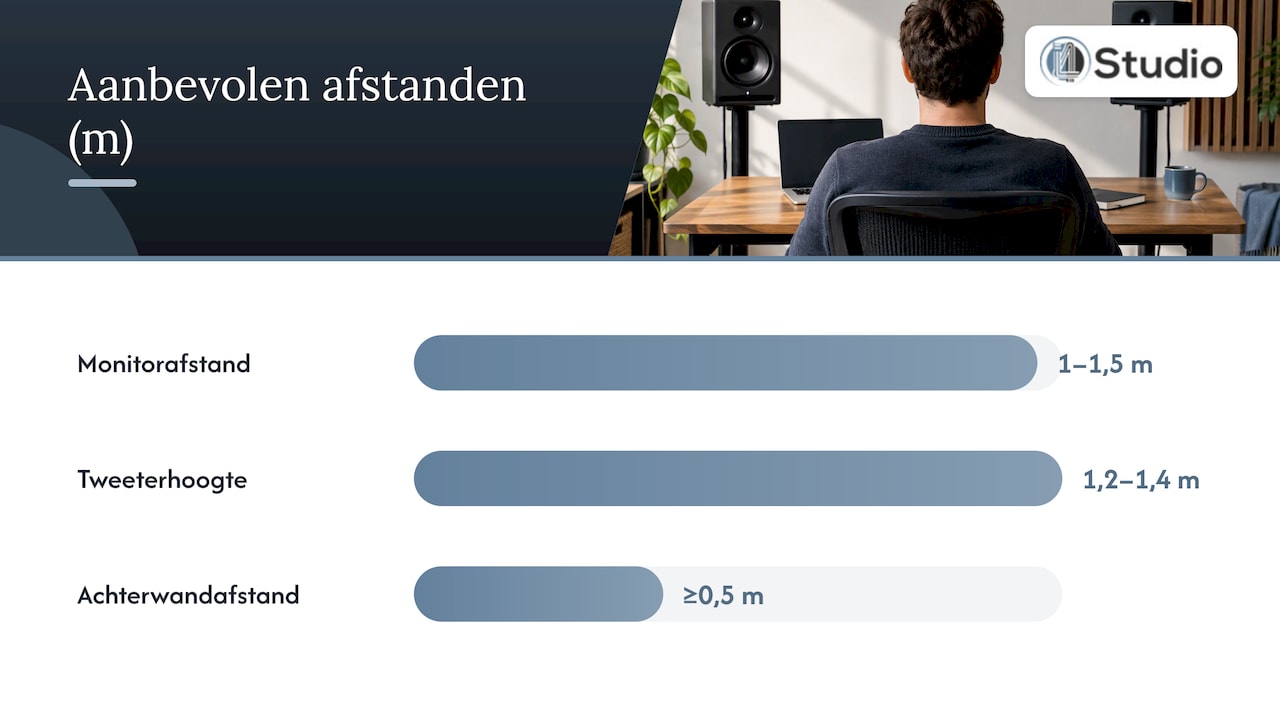
- Keep a distance of 1 to 1.5 meters between the monitors and between the monitor and the listening position.
- Position the tweeter at ear level, typically between 1.2 and 1.4 meters above the floor, as recommended by Genelec.
- Tilt the monitors 15 to 30 degrees inward, a technique known as “toe-in.”
- Ensure symmetry relative to the side walls and, where possible, maintain a distance of at least 0.5 meters from the back wall.
- Check your desk or mixing console: it may cause a boost around 160 to 200 Hz that distorts your measurement.
- Temporarily reduce early reflections with a panel or a rug before you start measuring.
For a more detailed explanation of these steps, check out our studio monitor setup guide.
Pro tip: First, measure without applying any active corrections, so you know how the room itself affects the sound before you make any changes.
Step by Step: The Measurement Procedure Using a Reference Level
Once you have the setup right, you can begin the actual measurement. The order of steps makes all the difference between a reliable result and a measurement that leads you astray.
- Position the measurement microphone exactly at ear level, in the spot where you normally mix.
- Measure each monitor separately—never both at the same time—so you get an accurate reading for each side.
- Use pink noise or sweep signals as a test source: these cover the entire frequency spectrum evenly.
- Take several measurements around the listening position, within about 30 centimeters of your head, to avoid a sweet spot that is too narrow, as recommended by Genelec and miniDSP.
- Set the reference level using your SPL meter. In its manuals, Presonus uses 85 dB SPL as a common example level, where the left and right channels should produce exactly the same sound level.
- Save your results as a preset and verify the results using familiar commercial tracks that you know well.
A reference level between 79 and 85 dB SPL, with left and right channels matched, is the standard basis for level calibration and prevents you from hearing one side louder than the other, which would distort your stereo image.
The microphone position, the test signal, and the reference level together form the core of any reliable measurement. Skip any one of these steps, and the rest of your calibration will be built on shaky ground. If in doubt, repeat the measurement: a second round of measurements is faster than a mix that turns out to be off later on.
What your measurement results tell you and what mistakes to avoid
A graph full of peaks and valleys quickly raises the question of how much you need to correct. The answer is: less than you think. Deep, narrow dips in the response often indicate reflection or phase cancellation, not a flaw in the monitor itself. Genelec points out that such a notch is usually better resolved by moving the speaker or listening position, or by adding absorption, rather than by filling in the dip with software.
- Treat a deep, narrow dip first as a placement issue, not as an EQ task.
- Avoid corrections greater than 6 to 10 dB: these usually indicate an underlying acoustic problem.
- Prefer broad, gentle corrections over sharp, narrow adjustments.
- Check whether a problem changes at different volumes, as this can indicate its cause.
- Repeat the measurement after every physical or software change to confirm that the adjustment is working.
Measuring isn’t an excuse to make adjustments blindly. First understand what’s causing a dip, and only then take action—this prevents you from permanently hiding a room issue within your plug-ins.
Practical experience and support with calibration
A calibration session is all about repeatable steps, not guesswork. Our guides on microphone placement and acoustic panel installation directly follow the steps outlined above: first, get the room and setup in order; only then proceed with the measurement and software correction. In practice, a typical session involves checking the setup, calibrating the microphone, measuring each side separately, matching the levels, and then verifying the results with tracks you already know well. This order prevents you from wasting time on corrections that mask a placement problem rather than solving it.
i4studio as a practical next step
Proper calibration starts with the room, not with a plugin, and that’s exactly where i4studio makes a difference. In addition to advice on acoustic panels, we offer access to studio monitors, audio interfaces, and measurement equipment that can immediately improve your measurement results—without you having to figure out all the options yourself.
- Advice on acoustic panels for those who need physical treatment after a measurement.
- A wide selection of studio monitors for those considering an upgrade.
- Custom-built studio PCs starting at €1,099 (one-time fee), optimized for low-latency audio work.
After taking your measurements, are you unsure whether your room or your equipment is the bottleneck? Get advice from i4studio and discuss your situation with an expert before you spend money on the wrong solution.
An Experienced Perspective on Calibration in Practice
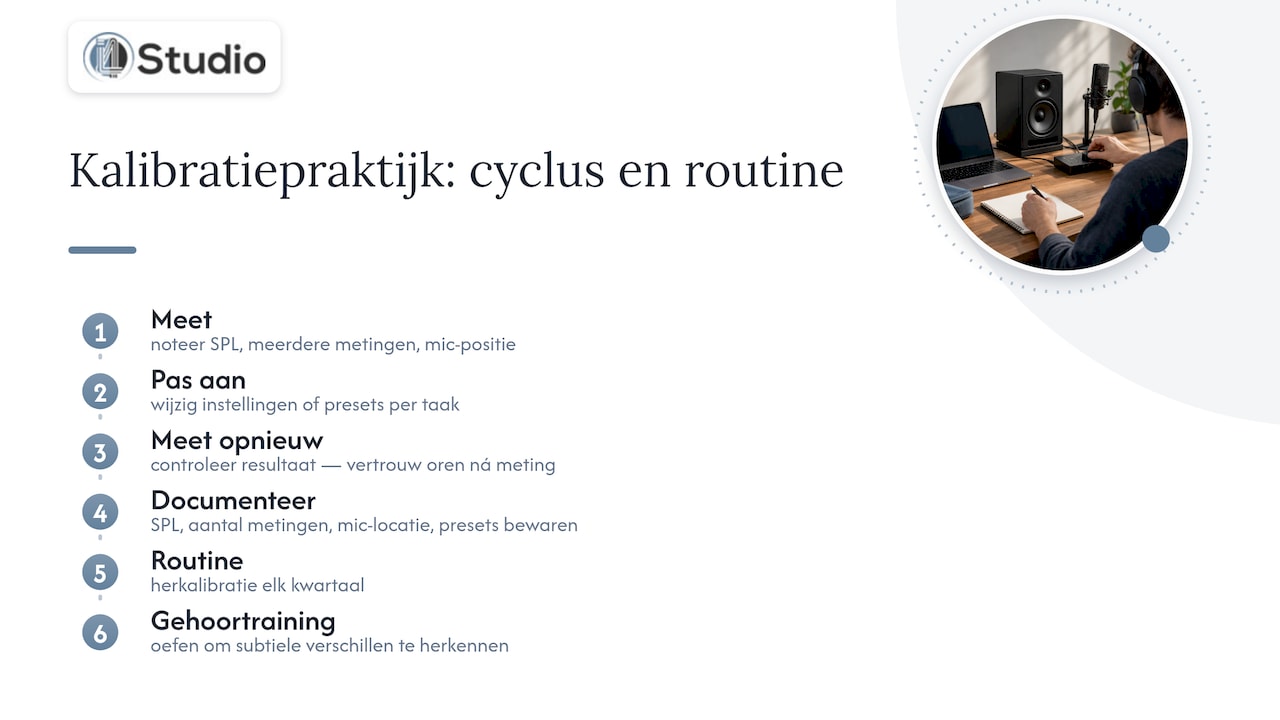
The biggest mistake I see studio owners make is stopping after the first measurement. Calibration isn’t a one-time process; it’s a cycle: measure, make an adjustment, measure again. Only then should you trust your ears—not before—because an uncalibrated room will also distort your own judgment.
Document what you do. Note your SPL value, the number of measurements, and where you placed the microphone, and save separate presets for mixing, mastering, or podcasting. A room can change due to the season, furniture, or new equipment, so recalibrating every quarter is not an excessive precaution. If you want to keep your judgment sharp beyond just the technical aspects, auditory training can help you continue to recognize more subtle differences.
– harold
Frequently Asked Questions
What’s the best way to calibrate my monitor?
Place both monitors in an equilateral triangle with the tweeter at ear level, then measure each side separately using a calibrated measurement microphone and pink noise. Match the levels using an SPL meter before applying any software correction.
What is the best studio monitor for calibration?
There is no single “best” monitor, because the choice depends on your space, budget, and the type of work you do. Monitors that respond well to calibration software and have a neutral baseline response—such as many models in our line of studio monitors—offer the most room for correction.
What is the point of calibrating studio monitors?
Calibration corrects the coloration that your room adds to the sound, so your mixing decisions aren’t based on a distorted perception. This results in less revision work and a more reliable translation to other listening systems.
How do I calibrate my monitor in Windows 11?
Display calibration in Windows 11, accessed through System Settings and Display, adjusts the color and brightness of your monitor and has nothing to do with the acoustic calibration of your speakers. For sound calibration, you need a measurement microphone and separate software—not display settings.
How long does a full calibration session take?
A thorough session—including checking the setup, taking measurements, and verifying results with reference tracks—typically takes two to four hours. The time depends on how much you need to adjust the placement and acoustics before you start measuring.
Sources
- How to Calibrate Your Monitors and Improve Room Acoustics? – Genelec.com
- Presonus Eris Studio Series User Manual (Calibration)
- How to Calibrate Studio Monitors for Accurate Mixing – Wisseloord
- GLM GRADE™ – Genelec.com