TL;DR:
- Proper acoustic panel placement targets reflection points to effectively reduce reverberation and echo. Use the hand-clap test, mirror method and measurement tools such as REW for accurate detection and placement. A combination of wall and ceiling panels and bass traps in the corners ensures optimal sound balance and recording quality.
Best acoustic panel placement is defined as the targeted positioning of absorption material at the reflection points in a room so that unwanted reverberation and echo are reduced without stifling the natural sound. For musicians and studio managers, this is the difference between recordings that sound professional and those that sound like they were made in a bathroom. Methods such as the mirror method and the hand-clap test, combined with products from I4studio, give you a concrete starting point. This article explains step by step how to determine the right place for acoustic panels and what mistakes to avoid.
How do you identify key reflection points?
Locating reflection points via a hand clap test is the fastest way to start. You clap your hands hard once at your listening or recording spot and listen for pings, flutter echoes and reverberation. Places where sound bounces back most strongly, when treated, give the most noticeable results. This is not a sophisticated technique, but it works.

The mirror method is more accurate. The mirror method marks initial reflection points by moving a mirror along the side walls and ceiling while you are in your listening position. Once you see the speaker in the mirror, mark that spot. There you place a panel. This principle works because sound behaves like light: the angle of incidence is equal to the angle of reflection.
For an even more precise approach, measurement tools such as REW with the mirror method combine to produce the best results. REW (Room EQ Wizard) is free software that uses a measurement microphone to map the acoustic response of your room. This allows you to see exactly which frequencies are causing problems and in which places.
Follow this roadmap to find reflection points systematically:
- Sit at your listening position with the monitors in their usual place.
- Clap your hands hard once and listen for the afterglow. Note how long it lasts and from where it seems to come.
- Move a mirror along the left side wall while an assistant sits at your listening position. Mark each spot where the speaker is visible.
- Repeat for the right side wall and ceiling above the listening position.
- Also check large bare areas such as windows, glass doors and untreated back walls.
Pro-tip: Windows are persistent reflectors. Heavy curtains help temporarily, but an acoustic panel on the adjacent wall tackles reflection structurally without blocking your daylight.
Walls, windows and ceilings all behave differently. A concrete wall reflects more harshly than drywall. A large window behaves like a mirror for sound. The ceiling above the mix position is the largest untreated reflector in most studios.

Wall panels versus ceiling panels: which works better?
Ceiling panels and wall panels each have a specific function. Ceiling panels quickly address reverberation, while wall panels provide focused control at listening areas. A combination of both is most effective for studios. Those who install only wall panels do not solve reverberation from above. Those using only ceiling panels miss the lateral reflections that interfere with stereo imaging.
| Feature | Wall panels | Ceiling panels |
|---|---|---|
| Primary Function | Attenuate lateral reflections | Reduce overall reverberation |
| Best position | Ear level at listening position | Above mix or recording position |
| Effect on speech | Greatly improved clarity | Less direct effect |
| Suitable for | Small rooms, recording booths | Larger studios, control rooms |
| Installation complexity | Low to medium | Medium to high |
Wall panels are placed at ear level at listening areas for maximum improvement in speech intelligibility. This is no accident. At ear level, direct reflections from the monitors hit the wall first. A panel at that spot absorbs the energy before it bounces back to your ears.
The optimal ratio for a control room is approximately 60 to 70% ceiling coverage and 30 to 40% wall coverage. This distribution prevents sound reflections and improves speech intelligibility at the same time. For small recording booths of less than 15 square meters, the balance shifts: there, wall panels are relatively more important because the ceiling is closer to the source.
Ceiling mounting requires more preparation than wall mounting. You need the right plugs for the ceiling material, and you want to be sure the panels hang securely. A 5-pound panel coming loose over an expensive microphone or musician is not an option.
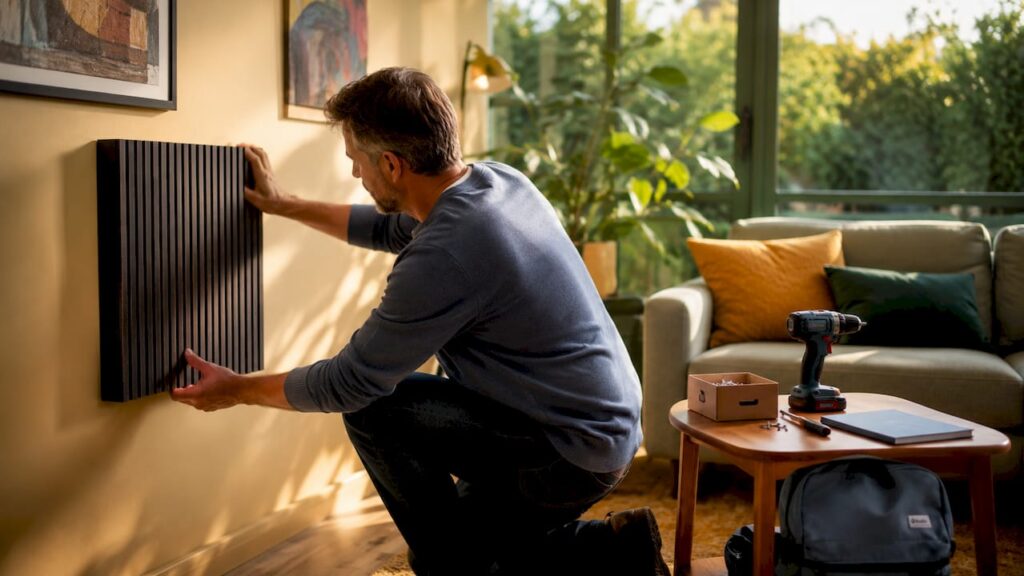
How do you securely attach acoustic panels?
Fasteners should be matched to the wall type for both safety and ease of use. The acoustic performance of the panel does not change with the mounting method, but a poorly mounted panel that hangs crookedly or comes loose will not do its job. Choose your method based on the substrate material and whether you want to be able to adjust the mounting later.
The most common mounting options by wall type:
- Drywall: Use drywall anchors or special drywall plugs in conjunction with screws. Standard plugs will not hold in drywall without an anchor.
- Concrete or masonry: Impact plugs with screws are the standard. Drill with a hammer drill bit to the correct diameter for the plug.
- Wood or wooden walls: Direct screws work fine. Use wood screws of the correct length for the thickness of the panel plus the wall.
- Temporary installation or rental property: Mounting adhesive or heavy duty Command Strips are suitable for lighter panels. Assembly time is approximately 10 minutes per panel, with full strength after 12 to 24 hours.
Pro-tip: Do not hang panels flat against the wall, but with a small air cavity of 5 to 10 centimeters. That cavity significantly increases the absorption of lower mid frequencies without the need for thicker or more expensive panels.
Fixed mounting with screws and dowels is the most reliable option for permanent studios. Temporary mounting with glue or strips works well for rental spaces or situations where you want to change the layout frequently. After mounting, always check that the panel hangs stably and measure again with the hand fold test to confirm that the placement is having the desired effect.
Which strategies deliver the best recording experience?
You get the fastest improvement by addressing the largest reflector. A large bare wall gives audible difference faster than small strips of panels scattered in quiet spots. Always start with the dominant reflector in the room, not the easiest place to hang a panel.
Effective placement strategies for recording studios:
- Treat the first reflection points as a priority. These are the side walls next to the listening position and the ceiling above. Without treatment here, any mix sounds different than intended.
- Use corner absorbers (bass traps) in all four vertical corners. Bass traps in the corners are essential for attenuating low frequencies that ordinary wall and ceiling panels do not address. Low frequencies accumulate in corners; without bass traps, the bass sounds muddy and uncontrolled.
- Treat the rear wall behind the listening position. A diffuser on the rear wall diffuses the sound instead of absorbing it, giving a more open sound without making the room dead.
- Leave the front of the room (behind the monitors) relatively dry. Excessive absorption behind the monitors makes the sound dull and unnatural.
| Zone | Recommended treatment | Effect |
|---|---|---|
| Side walls at listening position | Absorption panels at ear level | Improved stereo imaging |
| Ceiling above listening position | Cloud panel or ceiling panels | Less flutter echo |
| Vertical angles | Bass traps | Controlled low frequencies |
| Rear panel | Diffuser or combination | More open, livelier sound |
| Wall behind monitors | Light absorption or leave free | Maintain natural timbre |
The size and location of the treated area are more decisive than the exact position. A panel that covers the reflection area well works better than a smaller panel in just the right spot. Size really counts here.
Different rules apply to recording booths than to control rooms. In a vocal booth, you want a dead, controlled environment. Treat all four walls and the ceiling as completely as possible. In a control room, you want a balanced space that honestly tells you what’s in your mix.
What mistakes to avoid in panel placement?
Random placement without reflection analysis leads to less effective results and wastes budget. This is the most common mistake made. Panels that hang in decoratively attractive areas but are not at reflection points do little acoustically.
Avoid these common mistakes:
- Concentrating all panels on one surface. Those who treat only the back wall do not solve the lateral reflections. Spreading over multiple surfaces is always more effective.
- Panels hung too high or too low. At ear height at the listening position is the standard for wall panels. A panel hanging at 2.5 meters while listening at 1.2 meters misses the critical reflection zone.
- Insufficient area treatment for low frequencies. Standard absorption panels 5 inches thick work well for mid and high frequencies, but barely address bass. For that, bass traps are needed.
- Confuse sound insulation with sound absorption. Acoustic panels absorb sound within the room. They do not stop sound passing through walls. The effect of panels is localized; insulation between rooms requires additional measures.
- Never re-measure after placement. Always do another hand slap test or REW measurement after hanging panels. That way you will know if the placement is having the desired effect or if you need to make adjustments.
A room that is overly treated does not sound good either. A completely dead space without any reflection sounds unnatural and tiring to work in for a long time. Aim for a controlled, not a dead space.
Key insights
The best acoustic panel placement requires a combination of targeted reflection analysis, strategic distribution across walls and ceiling, and bass traps in the corners for full frequency control.
| Item | Details |
|---|---|
| Start with reflection analysis | Use the hand-clap test and mirror method before hanging even one panel. |
| Combine wall and ceiling | Aim for 60-70% ceiling coverage and 30-40% wall coverage for optimal balance. |
| Prioritize the largest reflector | Treat the largest bare wall or ceiling first for the fastest audible results. |
| Use bass traps in corners | Ordinary panels don’t address low frequencies; bass traps in vertical corners are essential. |
| Measure again after placement | Always check the result with a handclap test or REW to adjust as needed. |
What I’ve learned from years of studio acoustics
I have seen dozens of studios set up over the years, from small home studios in bedrooms to professional control rooms. The most common mistake is not buying the wrong panels, but hanging them in the wrong place. People buy a set of 12 panels, distribute them evenly on all the walls because it looks symmetrical, and then wonder why the acoustics don’t improve.
What I always do myself: measure first, then buy. With REW and a cheap measuring microphone, you know exactly where the problems are within an hour. That information determines how many panels you need and where to put them. That saves money and frustration.
Another thing that surprised me: the air cavity behind a panel makes a bigger difference than most people expect. A panel 5 inches thick hanging 8 inches from the wall absorbs noticeably more in the lower mid frequencies than the same panel flat against the wall. That’s free gain.
And about bass traps: I still see them as the most underrated investment in studio acoustics. People spend hundreds of dollars on wall panels while the corners are left untreated. The bass then sounds muddy, the mix doesn’t sound on other systems, and the cause is never found. Put bass traps in all four vertical corners and you’ll be amazed at the difference. Combine that with effective acoustic panels at the right reflection points and you have a room you can really rely on.
– harold
Improve your studio with I4studio
I4studio provides acoustic panels and studio gear specifically selected for musicians and studio managers who are serious about sound quality. Whether you’re handling a small home studio or optimizing a professional control room, it starts with the right materials in the right place.

Check out the acoustic panels for studio in I4studio’s range, from compact wall panels to specialized diffusers like the Studio Acoustic Diffuser Serious. Not sure exactly what you need yet? The guide studio gear for beginners will help you determine which combination of panels and mounting accessories best suits your space and budget.
FAQ
Where should I hang an acoustic panel first?
Hang the first panel at the first reflection point on the side wall next to your listening position, at ear level. This gives the fastest audible result for stereo imaging and speech clarity.
How many panels do I need for a small studio?
For a space of 10 to 20 square meters, a minimum of 6 to 8 panels are needed for a noticeable improvement, supplemented by bass traps in the corners. The exact number depends on the reflection analysis of the specific room.
What is the difference between an acoustic panel and a bass trap?
An acoustic panel absorbs mid and high frequencies and is placed on walls and ceiling. A bass trap absorbs low frequencies and is placed specifically in the corners of the room, where bass energy accumulates.
Can I hang acoustic panels without drilling?
Yes. Mounting adhesive or heavy strips are suitable for lighter panels and rental properties. Full strength is achieved after 12 to 24 hours. Always check the maximum weight the strips or adhesive can support.
Does an acoustic panel also improve sound insulation between rooms?
No. Acoustic panels absorb sound within the room and reduce reverberation and echo. Insulation between rooms requires additional measures such as mass in the walls, decoupling of structural elements, and sealing of gaps.
Recommendation
- The Best Solutions to Improve Your Studio Acoustics – https://i4studio.nl/
- Installing Acoustic Panels: Practical Guide For Studios And Recordings – https://i4studio.nl/
- Acoustic Panels For Studio: Complete Guide For Optimal Recording And Mixing Spaces – https://i4studio.nl/
- acoustic panels in your studio are indispensable