TL;DR:
- Proper setup of studio monitors is essential for an accurate mix by minimizing reflections and creating the right listening position. Finding first reflection points with the mirror method and building an equilateral listening triangle improves sound quality and clarity. Acoustic treatments such as absorption and diffusion ensure optimal monitor performance, especially when panels are at least 4 inches thick and air cavities are used.
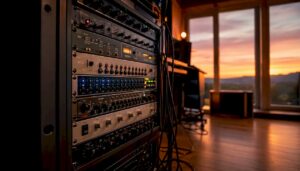
Optimal setup of studio monitors is the foundation of any reliable mix. Without proper positioning, you won’t hear what’s really in your audio, but a colored picture formed by reflections, resonances and incorrect listening position. This guide to studio monitors explains step by step how to position your monitors correctly, handle first reflection points and build an equilateral listening triangle. Whether you’re working with Yamaha HS5, Adam Audio T7V or Genelec 8030, the principles are universal and immediately applicable in any home studio or professional space.
What are first reflection points and how do you find them?
First reflection points are the places in your room where sound from your monitors first hits a surface before it reaches your ears. This direct sound plus the reflected copy cause coloration, comb filtering and a fuzzy stereo image. Treating these points is the most effective step you can take for more accurate monitoring.

The mirror method: fast and reliable
The mirror method is the fastest way to locate reflection points without measuring equipment. All you need is a mirror and a second person. Sit in your listening position and have someone slide the mirror along the side wall. Any spot where you see the monitor in the mirror is a first reflection point. Do this for both side walls, the ceiling and possibly the desk in front of you.
Here’s how to proceed:
- Sit at your fixed listening position and look straight ahead.
- Have an assistant hold the mirror flat against the left side wall and slowly slide it forward.
- Mark each position where you see the left monitor in the mirror.
- Repeat for the right side wall with the right monitor.
- Do the same for the ceiling, starting above the monitors and moving toward your head.
- Also mark the surface of your desk if your monitors are in desk mode.
Per side wall, you usually find two reflection points, and on the ceiling one or two. That’s at least four to six treatment sites in a standard rectangular room. Absorption at these points prevents stereo smearing and increases mix accuracy immediately and noticeably.
Pro-tip: Keep in mind that your head moves slightly during mixing. This means that a reflection point is not an exact point, but a zone. Therefore, treat a larger area than just the reflection point itself. Panels that are too small underperform because sound covers a wider reflection zone than just that one point.

A common mistake is to treat only the side walls and forget about the ceiling. Ceiling reflections affect the vertical soundstage and clarity of vocal recordings. For many producers, a ceiling “cloud” directly above your listening position is the most impactful addition to their studio.
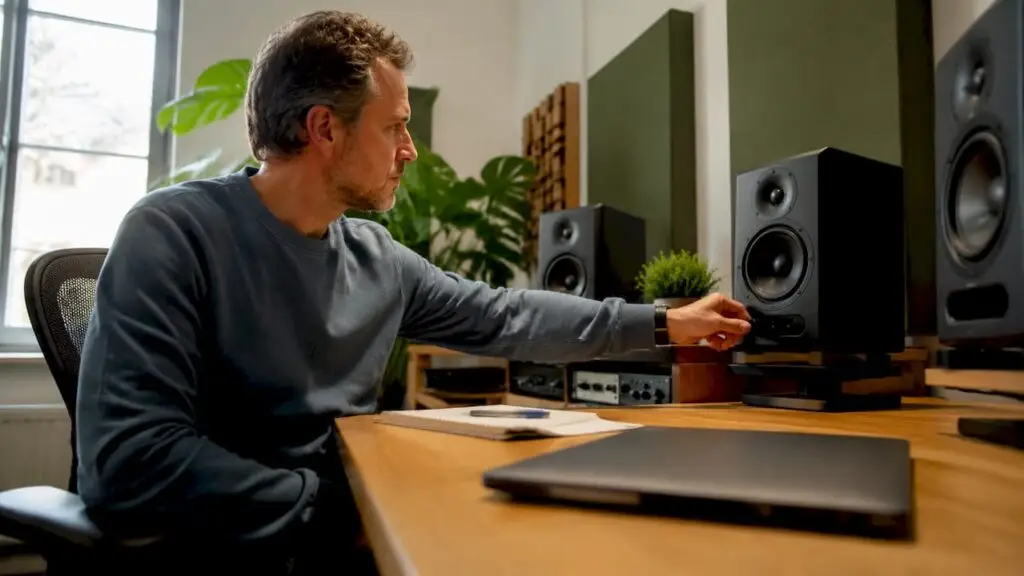
How do you set the right listening triangle?
The equilateral triangle between the two monitors and your listening position is the standard for optimal stereo balance. The distance between the two monitors should equal the distance of each from your head. At a listening angle of 60 degrees, you are right in the sweet spot where the stereo image is most accurate.
Concrete guidelines for the listening triangle:
- Distance: Set the sides of the triangle to a minimum of 1 meter and a maximum of 1.5 meters for nearfield monitors. For midfield monitors such as the Genelec 1032 or Focal Twin6 Be work with larger distances of 1.5 to 2.5 meters.
- Angle: Arrange the monitors so that the tweeters face your ears. An angle of 30 degrees to the center axis gives the most balanced reproduction.
- Height: The tweeter of any monitor should be at ear height when you are seated. In most nearfield monitors, this is the top half of the enclosure. Use monitor stands or isolation pads to adjust the height precisely.
- Symmetry: Both monitors should be exactly the same distance from the back wall. Even a difference of 10 centimeters causes an audible time difference between left and right.
- Clear space: Make sure there are no large objects directly next to or behind the monitors. Bookcases, rack cabinets and large screens reflect sound back to the listening position.
The difference between nearfield and midfield monitors is not only in power, but also in optimal listening distance. Nearfield monitors such as the Yamaha HS7 or KRK Rokit 7 are designed for short-distance use, with direct sound dominating over room sound. Midfield monitors require more distance to allow the drivers to integrate correctly, and therefore give a different view of the low mids.
What acoustic treatments are crucial?
Correct monitor placement and acoustic treatment are two sides of the same coin. The combination of correct placement and acoustic treatment maximizes the transparency and precision of your monitor system. Placement alone without treatment always produces a colored picture, no matter how good your monitors are.
Absorption versus diffusion: what do you use where?
| Treatment | Best location | Effect | When to apply |
|---|---|---|---|
| Absorption panel | First reflection points, ceiling cloud | Reduces direct coloring and comb filtering | Always the first step in any studio |
| Diffuser | Rear wall, lateral surfaces | Adds spaciousness without dead sound | After absorption is placed at reflection points |
| Basval | Corners of the room | Controls standing waves and low-frequency buildup | For problems with boomy or inaccurate bass |
| Ceiling cloud | Directly above listening position | Enhances vertical soundstage and vocal clarity | Priority in any professional setup |
Diffusers are less effective on first reflection points and can actually reduce clarity. Diffusion works better on back or lateral surfaces where you want to add spaciousness without disturbing the direct sound.
Panel thickness and air cavity
The thickness of your absorption panels determines which frequencies are absorbed. Panels of 1 to 2 inches absorb mainly treble frequencies. For control over the mid frequencies, which are most critical to mix clarity, panels of at least 4 inches are needed. An air cavity of 5 to 10 inches behind the panel greatly increases effectiveness at lower frequencies, without the need for thicker materials.
Pro-tip: Don’t hang your absorption panels directly against the wall, but leave an air cavity of at least 5 cm. Panels with air space give significantly better control of mid frequencies in your mix environment, which is directly audible in the clarity of your mixes.
Early reflections within 50 to 80 ms affect the clarity (C80) and intelligibility (D50) of your mix. This time window is exactly why first reflection points are so critical: the reflected sound arrives just a little later than the direct sound, causing audible coloration and a fuzzy stereo image. Treat these points correctly, and you’ll hear your mix as it really sounds.
Common mistakes when installing studio monitors
Even experienced producers make mistakes in monitor set-up. Knowing the most common pitfalls will save you hours of frustration and unnecessary purchases.
- Too close to the wall: At least 30 inches away from side walls and back wall is necessary to reduce standing waves and unnatural bass amplification. Many home studios have monitors directly against the back wall, resulting in boomy bass that sabotages mixing decisions.
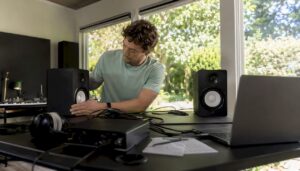
- Monitors directly on the desk: Placing monitors on the desk causes vibration and distortion through the desk surface. Always use isolation pads such as the Auralex MoPAD or IsoAcoustics ISO-155, or invest in monitor stands.
- Incorrect height: If the tweeter is not at ear height, you lose the high frequencies and stereo image. This is one of the most underrated mistakes in home studios.
- Asymmetrical setup: One monitor closer to a side wall than the other gives an imbalance in the stereo image that you cannot mix away. Always measure the distances with a tape measure.
- Treat only side walls: Producers who ignore ceiling reflections are missing a great source of coloring. The ceiling cloud is not a luxury but a necessity for accurate monitoring.
- Absorption panels too small: A 30-by-30-centimeter panel at a first reflection point is too small. Use at least 60 by 90 centimeters per treatment site for effective absorption over the entire reflection zone.
For a complete overview of proven setups, check out I4studio’s monitor setups list, which covers various room configurations with concrete placement diagrams.
Key insights
Proper setup of studio monitors requires an equilateral listening triangle, treatment of all first reflection points with panels of at least 4 inches, and at least 30 centimeters away from all walls.
| Item | Details |
|---|---|
| Setting listening triangle | Keep the distance monitor to ear equal to the distance between the two monitors, with a 60-degree angle. |
| Handle first reflection points. | Use the mirror method to find all reflection points on side walls and ceiling. |
| Panel thickness and air cavity. | Use panels of at least 4 inches or add an air cavity of 5 to 10 cm for mid-frequency control. |
| Desk Isolation. | Always place monitors on isolation pads or stands to prevent vibration transmission. |
| Monitor symmetry | Measure all distances with a tape measure. Even small asymmetry distorts the stereo image. |
What I have learned after years of monitor setups
After reviewing and setting up dozens of studios, from small bedroom studios to professional recording rooms, I always notice the same thing: most producers invest in better monitors when the real bottleneck is space. A pair of Genelec 8341 in an untreated room sounds worse than a pair of Adam Audio T5V in a well-treated room. That’s not an opinion, that’s acoustics.
Another thing I see: people treat one or two reflection points and then stop. The ceiling is consistently skipped. As soon as I install a ceiling cloud above the listening position, I always hear an immediate improvement in the clarity of vocals and the definition of high mids. It is the most underrated investment in a home studio.
My practical advice for small rooms: start with the mirror method, treat all points found with panels of at least 4 inches with air cavity, and put your monitors on stands at ear height. Only then see if your monitors themselves need an upgrade. For those who want to know more about the complete acoustic design of a studio, a systematic room analysis is the logical next step.
One warning: don’t over-optimize. A completely dead room sounds unnatural and gives a false image of how your mix sounds on other systems. Aim for a balanced mix of absorption and diffusion, not a soundless bunker.
– harold
Set up your studio with the right gear from I4studio

Whether you are setting up your first home studio or want to improve an existing setup, the right equipment makes all the difference. I4studio not only supplies studio monitors and acoustic panels, but also thinks with you about the optimal setup for your space. From studio gear for beginners to professional monitor controllers like the Mackie Big Knob: everything you need for a correct and reliable monitor setup can be found at I4studio. Want to know which acoustic panels are best for your space? Check out the selection and ask for advice.
FAQ
What is the proper distance between studio monitors and listening position?
The distance from each monitor to your listening position should be equal to the distance between them. For nearfield monitors, this is typically 1 to 1.5 meters, giving a listening angle of 60 degrees.
How do I find the first reflection points in my studio?
Use the mirror method: sit at your listening position and have someone slide a mirror along the side wall. Any spot where you see the monitor in the mirror is a first reflection point that should be treated with an absorption panel.
How thick should acoustic panels be for studio monitors?
Panels of 1 to 2 inches absorb only treble frequencies. Effective mid-frequency absorption requires panels of at least 4 inches, or thin panels with an air cavity of 5 to 10 inches behind the panel.
Why do my monitors sound different at different positions?
Small changes in listening position alter the balance between direct sound and reflected sound. Early reflections within 50 to 80 ms affect the clarity and intelligibility of your mix, so any position change has audible effects.
Should I use isolation pads under my studio monitors?
Yes. Placing monitors directly on a desk or shelf causes vibration transfer that obscures the reproduction. Isolation pads such as the Auralex MoPAD or IsoAcoustics ISO-155 decouple the monitor from the surface and immediately improve the accuracy of the stereo image.