Briefly:
- Professional studios use XLR and balanced TRS connections for microphones and long signal lines. Shorter unbalanced cables under 150 centimeters are suitable in quiet environments, but a balanced connection is required in the event of interference. Digital connections such as USB, ADAT, and Dante link audio equipment via specific protocols for optimal performance.
XLR and balanced TRS connectors form the backbone of every professional studio. For microphones and long signal paths, always use XLR or balanced TRS. Instruments are connected via TS or a DI box, and consumer equipment via RCA. Digital signals are transmitted via USB, Thunderbolt, ADAT, S/PDIF, AES/EBU, or Dante, depending on the number of channels and distance. Three rules of thumb to always keep in mind:
- XLR or balanced TRS for microphones, preamps, and long runs
- Always check the device specifications at TRS: the same plug can be balanced mono or stereo
- Keep unbalanced cables short, preferably under 150 cm, especially in environments with a lot of electromagnetic interference
Brands such as Bax Music, Thomann, and Antelope Audio adhere to these standards in their product specifications. I4studio builds custom studio PCs and supplies audio interfaces that are compatible with all of these connections.
Table of contents
- Which analog connectors do you use, and when?
- Which digital audio connection is right for your situation?
- Balanced vs. Unbalanced: When Does It Really Make a Difference?
- How do you properly connect your microphone, instrument, and monitors?
- How do you fix hum, clicks, and phase issues?
- Quick Reference: Pinouts and Wiring
- Purchasing Checklist for Cables and Interfaces
- Key insights
- Connectivity is the foundation of any good studio
- I4studio helps you get started with the right gear and setup
- Recommended Resources and Further Reading
- Frequently Asked Questions
Which analog connectors do you use, and when?
XLR: The Professional Standard
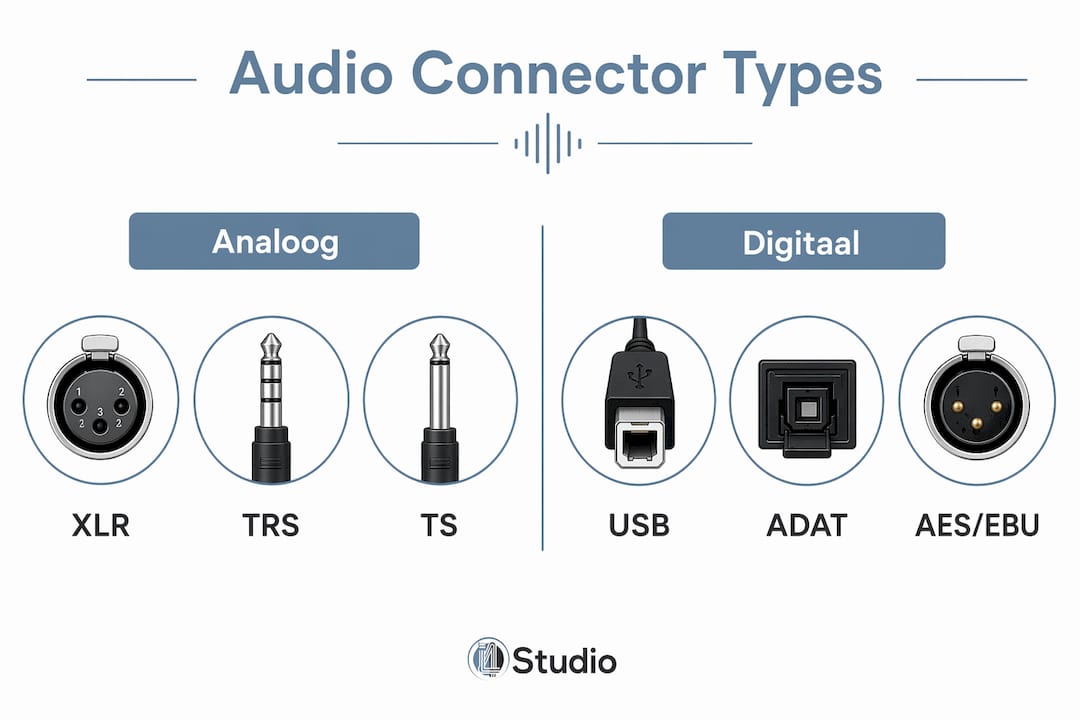
XLR connectors are three-pin: pin 1 is ground, pin 2 is the hot signal, and pin 3 is the cold signal. This configuration enables balanced transmission, which cancels out interference that affects both conductors along the way. The result: a clean signal, even over distances of tens of meters. Microphones, mixing consoles, and preamps almost always use XLR connectors. The locking mechanism prevents cables from accidentally disconnecting during a session.
TRS and TS: Note the difference
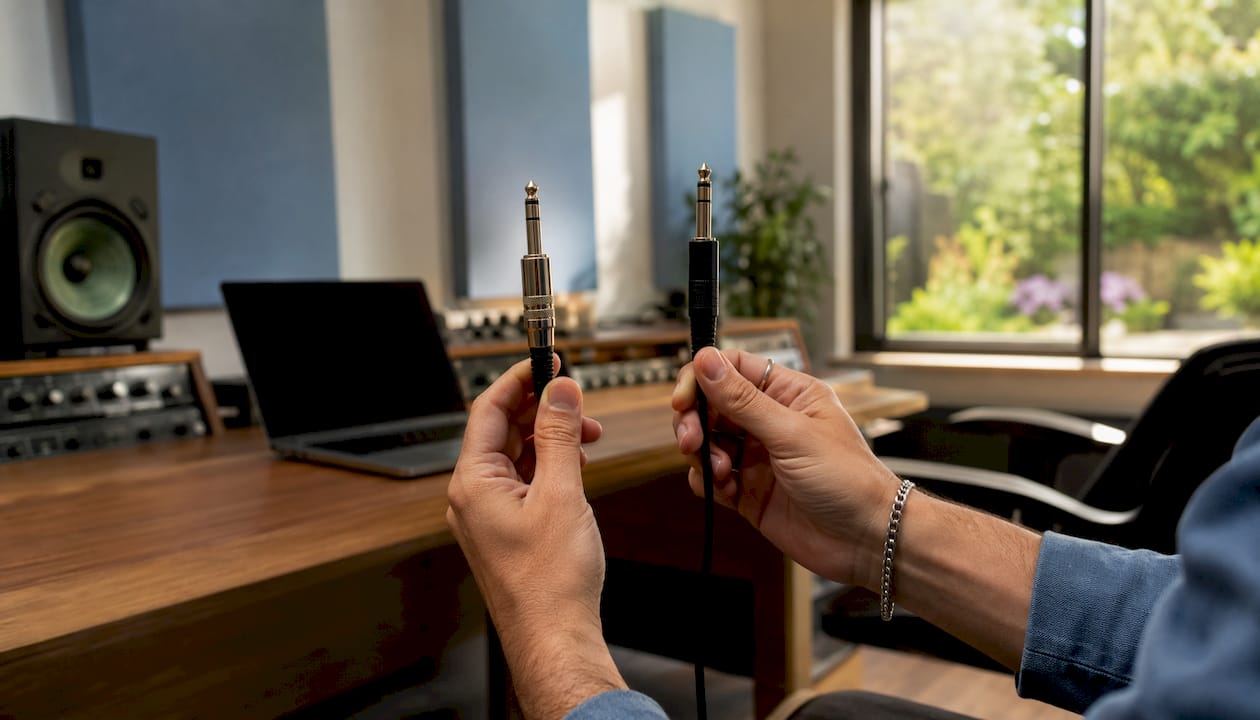
A 6.35 mm TRS plug has three contacts (tip, ring, sleeve) and can perform two completely different functions: balanced mono or unbalanced stereo. Which function is active is determined by the device’s internal circuitry, not by the cable itself. So always check the manual or product specifications. A TS plug has only two contacts (tip and sleeve) and is always unbalanced mono: ideal for connecting an electric guitar or keyboard to a DI box.
RCA (tulip) is an unbalanced connection intended for consumer electronics. Keep RCA cables as short as possible and never run them parallel to power cords.
Pro-tip: Not sure if a TRS output on your interface is balanced? Look up “balanced output” or “TRS balanced” in the manual. If it only says “stereo output,” then it’s unbalanced stereo, and you’ll lose 6 dB if you connect that output to a balanced input using an adapter.
Which digital audio connection is right for your situation?
USB and Thunderbolt
USB is the most common connection between an audio interface and a DAW computer. It’s plug-and-play, widely supported, and sufficient for most studio setups. Thunderbolt offers more bandwidth and lower latency, which becomes important when working with a large number of channels or heavy plugin loads. The Antelope Audio Zen Quadro Synergy Core combines USB-C with FPGA processing and demonstrates just how well a modern USB interface can perform.
USB microphones are handy for streaming and simple recordings, but XLR-based systems offer more flexibility for serious multi-microphone sessions.
ADAT, S/PDIF, and AES/EBU
ADAT (optical, Toslink) transmits eight channels simultaneously over a single cable and is the standard way to connect an external preamp or converter module to an interface. S/PDIF transmits two channels digitally via coax or Toslink. For S/PDIF cables longer than 3 meters, use special coax cables instead of regular RCA cables, because otherwise the impedance will be incorrect.
AES/EBU uses the same XLR connector as analog, but electrically it’s a different story: higher impedance, balanced digital signal. Never use a standard analog XLR cable for long AES/EBU runs.
Dante and MADI: Network Audio
Dante distributes hundreds of audio channels over a standard IP network. Cat5e or Cat6 cabling is required, along with a managed switch with QoS settings and a sound clocking strategy. MADI (coaxial or optical) is the preferred choice for high channel counts over longer distances in fixed installations. Word clock (BNC) synchronizes multiple digital devices so that sample-rate conflicts do not cause clicks.
Balanced vs. Unbalanced: When Does It Really Make a Difference?
Balanced connections work via common-mode rejection: the signal is transmitted both in phase and 180° out of phase. Interference that affects both conductors along the way is canceled out upon arrival. This principle is what makes XLR and balanced TRS connectors so reliable over long distances.
There is a caveat for short distances. Well-shielded unbalanced cables over short distances can produce virtually identical results to balanced connections in a quiet home studio, provided there are no strong sources of interference nearby. As soon as your cables run past dimmer boxes, fluorescent lights, or power cables—or as soon as the run gets longer—balanced connections are not a luxury but a necessity.
Connecting a balanced output to an unbalanced input using a simple adapter will result in a 6 dB loss in signal level. In that case, use a DI box: it corrects both impedance and level at the same time.
Pro-tip: Quad microphone cables (four conductors) offer additional noise reduction in critical situations, such as when recording right next to dimmer boxes or large transformers. They are slightly more expensive but well worth the investment for permanent installations.
How do you properly connect your microphone, instrument, and monitors?
Microphone to preamp or interface
- Connect the microphone via XLR to the microphone input on the preamp or interface.
- Turn on the 48V phantom power for condenser microphones. First, check whether the microphone requires phantom power: dynamic microphones can usually handle it, but ribbon microphones may be damaged by it.
- Set the gain so that the signal peaks at around -18 dBFS on average in the DAW.
Electric guitar or bass
- The guitar is connected via a TS cable to a DI box or pedalboard.
- An XLR cable runs from the DI box to the interface’s microphone input.
- Do you want to feed the signal directly through an instrument input? If so, use the interface’s Hi-Z input—never a standard line input.
Monitors and headphones
Balanced outputs (XLR or TRS) from the interface to the powered monitors provide the cleanest connection. Use RCA only if the monitor does not have a balanced input and the cable length remains short. Headphones should be connected via the interface’s dedicated headphone output or a separate headphone amplifier. See the complete recording guide for a full overview of signal chains.
Checklist for Hiring:
- Are all the cables connected and secured?
- Turn off phantom power before connecting your microphones?
- Is the sample rate set to the same value on all devices?
- Is the monitor volume low during the first test?
How do you fix hum, clicks, and phase issues?
Hum and ground loops occur when two devices are connected via different ground points. Isolate the problem by disconnecting devices one by one. A DI box with a ground-lift switch resolves most ground loops without removing the safety grounding from the devices.
Clicks and dropouts almost always indicate a digital problem: an incorrect sample rate, a buffer size that’s too small, or a faulty optical cable. First, check to make sure all devices are set to the same sample rate. As a first step, replace the Toslink or coaxial cable, since they’re fragile and inexpensive to test.
Phase issues occur when you use a TRS cable incorrectly: connecting a balanced output to an unbalanced stereo input can cause the left and right channels to partially clash in phase. Always test using a mono sum in your DAW: if the signal drops out or sounds thinner, there’s a phase problem.
Pro-tip: Label all cables in complex racks, and never run signal cables parallel to power cables. Color-coding by signal type (microphone, line, digital) saves hours of troubleshooting.
Never use a simple cable adapter to convert balanced to unbalanced signals without level and impedance correction. A passive DI box or an active splitter is the correct solution. For additional troubleshooting steps, see the I4studio troubleshooting guide.
Quick Reference: Pinouts and Wiring
| Connector | Pin / Contact | Function |
|---|---|---|
| XLR3 | Pin 1 | Ground (shield) |
| XLR3 | Pin 2 | Hot (positive signal) |
| XLR3 | Pin 3 | Ground (negative signal) |
| TRS Balanced | Tip | Hot |
| TRS Balanced | Ring | Cold |
| TRS Balanced | Sleeve | Ground |
| TS | Tip | Signal |
| TS | Sleeve | Earth |
| RCA | Center Pin | Signal (unbalanced) |
| RCA | Outer Ring | Ground |
| AES/EBU (XLR) | Pin 1 | Ground |
| AES/EBU (XLR) | Pins 2/3 | Balanced digital (110 Ω) |
| RJ45 Dante | All wire pairs | Cat5e/6 standard |
Note regarding AES/EBU: The XLR connector looks identical to the analog version, but the impedance is 110 Ω instead of the usual 600 Ω for analog. Use special AES/EBU cables for runs longer than 5 meters. For Dante via RJ45: use a managed switch with QoS and set the clock priority via Dante Controller.
Purchasing Checklist for Cables and Interfaces
Before you place your order, go over these points:
- Check the TRS function: Does the manual say “balanced output”? If so, use balanced cables. If it says “stereo output,” then it’s unbalanced stereo.
- Cable length: Keep unbalanced connections under 1.5 meters. Plan your routes in advance so you don’t end up with cables that are too short.
- Shielding: Choose cables with adequate shielding. For critical microphone routes, quad cables are the best choice.
- Connector quality: Cheap connectors with poor solder joints are the most common cause of intermittent malfunctions.
- DI boxes: Do you have instruments that need to be plugged directly into a microphone input? A passive DI box is essential.
- Digital cables: For S/PDIF connections longer than 3 meters, use special coaxial cables. For ADAT, choose high-quality Toslink cables with good ferrule connections.
- Network audio: For Dante, you’ll need a managed switch, Cat5e or Cat6 cabling, and knowledge of QoS settings.
- Always buy two spare cables of each type that you use frequently.
- A simple cable test (using a multimeter or cable tester) can save hours of troubleshooting.
- Color-code by type: red for microphone, blue for line, yellow for digital.
Check out the I4studio interface guide for an overview of interfaces with the right I/O for your setup.
Key insights
The essentials of professional studio connectivity: XLR and balanced TRS for microphones and long runs; TS and RCA only for short instrument and consumer connections; and digital protocols chosen based on the number of channels and distance.
| Item | Details |
|---|---|
| XLR for microphones and long runs | Pin 1 ground, pin 2 hot, pin 3 cold; balanced and locking. |
| Check the TRS function | The same plug can be balanced mono or stereo; always check the device specifications. |
| Keep short and unbalanced | Acceptable below 150 cm in quiet environments; always use balanced mode during malfunctions or long runs. |
| Selecting a Digital Protocol | USB/Thunderbolt for the interface to the DAW; ADAT for channel expansion; Dante for network audio. |
| I4studio as a retailer | I4studio supplies audio interfaces, custom-built studio PCs, and accessories for interference-free Dutch studios. |
Connectivity is the foundation of any good studio
Many professionals invest heavily in microphones and preamps, but leave the choice of cable up to whatever happens to be in the box. For more information about the audiovisual sector and the role of technical knowledge in this industry, see here. That’s a mistake. A weak link in the signal chain, the wrong adapter, or an unbalanced cable running alongside a power cable undermines the quality of all the expensive gear upstream.
What I’ve noticed in practice: most of the issues I4studio encounters with custom studio PC setups aren’t hardware problems. They’re cabling issues. Ground loops, incorrect sample rates, a TRS cable sending a stereo signal to a balanced input. All of these can be prevented with the right knowledge up front.
The shift toward network audio (Dante, MADI) makes this even more relevant. A Cat6 cable looks harmless, but without a managed switch and QoS configuration, you’ll experience dropouts that take hours to diagnose. The physical layer is the foundation for everything running on top of it, including your DAW, your plug-ins, and your custom-built studio PC.
Invest in good cables, understand what you’re connecting, and label everything. That’s not overkill. That’s working professionally.
I4studio helps you get started with the right gear and setup
You now have the technical knowledge to select connectors, connect cables correctly, and diagnose malfunctions. The next step is to acquire the right hardware that matches that knowledge.

I4studio supplies audio interfaces, custom-built studio PCs, and studio accessories for Dutch audio and video professionals. Whether you’re looking for an interface with the right balanced I/O, want to have a custom DAW computer built, or want to check out the Antelope Audio Zen Quadro Synergy Core as a versatile USB interface—everything is available through the online store. Delivery in the Netherlands, technical support, and custom solutions available upon request.
Check out the studio PC configurations or request advice directly through the website.
Recommended Resources and Further Reading
For further details and verification of the technical information in this article:
- Seetronic XLR Connector Guide: Detailed pinout explanations and professional standards for XLR connectors.
- Bax Music: Balanced and Unbalanced Explained: A practical explanation of the TRS function and when balanced is necessary. Bax Music is available to Dutch buyers.
- Thomann cabling tips: cable management, quad cables, and S/PDIF advice for home studios. Thomann also ships to the Netherlands.
- Soydemac Audio Interconnects: AES/EBU, Dante, and MADI Explained with Technical Background.
- PCHardwarePro: XLR vs. USB Comparison: Purchase Considerations for USB vs. XLR Workflows.
- I4studio Audio Interface Features: Technical explanation of interface I/O for Dutch studio setups.
- I4studio Home Studio Recording Tips: practical setup advice, including microphone placement and cabling.
The technical information in this article is based on manufacturer documentation, industry standards, and practical experience. Always check the current manual for your specific equipment for definitive pinout and impedance specifications.
Frequently Asked Questions
What is the difference between XLR and TRS?
XLR is a three-pin connector with a locking mechanism; it is always balanced mono. TRS also has three pins but can be either balanced mono or unbalanced stereo, depending on the device.
When do you need a DI box?
Use a DI box if you want to connect a high-impedance instrument (guitar, bass) to a microphone input, or if you want to send an unbalanced signal to a balanced input without any loss of level.
Is an unbalanced cable sufficient for a home studio?
Yes, provided the cable is shorter than 150 cm, is properly shielded, and there are no strong sources of interference nearby. For longer runs or environments with dimmer boxes and fluorescent lighting, a balanced connection is required.
What kind of cable should I use for Dante network audio?
Cat5e or Cat6, connected to a managed switch with QoS settings. Do not use unmanaged consumer-grade switches for Dante installations.
How do I know if my TRS output is balanced?
Look up “balanced output” or “TRS balanced” in the manual for your interface or mixer. If it only says “stereo output” or “headphone output,” then it’s unbalanced stereo.