To set up a professional studio in Rotterdam, start by hiring an acoustic consultant and a measurement service, then choose a custom-built studio PC and a reliable interface, and test your monitors in your own space using reference tracks. Always ask about return policies before making a final purchase. Specialists such as i4studio and author Harold offer the technical expertise to ensure these steps are taken in the correct order.
Briefly:
- A proper acoustic measurement requires the use of Class I equipment and the repetition of measurements at multiple locations in accordance with applicable standards.
- The installation and finish of absorption materials and diffusion elements determine the sound quality and must be carefully planned and tested in advance.
- A studio PC and interface must be configured in advance to match the workflow and tested for stable performance, with a focus on low latency and preventing xruns.
- Designing a studio begins with a clear scope and purpose, with acoustic analysis and technical specifications taking priority.
- Local suppliers in Rotterdam typically offer microphones and accessories, but for custom-built PCs and acoustic advice, specialized national providers are the better choice.
Table of Contents
- Checklist: What to Decide and Purchase Before the Design Process Begins
- Which acoustic parameters should you measure, and which standards apply?
- Specify the technical requirements for your custom studio PC and interface
- Room layout and the correct listening position
- From delivery to testing: the installation and acceptance steps
- Proof of expertise: i4studio and author Harold
- Best materials and furniture for studio design in Rotterdam
- Local suppliers and stores in Rotterdam for studio furnishings
- Permits and regulations in Rotterdam for studio furnishings
- When to Choose a Specialized Supplier and What Are the Benefits
- Quick overview: custom solutions and acoustic consulting at i4studio
- Sources
- Frequently Asked Questions
Checklist: What to Decide and Purchase Before You Start Decorating
Before you request quotes, define the scope of your project. Without a clear objective, you’ll be comparing apples to oranges once suppliers present different solutions.
Start by asking yourself exactly what you’ll be using the space for: recording, mixing, mastering, and video editing each have different requirements in terms of acoustics and equipment. A mixing studio requires accurate monitoring, a recording room requires soundproofing, and an editing suite requires consistent render times.
- Create a prioritized equipment list: monitors, audio interface, studio PC, microphones, and wiring diagram.
- Determine your acoustic approach: where to place absorption, where to place diffusion, and how to handle low frequencies.
- Check the power supply, network connections, and the ergonomics of your workspace.
- Set aside a budget and time, and explicitly ask suppliers about trial and return policies.
This approach prevents a common mistake: buying furniture and equipment first and only then thinking about acoustics. A studio design checklist for sound quality and workflow helps you define these elements before you compare quotes.
Which acoustic parameters do you measure, and which standards apply?
Three measurement values determine whether a space is suitable for recording or mixing: T60 (reverberation time), C50 (clarity), and DRR (the ratio of direct sound to reverberation). T60 tells you how long sound lingers, C50 provides insight into the intelligibility of speech and instruments, and DRR is particularly relevant when recording with microphones.
Dutch and international guidelines provide specific measurement rules:
- Measure at ear level, at the spot where you are actually listening or recording.
- For T60 measurements, preferably use an impulse response or noise source and repeat the measurement at multiple positions.
- For professional measurements, maintain a measurement duration of at least 15 minutes, as recommended by the Dutch Noise Covenant measurement protocol.
- Calibrate your measuring equipment using a calibration source with a standard level of 94 dB at 1 kHz, and check this preferably once a year, with calibration intervals of no more than two years.
Class I measuring equipment with a statistical measurement module is recommended for accurate assessment, according to the NVKF quality standard for measurement rooms, which distinguishes between an indicative measurement and a reliable one.
For smaller spaces, there are often specific considerations at low frequencies such as 125 Hz, for which the NVKF standard recommends alternative assessment methods such as impulse response and the Speech Intelligibility Index (STI). If you want certainty without taking measurements yourself, a professional studio acoustics measurement is a direct way to obtain these figures. Based on the results, you can determine whether you primarily need absorption to reduce reverberation, diffusion for a more natural sound, or targeted bass treatment for the low frequencies.
Specify the technical requirements for your custom-built studio PC and interface
A studio PC that freezes when using large buffer sizes or an interface that produces drifting clock signals will ultimately cost you more time than money. Therefore, determine in advance what performance you expect so that a quote for a custom configuration can be evaluated.
- Choose a processor with enough cores and clock speed for your specific DAW and plugin workload.
- Make sure you have plenty of RAM and a fast NVMe SSD for sessions with lots of tracks and samples.
- Check whether the supplier includes low-latency audio drivers and reliable cooling, including any redundancy.
- Ask about the number of inputs and outputs on the interface, the connection type (Thunderbolt or USB), the quality of the AD/DA converters, and whether an integrated monitor controller is included.
- Set up a separate power circuit or UPS and plan your cable management before connecting everything.
Pro tip: When the system is delivered, request a test with a low buffer size for at least thirty minutes. If the CPU load remains stable and there are no xruns, the configuration is suitable for live recordings.
A studio computer built specifically for producers already takes these factors into account, which makes comparing quotes a lot easier.
Room Layout and the Correct Listening Position
Where you place your monitors is just as important as the monitors themselves. An incorrect setup distorts the low end, shifts the stereo image, and makes mixing decisions unreliable.
- Place your monitors and listening position in an equilateral triangle, with the tweeters at ear level.
- Identify the primary reflection points on the side walls and ceiling, and treat them with absorption.
- In a small room, use near-field monitors and place bass traps in the corners, where low frequencies tend to accumulate.
- Choose a desk and monitor stands that support your workspace without transmitting vibrations to the monitors.
In small Rotterdam studios—often set up in an attic or garage—symmetry can sometimes be difficult to achieve due to slanted walls or fixed plumbing. In such cases, targeted bass treatment often takes precedence over striving for a perfect triangle. A compact desk like the Studio Desk Spirit is designed for these types of spaces, with monitor placement that takes into account reflections from the desktop. An installation guide for studio monitors provides specific steps for the setup itself.
From Completion to Testing: The Installation and Acceptance Steps
A proper handover follows a set procedure, so you know exactly when a studio is ready for use.
- Check the physical installation: power connections, grounding, network settings, and any rack mounting.
- If you have any doubts about the room, have an acoustic quick scan performed, or a full measurement at ear level including T60 and impulse response.
- Test with reference tracks from various genres, including at low volume, and listen at different times of the day.
- Request documentation: measurement reports, calibration certificates, a wiring diagram, and warranty terms.
- Agree on after-sales service, including recalibration of measurement equipment and support for future adjustments.
Pro tip: Keep your measurement report and calibration certificate together with your warranty documents: this will save you from having to do a complete new measurement if you renovate or move in the future.
For step-by-step instructions on the setup itself, the guide “Studio Setup for a Professional Home Studio ” is a useful reference.
Proof of Expertise: i4studio and Author Harold
i4studio specializes in custom-built studio PCs, acoustic panels, and consulting services for the design and construction of professional studios. The combination of hardware expertise and acoustic consulting ensures that a system is not only fast but also well-suited to the space in which it will be installed.
Author Harold has previously published step-by-step guides on studio setup, ranging from studio design tips to the features of a professional studio. These articles build on the same practical approach: measure first, then choose, then test. That sequence serves as the common thread throughout this entire article.
The Best Materials and Furniture for Studio Design in Rotterdam
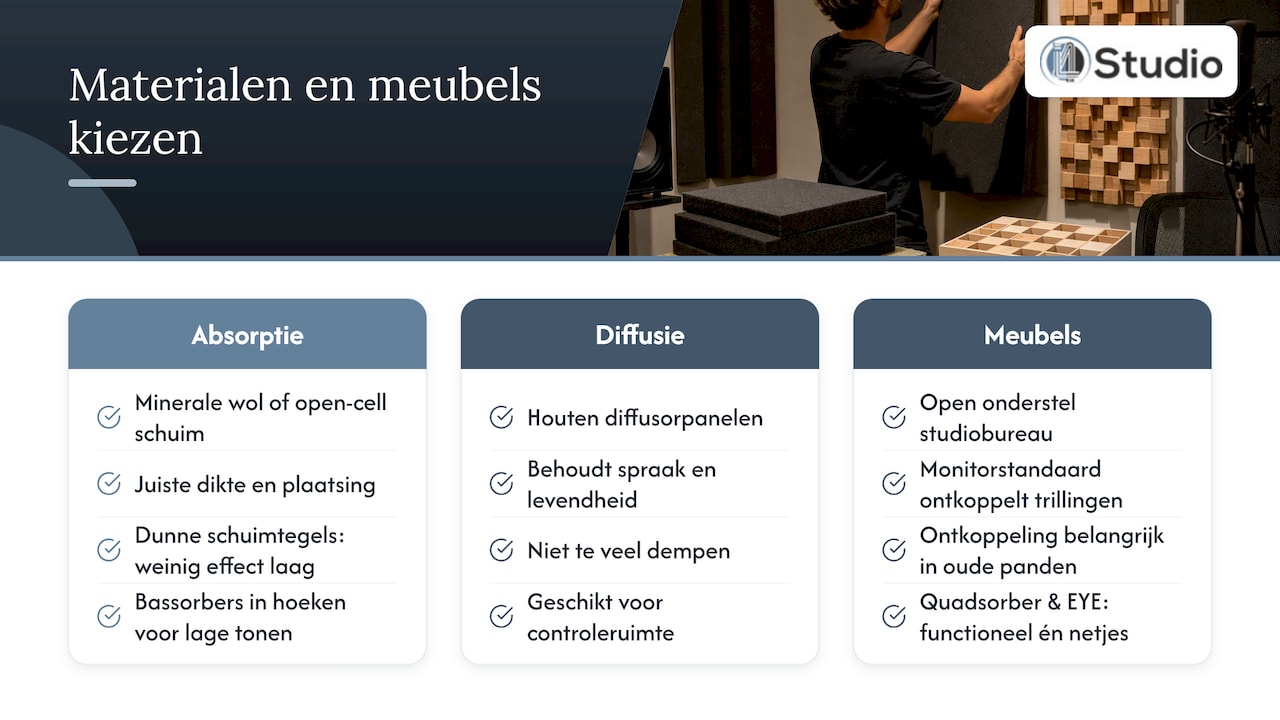
When it comes to sound absorption, mineral wool and open-cell foam provide the most predictable results, provided they are installed at the correct thickness and in the right location. Thin foam tiles look professional, but are not very effective at absorbing low frequencies; for that, you need deeper bass absorbers in the corners.
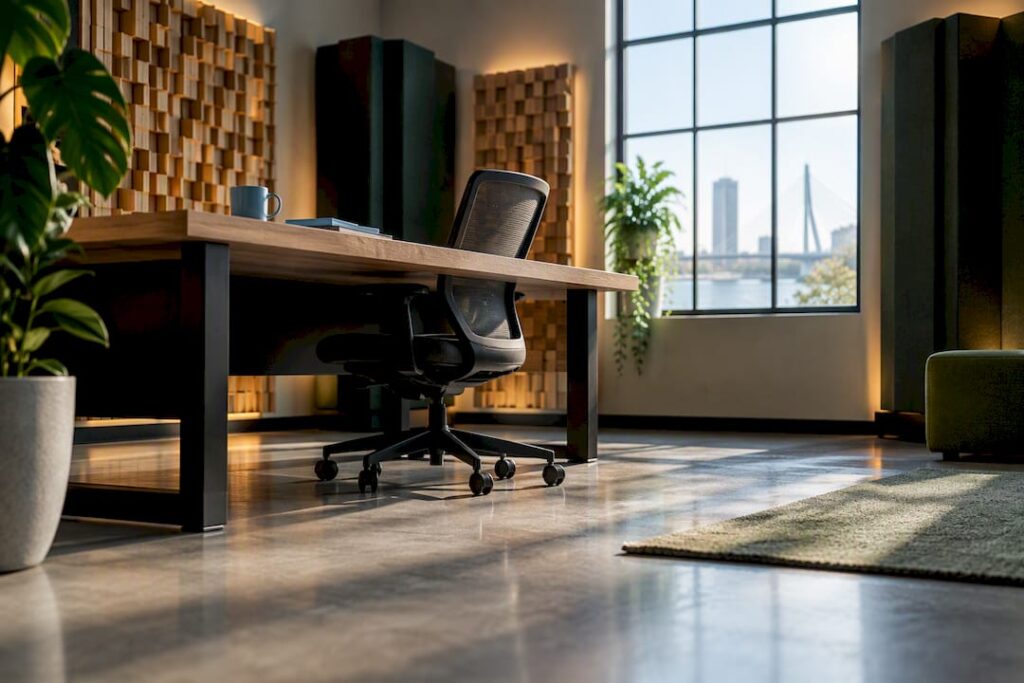
For diffusion, wooden diffuser panels are a good choice in spaces where you don’t want to dampen too much sound, such as a control room where you also want to be able to talk without it feeling too dead. An explanation of how absorption material works shows which material is best suited for which problem.
Furniture deserves just as much attention as the acoustics themselves. A studio desk with an open base prevents sound from bouncing back from under the desk toward your listening position, and a monitor stand that’s decoupled from the floor prevents vibration transfer to the cabinet underneath. In Rotterdam, where many studios are located in older buildings or former commercial spaces with hard floors, this decoupling is often more important than in a newly constructed building with carpet. Panels such as the Quadsorber acoustic panels or an EYE acoustic panel in Fabrik Sonoma MDF combine functionality with a finish that also fits well in a professional studio.
Local suppliers and stores in Rotterdam for studio furnishings
Rotterdam has a number of specialty music stores for instruments and individual pieces of equipment, but when it comes to custom-built studio PCs, acoustic measurements, and personalized advice, options are more limited. Most Rotterdam studio owners therefore combine a local store for microphones or cables with a specialized supplier for the more substantial components: the PC, the interface, and acoustic treatment.
There are suppliers that deliver throughout the Netherlands and offer custom configurations and acoustic consulting—either remotely or on-site. The selection of microphones is extensive, ranging from the sE Electronics DynaCaster for voice-overs and podcasts to the Microtech Gefell M930 for high-end studio recordings. For accessories like a pop filter from König & Meyer, you don’t have to make a separate trip to a music store: you can combine everything—including your PC and acoustic panels—in a single order.
If you’d prefer to get a hands-on feel for the sound and materials first, you’re advised to visit local music stores for instruments and small accessories, and to order the technical core of the studio (computer, audio interface, acoustics) from a specialized supplier with experience in turnkey installations.
Permits and Regulations in Rotterdam for Studio Design
Furnishing a studio in an existing home or commercial space in Rotterdam is generally considered a standard renovation, as long as you do not move any load-bearing walls or alter the facade. However, if you do plan structural changes—such as erecting a soundproof interior wall or modifying a roof to create a soundproof booth—you should check with the City of Rotterdam to see if an environmental permit is required. This varies by property and zoning plan, so it’s wiser to check individually rather than assume a general rule applies.
In the case of a studio in a rental property, the relationship with the landlord is also a factor: soundproofing measures that affect the building structure—such as detaching a floor or hanging heavy panels on a shared wall—usually require prior permission. For rental situations involving shared buildings, such as apartment complexes, there are often additional rules regarding permissible noise levels at certain times, as specified in the lease agreement or the homeowners’ association bylaws.
As for structural soundproofing itself—regardless of permits—a guide to building a soundproof room on your own provides a realistic picture of what is and isn’t feasible without professional construction supervision. If you’re unsure whether your specific renovation requires a permit, consult the City of Rotterdam or an architect before you begin demolition or remodeling.
When Should You Choose a Specialized Supplier, and What Are the Benefits?
A specialist provides you with guaranteed latency stability, a PC tailored to your specific workflow, and acoustic advice tailored to your own space. Figuring it out on your own takes time and can quickly get bogged down in minor details. With a specialized provider, you’ll usually get faster delivery, a measurement report, and concrete after-sales service agreements.
– harold
Quick Overview: Custom Solutions and Acoustic Consulting at i4studio
i4studio combines custom-built studio PCs with acoustic consulting, so you don’t have to coordinate two separate processes for equipment and space. This eliminates the need to coordinate between suppliers and prevents an expensive PC from still sounding subpar due to an untreated room.
For Rotterdam-based producers, video editors, and studio owners looking to purchase and have their space set up, this is a streamlined process: a single point of contact for the PC, interface, and acoustics, with personalized support from industry experts. The Studio PCs are available in configurations tailored to audio and video production; current prices can be found on the website.
- Check out the Studio PCs for a custom configuration based on your workflow.
- Ask for advice on acoustic panels before you set up a space.
- Compare audio interfaces and studio monitors for your recording or mixing setup.
Contact us to schedule a consultation or request a quote for a custom studio PC: this way, you’ll quickly find out how much a complete setup for your space in Rotterdam will cost.
Sources
- Measurement Protocol for the 2019 Netherlands Noise Agreement
- NVKF Quality Standard for Measurement Rooms and Consultation Rooms in Audiology Centers (draft)
Frequently Asked Questions
How much does it cost to set up a professional studio in Rotterdam?
The costs depend heavily on the space, equipment, and the level of acoustic treatment. A custom-built studio PC starts at 1,099 euros (one-time fee) at i4studio, while acoustic panels and consulting are priced separately based on your space.
How long does an acoustic measurement of a studio take?
A professional measurement conducted in accordance with the Dutch measurement protocol typically takes at least fifteen minutes per measurement position, as specified in the Noise Covenant measurement protocol. If there are multiple measurement points or a full T60 analysis is required, the total session often takes up to half a day.
Do I need a permit to convert a space into a studio?
That depends on the nature of the renovation and your building’s zoning plan. For structural modifications, such as erecting insulated walls, you should check with the City of Rotterdam or your landlord in advance.
How often does acoustic measurement equipment need to be calibrated?
Calibration should preferably be performed annually and, at the very least, within a two-year interval, as described in the Noise Covenant Measurement Protocol. Without up-to-date calibration, measurements are less reliable as a basis for acoustic decisions.
Can I return monitors or a studio PC if they don’t fit in my space?
Return policies vary by supplier and product, so always ask about them explicitly before placing an order. Whenever possible, test i4studio products with reference tracks in your own space, since the acoustics of that space often have a greater impact on the sound than the monitor brand itself.