TL;DR:
- Many musicians experience problems connecting an audio interface due to simple errors with hardware and setup. A correct order of connection, using the right cables and installing the drivers correctly will prevent common problems. Test your setup thoroughly with a short recording, check your cables and settings, and avoid noise and delay for a stable recording experience.
You’ve purchased an audio interface, the box is open, cables are at the ready. Then you start up your DAW, see no signal, hear a high-pitched beep, or get noise. That’s the reality for many musicians connecting an audio interface for the first time without a concrete roadmap. The good news: most problems stem from a handful of avoidable mistakes with hardware, cables, or software settings. This guide from I4studio takes you through step-by-step audio interface hookups, from initial preparation to testing your signal.
Table of contents
- Key points
- Supplies for your audio interface setup
- Connecting hardware and cables step by step
- Software configuration after connecting
- Common problems and pitfalls
- Checking and testing your setup
- What I have learned after years of connecting interfaces
- I4studio helps you with the right gear
- FAQ
Key points
| Item | Details |
|---|---|
| Use direct connection | Connect your interface directly to a USB or Thunderbolt port, never through a hub. |
| Installing drivers first | Install the proper drivers before starting recording software for reliable recognition. |
| Enable direct monitoring | Turn on instant monitoring during recording to avoid noticeable latency. |
| Choosing balanced cables | Use TRS cables for studio monitors to avoid interference. |
| Turn off software monitoring | With physical direct monitoring, turn off software monitoring to avoid duplicate noise. |
Supplies for your audio interface setup
Before you start connecting, it pays to have everything ready. Finding missing materials halfway through will cost you unnecessary time.
What you need
- Audio interface: choose one that fits your workflow, not the longest specification list
- Cables: XLR for microphones, jack (6.35 mm) for instruments, TRS for monitors
- Computer with enough USB or Thunderbolt ports
- DAW software such as Ableton, Logic Pro, Reaper or GarageBand
- Studio monitors or headphones for monitoring
- Drivers downloaded from your interface manufacturer’s website
Connection options compared
| Connection type | Speed | Latency | Recommended usage |
|---|---|---|---|
| USB-A | Medium | Low | Home and podcast setup |
| USB-C | Fast | Low | Modern interfaces and laptops |
| Thunderbolt | Very Fast | Very low | Professional studios |
| FireWire | Outdated | Low | Older interfaces |
For most home studios and live setups, USB-C is more than adequate. Thunderbolt pays off for interfaces with many channels and a powerful studio production workflow, as described in I4studio’s DAW hardware recommendations.
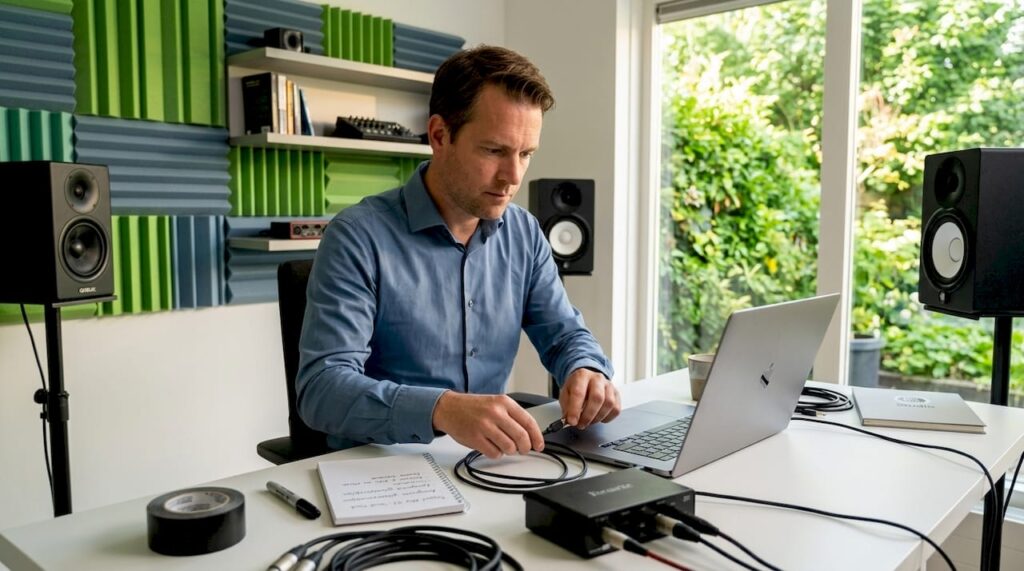
Cable management and workstation preparation
Don’t lay cables across the desk, but route them along the edge. This prevents you from accidentally unplugging them and keeps your workspace uncluttered. Keep signal cables, such as XLR and jack, separate from power cables. Tackling audio cabling step by step starts with a logical layout on your desk, before even one cable goes into a port.

Pro-tip: Put labels on your cables with a piece of tape and a marker. With multiple cables, this will save you a lot of searching when you switch something.
Connecting hardware and cables step by step
Now we get down to concrete work. Follow these steps in order for a stable audio interface setup.
Turn off your computer or turn down the speakers. This prevents a loud pop or feedback when connecting.
Connect the audio interface directly to a USB or Thunderbolt port on your computer. A direct connection provides more stability than a hub and avoids power and bandwidth problems.
Connect your microphone via XLR to input 1 or 2. Make sure the cable is secure. A loose XLR connection gives irregular signal or noise.
Connect an instrument via a jack cable. Use the instrument input (aka Hi-Z input) for this, not the line input. The Hi-Z input has a higher impedance to suit guitars and basses.
Connect your studio monitors with TRS cables. Balanced TRS cables protect your signal from electromagnetic interference, which you hear as buzzing or humming in your monitors.
Connect your headphones to the headphone output. There is a separate volume knob for this on most interfaces.
Turn on phantom power (48V) when using a condenser microphone. Do this only after the microphone is plugged in and the monitors are turned off or muted. Ribbon microphones do not tolerate phantom power, keep that in mind.
Adjust the gain knob. Slowly turn up the gain while talking into the microphone or playing a note. The signal window on the interface should be green. Red means the signal is too loud and distorted.
Pro-tip: Address the interface directly through a USB or Thunderbolt port on the computer itself, never through a USB hub or docking station. This is one of the most common causes of recognition errors and unstable connections.
Software configuration after connecting
Connecting hardware correctly is step one. Configuring software is step two. Many recording problems originate here, not with the cables.

Installing Drivers
Before you start recording software, install your interface drivers. Connect the interface before starting your DAW so that the operating system recognizes the device. Always download the drivers from the manufacturer’s official website.
For Windows users, ASIO drivers are crucial for low latency and stable audio. ASIO is the industry standard for professional audio processing on Windows. Don’t have a branded ASIO driver? ASIO4ALL can serve as an alternative, but is less stable. On macOS, use Core Audio, which is already built into the system and requires no additional installation.
Interface set up as an audio device
- Open the sound setting of your operating system
- Set your interface as the default input and output device
- Open your DAW and go to the audio settings or preferences
- Select the interface as the audio device (on Windows choose ASIO, on macOS Core Audio)
- Set the sample rate to 44,100 Hz or 48,000 Hz, depending on your project
Buffer size and latency
Setting buffer size correctly directly affects latency and system load. A low buffer (64 or 128 samples) gives less latency during recording, but demands more from your processor. If you suffer from crackling audio or dropouts, increase the buffer to 256 or 512 samples. More information on reducing audio latency can be found in I4studio’s guide.
Pro-tip: Set your sample rate before you create a new project in your DAW. If your sample rate changes halfway through a session, plugins and recordings may desynchronize.
Set up instant monitoring
Direct monitoring sends the input signal directly to your headphones or monitors, without processing by the computer. This eliminates noticeable latency during recording. Turn on direct monitoring on the interface itself. Then turn off software monitoring in your DAW, or you will hear the signal twice. Having direct and software monitoring active at the same time gives an echo or flanging sound that is a beginner’s mistake you can easily avoid.
Common problems and pitfalls
Even when connected correctly, problems can occur. Here are the most common situations and how to handle them.
Overview of typical problems
- No signal in the DAW: check that the interface is selected as the input device. Restart your DAW after connecting the interface.
- High beep or feedback: audio feedback loops occur when active studio monitors pick up microphone sound. Turn off monitors during recording and use headphones.
- Double hearing or echo: this is the result of direct monitoring and software monitoring at the same time. Disable software monitoring in your DAW.
- Noise or humming: use balanced TRS jacks for your monitors. Keep power cables separate from signal cables.
- Interface not recognized by computer: try another USB port, restart computer, reinstall drivers.
- Distortion on the recording: the gain is too high. Turn back the gain until the signal light remains green.
Note: For step-by-step audio cable laying, always use cables of sufficient quality. A cheap or damaged cable is more often the cause of problems than the interface itself.
It’s also worth reading up on the audio interface features of your particular model. Some interfaces have specific routing options that can cause confusion if you don’t know them.
Checking and testing your setup
You have everything connected and configured. Now it’s time to test if everything is working correctly.
Speak into the microphone or play a note on your instrument. See if the input meter on the interface and in the DAW moves. No movement means there is something wrong with the connection or settings.
Listen via headphones. Do you hear the signal clearly, without delay and without noise? Then direct monitoring is working correctly.
Make a short test recording in your DAW. Play it back and listen to see if the recording matches what you heard live. Watch for distortion, noise or unwanted tones.
Test with studio monitors. Slowly increase the volume. Does the sound sound clear and balanced? If so, your audio interface setup is ready to go. If you hear hums or tones, check the cable connections and grounding of your equipment.
Check latency. Play an instrument live and listen to see if there is an audible delay between playing and the sound in the monitors. If the latency is too high, lower the buffer size in your DAW settings.
If you still have problems after several attempts, check out I4studio’s audio interface troubleshooting guide for targeted solutions.
Studio monitors give a more accurate picture of your sound than regular speakers. Use them for mixing and production. Headphones are useful when recording to avoid feedback. Use both for a good reference picture.
What I have learned after years of connecting interfaces
Having connected dozens of interfaces, from budget models to professional units with multiple channels, I always see the same pattern with beginners. They start with the software, while the basics are always in the hardware. A wrongly chosen cable, an input selection that was forgotten to change, or a USB hub that cuts power mid-session: these are the causes of more than half of the complaints I hear.
What I always do myself: connect interface, restart computer, then install drivers, and only then open the DAW. In that order. That order makes the difference between an interface that is immediately recognized and one that disappears halfway through a session.
I have also learned that choosing interface on workflow is much smarter than choosing on specs. An interface with two inputs and stable drivers is worth more in daily practice than a model with eight inputs that becomes unstable every update. Stability and reliable drivers are the features that make the difference in the long run, not the paper technical profile.
Patience in initial setup pays off. Take your time, follow each step, and test thoroughly before starting a recording.
– harold
I4studio helps you with the right gear
You now know exactly how to connect an audio interface step by step. The next question is: do you have the right gear in place?

At I4studio, you’ll find a complete overview of studio gear for beginners with honest advice on what you really need and what you can skip. Also check out the overview of popular audio interfaces for a comparison of the best models for home, studio and podcast use in 2026. Want to start immediately with a complete set? The sE Electronics X1 S Studio Bundle includes microphone, shockmount and pop filter in one package. Everything you need for your first recording, without having to search for individual parts.
For professional audio cables for your studio, also check out the Audio & Video Cable selection for high-quality connection options.
FAQ
How do I connect an audio interface to my computer?
Connect the interface directly to a USB or Thunderbolt port on your computer, install the appropriate drivers, and select the interface as an audio device in your operating system and DAW.
Why doesn’t my computer recognize the audio interface?
Try another USB port, reboot your computer after connecting it, and reinstall the drivers from the manufacturer’s official website. Avoid USB hubs.
What is direct monitoring and why is it important?
Direct monitoring sends the input signal to your headphones or monitors without computer processing, so you won’t hear a noticeable delay while recording. Turn off software monitoring if you use this.
What cables do I need for an audio interface?
For microphones use XLR cables, for guitars and basses a 6.35 mm jack cable for the Hi-Z input, and for studio monitors preferably balanced TRS cables.
What do I do when there is humming or noise from my monitors?
Check that you are using balanced TRS cables and that power and signal cables are separated. Noise can also be caused by a grounding problem or a faulty cable.