For the lowest recording latency on Windows, choose an audio interface with native ASIO drivers, or WASAPI-exclusive drivers that support IAudioClient3. Next, reduce the DAW buffer to 128 to 256 samples and enable direct monitoring if your interface supports it. Measure the result using LatencyMon and a loopback test in your DAW to determine whether the improvement is real or just theoretical.
Briefly:
- Using an audio interface with native ASIO drivers or WASAPI exclusive mode and reducing the DAW buffer to 128 or 256 samples provides the greatest improvement in low-end response.
- Small buffers result in lower latency, but they also increase the load on the processor and can cause crackling and dropouts.
- Hardware with its own DSP and direct monitoring provides the lowest latency during recording, especially for interfaces with Thunderbolt or USB-C connections.
- Systematic monitoring of drivers and DPC behavior using LatencyMon, along with avoiding outdated drivers and slow storage, is crucial for optimal performance.
- To ensure stable, low latency, you should test using a loopback in your DAW and adjust only one parameter at a time, because making multiple changes simultaneously can skew the results.
Table of Contents
- What causes latency in a low-latency audio PC?
- Quick Check: The Fastest Way to Reduce Latency
- WASAPI, ASIO, or IAudioClient3: Which driver should you choose?
- Which hardware reduces latency the most?
- System tuning: DPC, drivers, and power settings
- How do you measure audio latency in practice?
- Real-World Examples: Recommended Settings by Workflow
- What I See Going Wrong with Almost Every Latency Issue
- Immediate help with a low-latency audio PC
- Resources
- Frequently Asked Questions
What causes latency in a low-latency audio PC?
Latency occurs in three places at once: in your buffer, in the Windows audio stack, and in your hardware. If you understand these three, you’ll know right away where to take action.
The buffer is the easiest concept to grasp. At a sample rate of 48 kHz, a buffer of 256 samples amounts to approximately 5.3 ms, while 1,024 samples amounts to just over 21 ms. Smaller buffers result in less latency, but place a greater load on your processor and increase the risk of crackling and dropouts, as is also evident from the calculation examples regarding buffer size and latency.
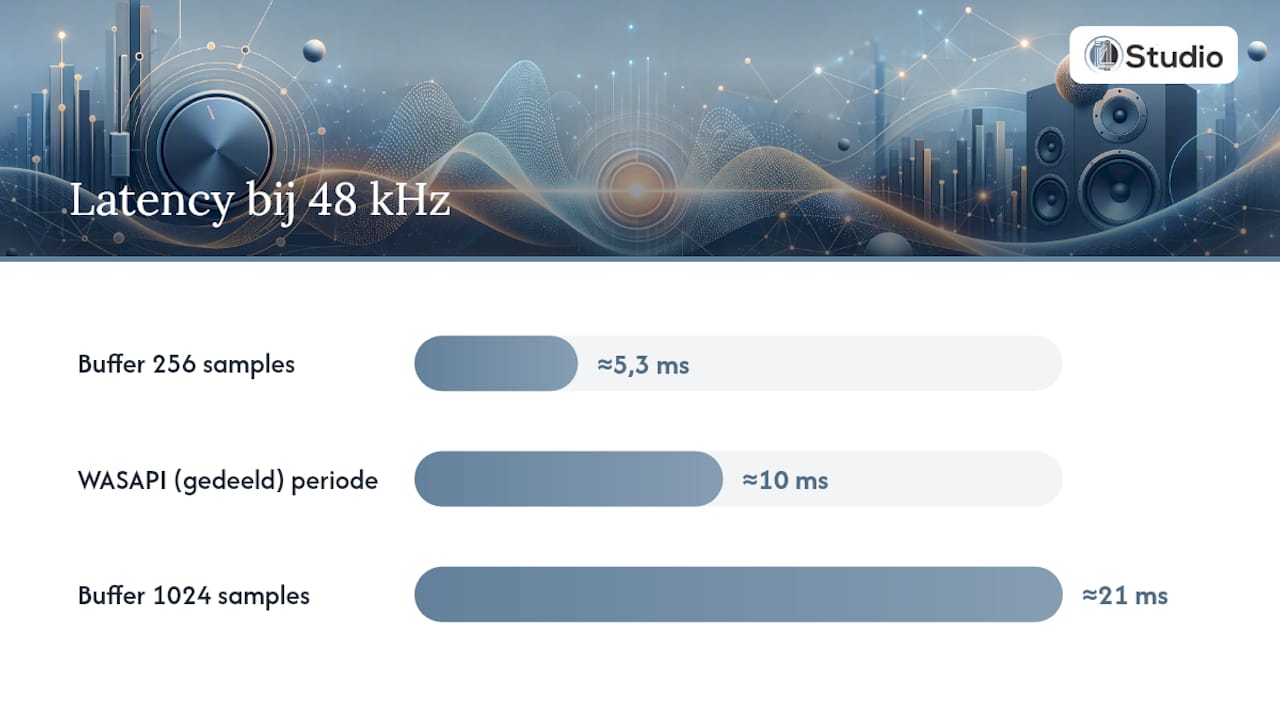
Next comes the Windows audio stack. By default, audio runs through the Windows mixer in shared mode (WASAPI shared), which allows all programs to play simultaneously but imposes a fixed period size, usually around 10 ms. WASAPI exclusive gives a single application full control over the interface and can reduce that period. ASIO completely bypasses the Windows mixer and communicates directly with your interface, which—according to the same source on sound latency testing—enables very low total latencies on compatible hardware. Newer Windows APIs such as IAudioClient3 and AudioGraph make it possible to use much smaller buffers even in shared mode, but only if your interface’s driver explicitly supports it, as Microsoft describes in its documentation on low-latency audio in Windows.
Hardware plays a minor role. Your interface’s internal signal processing (DSP), the type of connection (USB, Thunderbolt, or outdated onboard audio), and additional steps such as sample rate conversion all add milliseconds before anything even happens to your buffer.
Quick Check: The Fastest Way to Reduce Latency
Before you start tinkering with drivers or buffers, there are a few things you can do that will yield results within five minutes. Follow this sequence, because the first steps provide the greatest improvement relative to the effort.
- Turn off audio enhancements on your playback device in Windows, and disable exclusive mode and spatial sound.
- Replace wireless monitoring with wired headphones or monitors; Bluetooth often introduces a noticeable delay, whereas a wired 3.5 mm connection has virtually no delay, as shown by research on Bluetooth latency and LE Audio.
- Set your DAW to ASIO, or to WASAPI exclusive if ASIO is not available, and reduce the buffer to 128 or 256 samples.
- Close any background processes that aren’t relevant to your session, and set Windows Power Options to the highest performance profile.
- Use direct monitoring or your interface’s DSP mixer, if available, so that you hear the sound directly through the hardware rather than through the computer.
This combination of adjusting drivers, reducing buffers, and disabling enhancements typically yields the most noticeable performance gains—even before you look into system tuning—as highlighted in the practical approach to WASAPI settings for low latency.
Pro tip: When testing, change only one setting at a time. If you lower the buffer and disable Bluetooth at the same time, you’ll never know which change made the difference.
WASAPI, ASIO, or IAudioClient3: Which driver should you choose?
The choice between ASIO and WASAPI is less a matter of personal preference than of what your hardware can actually handle. Both methods can provide low enough latency for serious recordings, but the practical differences are significant.
- ASIO gives your DAW direct, exclusive access to the interface and generally provides the lowest and most predictable latency, especially with brands that write their own ASIO drivers.
- WASAPI exclusive comes close to ASIO in terms of speed when the driver supports IAudioClient3, which allows Windows to use shorter intervals than the standard 10 ms.
- WASAPI shared is more stable when multitasking between apps, but is limited to a fixed, larger period size and is less suitable for critical recording sessions.
- ASIO4ALL is a universal wrapper for onboard audio that does not have its own ASIO driver; it can reduce latency, but is less stable than a native driver, as noted in ASIO4ALL’s own documentation.
Whether Windows actually allows small buffers depends on a specific driver attribute: DEVPKEY_KsAudio_PacketSize_Constraints2. If your interface’s driver reports this correctly, IAudioClient3 can offer buffers smaller than the default period. If that support is missing, Windows falls back to the standard periods, regardless of how you further adjust the settings, as Microsoft explains in its technical documentation on low-latency audio drivers.
In practice, you can access this in Windows’ sound settings: open the properties of your audio device, go to the Advanced tab, and enable “Exclusive Control” there if you want to use WASAPI Exclusive. Next, set the correct driver in your DAW and test which of the two—ASIO or WASAPI Exclusive—provides the most stable, lowest value in your situation.
Which hardware reduces latency the most?
Not all interfaces are created equal, and that difference is exactly where many producers lose money through trial and error. An interface with its own DSP and direct monitoring sends the input signal straight to your headphones, without having to travel through the computer and back. That eliminates the entire round trip that would otherwise add up with each buffer.
- Interfaces with onboard DSP and direct monitoring provide the lowest perceived latency during recording, because the signal does not need to pass through the computer to be audible.
- Thunderbolt and recent USB-C ports offer more consistent timing than older USB 2.0 ports, which is especially noticeable when recording multiple channels simultaneously.
- Onboard Realtek chips generally perform the worst; they lack professional drivers and aren’t designed for real-time signal processing.
- Keeping firmware and drivers up to date is not just a formality: manufacturers regularly improve timing behavior, and an outdated driver can completely negate the benefits of a better buffer.
Sample rate and bit depth also play a role, though not as significantly as buffer size. A higher sample rate—such as 96 kHz instead of 48 kHz—reduces the time per sample and, with the same buffer size in samples, can lower latency by a few milliseconds. The downside is a higher load on your processor, which, in borderline cases, can actually lead to more dropouts. For most recording sessions, 48 kHz with a small buffer offers a better balance than 96 kHz with a larger one. If in doubt, check which audio interface combines native ASIO support and direct monitoring for your specific workflow.
System Tuning: DPC, Drivers, and Power Settings
Even with the perfect interface and driver selection, your system itself could be the culprit. Deferred Procedure Calls (DPC) and Interrupt Service Routines (ISR) are processes that Windows uses to handle hardware events. If a driver takes too long to process these, you’ll hear it as a click, crackle, or complete dropout—even if your buffer is set perfectly.
- Install LatencyMon and let it run for a few minutes during normal use; the tool analyzes DPC/ISR behavior and hard page faults and identifies drivers that cause audio dropouts, as described by Resplendence Software.
- If you notice a driver with high DPC times, check for an update or, if in doubt, roll back to a previous stable version.
- Replace a mechanical hard drive with an NVMe SSD if you aren’t already using an SSD; slow storage can cause stuttering when loading samples or plug-ins.
- Set the power management to “High Performance” mode so that the processor doesn’t keep throttling up and down during a recording.
- Limit automatic Windows updates during sessions; Microsoft recommends prioritizing pro-audio tasks using real-time queues, as background updates can interfere with them, according to Microsoft’s own DAW PC guidelines.
The practical order is: first, check the drivers and run tests with LatencyMon; then, fine-tune the buffer settings; and as a last resort, consider replacing the hardware. Those who reverse this order often end up spending a lot of money on a new interface that doesn’t solve the actual problem—an outdated chipset driver.
Pro tip: A single red warning in LatencyMon isn’t necessarily a disaster. Look for patterns: a driver that consistently tops the list is the one to address first.
If you want to delve deeper into Windows configuration, the guide on optimizing Windows 11 for audio goes into more detail about specific settings for each version.
How do you measure audio latency in practice?
Measuring prevents you from drawing conclusions based on gut feelings that aren’t accurate. There is a difference between round-trip latency—the time it takes for the signal to travel from the input to the output and back again—and end-to-end latency—the time it takes for the sound to actually reach your ear during monitoring. For recording purposes, round-trip latency is the most relevant metric.
- Start with LatencyMon to establish a system-wide baseline for DPC behavior before tweaking any settings.
- Run a loopback test in your DAW: send a click signal to the interface and measure the resulting latency.
- Then change one parameter at a time—buffer, driver, or sample rate—and repeat the exact same test.
A buffer of 256 samples at 48 kHz equates to approximately 5.3 milliseconds of base latency, but the final round-trip value is often higher due to processing time in the driver and hardware. If you hear crackling despite a large buffer, this is more likely a driver issue than a lack of headroom; if you only hear it with small buffers, it’s simply a matter of increasing the buffer slightly until the signal stabilizes.
Real-world examples: recommended settings for each workflow
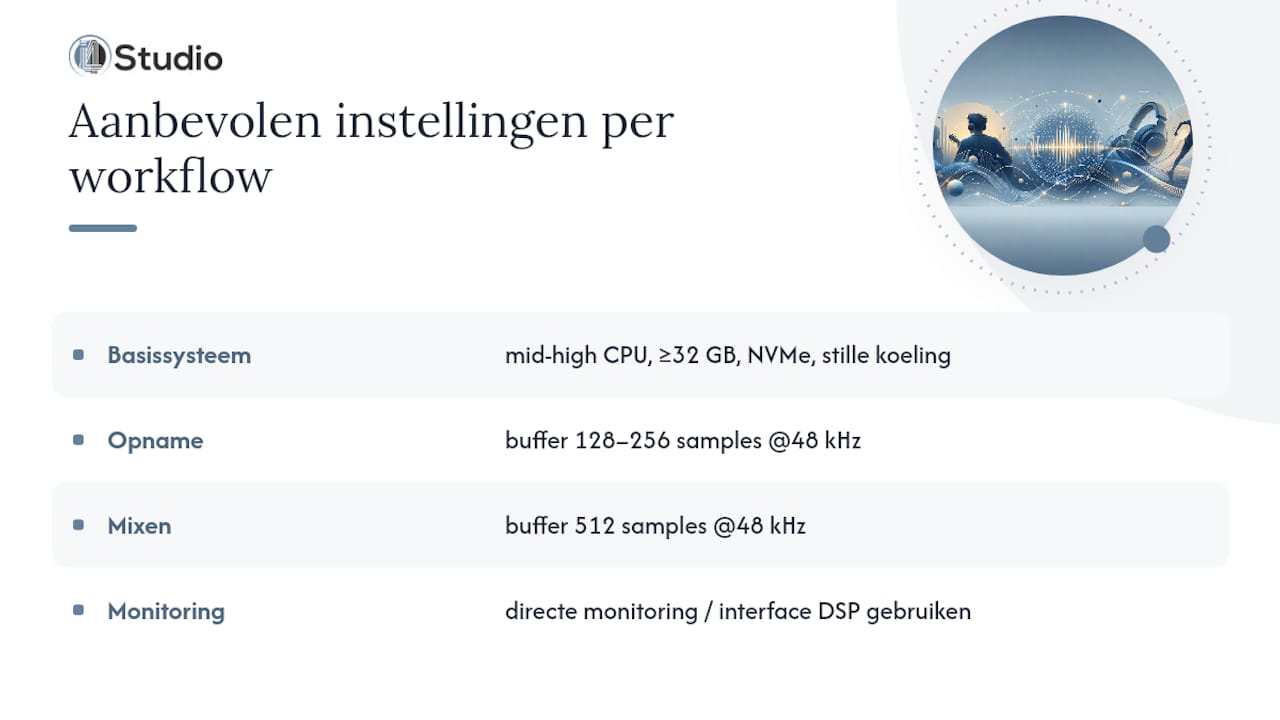
For a studio PC used daily for both recording and mixing, I4studio recommends a recent mid-range to high-end processor, at least 32 GB of RAM, and an NVMe SSD as the system drive, with quiet cooling so that fan noise doesn’t add background noise to recordings. This setup keeps DPC times low even under heavy plugin loads.
For recording, you usually set the buffer to 128 to 256 samples at 48 kHz; for mixing with a lot of plug-ins, 512 samples may be more comfortable without any audible drawback, since you’re no longer monitoring live. If your interface has direct monitoring or its own DSP, use that during recording instead of relying on software monitoring through the DAW. Specific example configurations for different budgets and workflows are described in the 2026 studio PC examples.
What I See Going Wrong with Almost Every Latency Question
Most latency issues aren’t solved with more expensive hardware, but with discipline: measure first, then change one setting, and measure again. Producers often skip that step and immediately replace their interface, even though an outdated driver or an incorrectly configured buffer was the real cause. Checking drivers and measuring with LatencyMon takes half an hour and prevents a purchase that won’t solve the problem.
– harold
Immediate help with a low-latency audio PC
Figuring out for yourself which combination of processor, interface, and drivers provides the lowest latency takes time that you’d rather spend on music. Custom-built studio PCs can be optimized for stable, low latency right from the start, with personalized advice on drivers, buffers, and interface selection from experts who have experience with these systems.
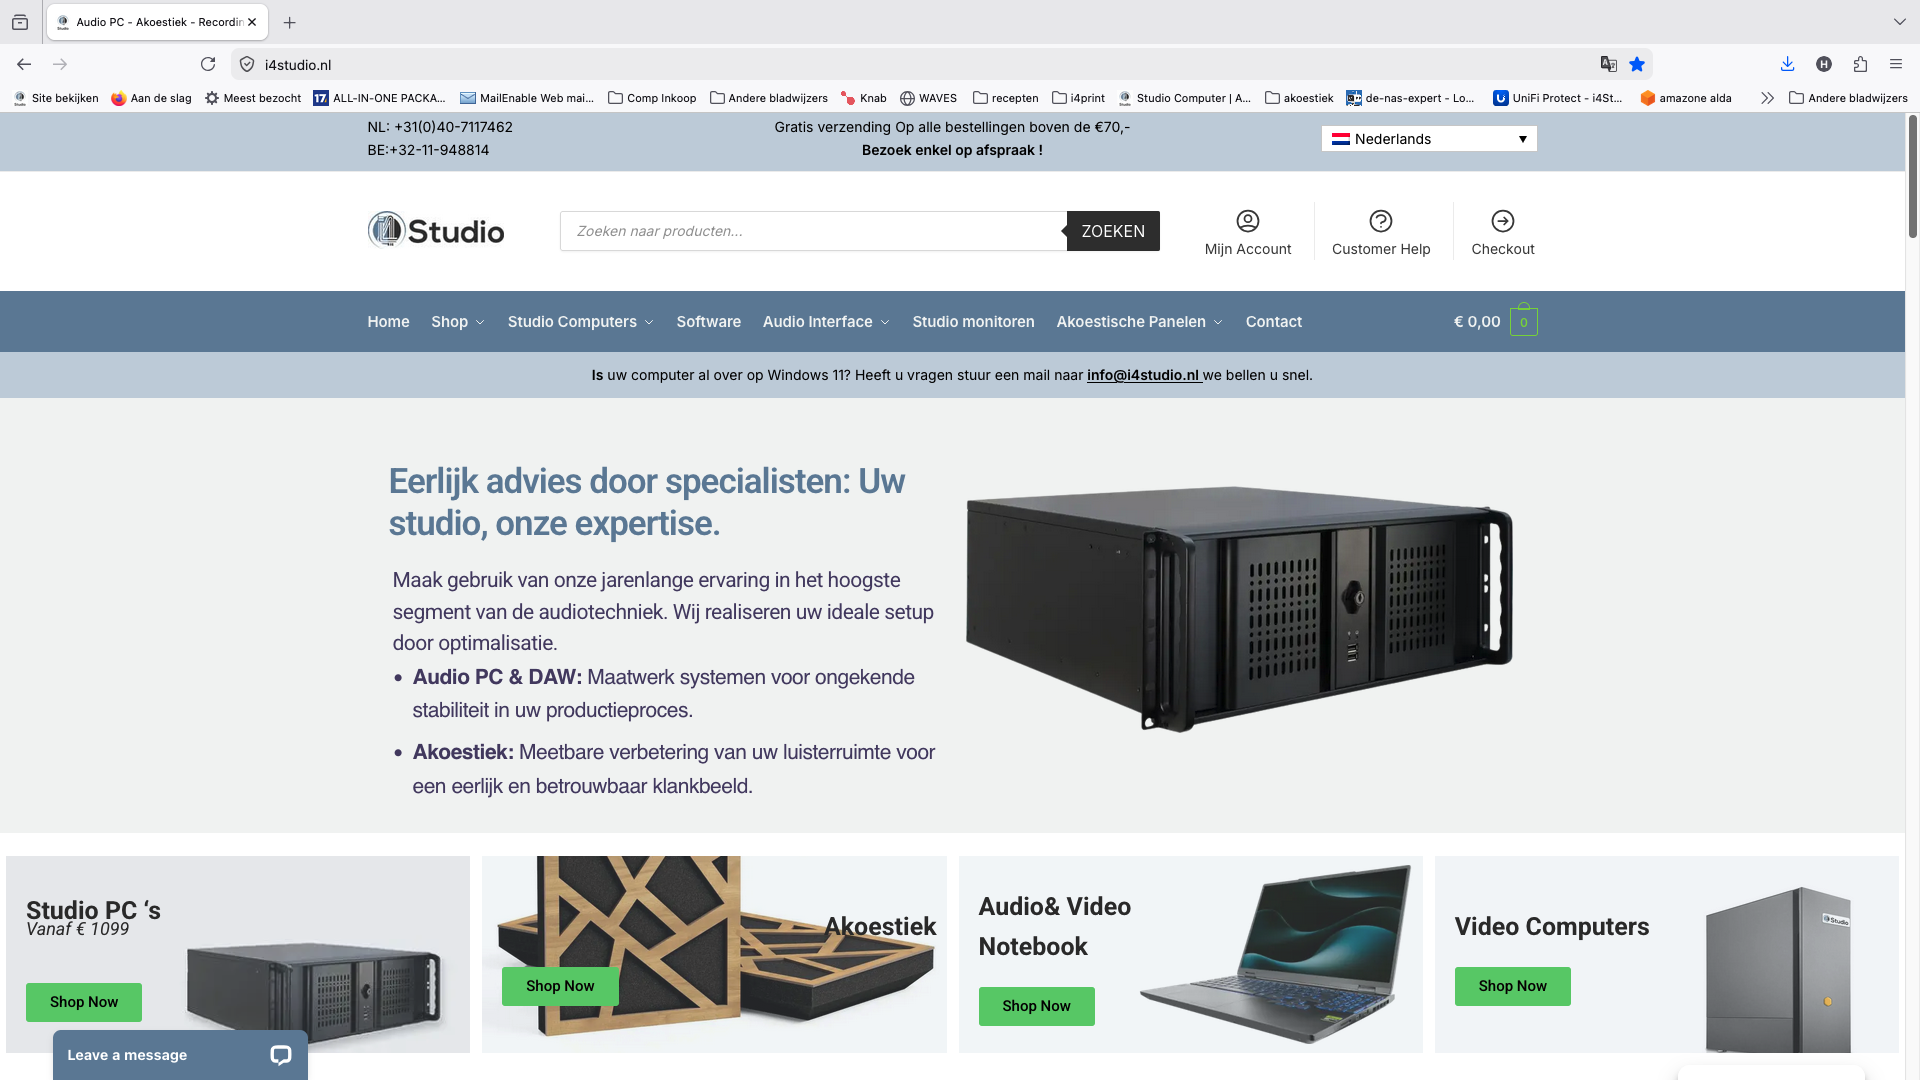
If you’re deciding between a new interface or a fully optimized computer, check out the Studio PCs. For current prices, please visit the website. If you’d prefer advice on your existing setup first, I4studio can also help with recommendations on acoustic panels and general studio design. Request a quote through the website and explain which DAW and interface you use, so the advice or configuration will be tailored to your workflow.
Sources
Frequently Asked Questions
How do I reduce audio latency on my PC?
Use an audio interface with native ASIO drivers or WASAPI exclusive mode, reduce the DAW buffer to 128 to 256 samples, and enable direct monitoring if your interface supports it. Then, use LatencyMon to check whether the drivers are causing the bottleneck before you start tinkering with the hardware.
Is lower latency always better for audio?
Not necessarily: below about 10 ms, monitoring is perceived as natural, while values around 20 to 40 ms are still acceptable for casual use but can be disruptive during live recording, as research on audio latency and perception shows. Going too low without your system being able to handle it will only result in more dropouts, so find the lowest value that still runs stably.
How do I get low-latency audio to work on Windows?
Enable WASAPI exclusive or ASIO, turn off audio enhancements and spatial sound, and use a driver that supports IAudioClient3 for smaller shared buffers, as described in the Windows documentation on low-latency audio. Then use LatencyMon to measure whether your system actually benefits from these adjustments.
Is 20 ms of audio latency good enough?
For casual listening or non-critical monitoring, 20 ms is perfectly acceptable, but for live recording or precise timing during tracking, most musicians can already tell the difference. When recording, aim for values below 10 ms using ASIO or a well-supported WASAPI exclusive driver for the most natural feel.
How much does a studio PC optimized for low latency cost?
I4studio’s custom Studio PCs start at a one-time fee of €1,099, with a configuration designed for stability and low latency already included. The exact price depends on the processor, memory, and storage options you choose in consultation with I4studio to suit your workflow.