First, set your audio interface to its native ASIO driver and switch the power management setting to “High Performance.” In practice, these two steps resolve most clicks, pops, and latency issues. Next, gradually reduce the buffer size in your DAW until you can no longer hear any dropouts, disable audio enhancements in Windows 11, and close any unnecessary background processes during your session. Measure the results with LatencyMon before making further tweaks in the BIOS or registry.
In short:
- Before recording, make sure the correct driver is installed, the power plan is set to maximum performance, and audio enhancements are disabled.
- Gradually reduce the buffer in the DAW until you start hearing dropouts, and measure latency with LatencyMon for optimal stability.
- If you encounter problems, be sure to use LatencyMon to identify the cause of high DPC times, and systematically disable or update components and drivers.
- By consciously choosing reliable hardware and proper system settings, you can prevent recurring issues—or, if necessary, promptly switch to a custom-built studio PC.
Table of contents
- Quick Checklist Before Your Session
- Audio drivers and interface configuration
- DAW settings and buffer tuning for low latency
- System and BIOS tweaks that often make all the difference
- Windows audio settings and the classic Sound panel
- Diagnosis and troubleshooting: tools and measurement methods
- i4studio Recommendations and When Customization Is Useful
- What to Prioritize When Optimizing
- i4studio: Ready-to-use solutions for your studio PC
- Resources
- Frequently Asked Questions
Quick Checklist Before Your Session
Before you start a recording or mixing session, go through a standard checklist. This prevents you from having to stop in the middle of a take because Windows 11 wants to run an update or sync a cloud folder in the background.
- Check your driver. Open Device Manager and verify that your interface is using its own ASIO driver, not a generic Windows driver.
- Set your power plan to maximum performance. Set the minimum and maximum processor states to 100% so that the CPU does not switch between performance levels during a recording.
- Turn off audio enhancements. Go to the Classic Sound panel and uncheck all the boxes next to the enhancements for your output device.
- Test your buffer and measure the latency. Run a short session and use LatencyMon to check if any drivers with high DPC times show up.
- Pause synchronization. Temporarily pause OneDrive, Dropbox, and Windows Update so that no disk or network activity interferes with your buffer.
Together, these five steps take less than two minutes, but they prevent most of the malfunctions that producers attribute to “a faulty system.” Often, it’s simply a setting that’s still set to its default value.
Audio Drivers and Interface Configuration
Your choice of driver has a greater impact on your latency than almost any other setting. A native ASIO driver from your interface manufacturer communicates directly with the hardware and bypasses the extra processing layers that Windows normally adds. WASAPI is a good alternative if your manufacturer doesn’t provide an ASIO driver or if you’re working with system audio alongside your DAW: modern Windows audio APIs such as AudioGraph and WASAPI with IAudioClient3 support low latency, but only if the driver itself offers those minimum buffer sizes.
The safest way to update drivers is directly through your interface manufacturer’s website, not through Windows Update. Download the latest version, first uninstall the old driver via Device Manager, and then install the new version with the interface connected.
- Look up the exact model name of your interface before downloading a driver.
- Completely uninstall the old driver through Device Manager, not just by updating it.
- Restart your system after installation before reconnecting the interface.
- Check in your DAW to see if the new driver is recognized in the audio settings.
If a manufacturer’s driver continues to cause problems, the generic Microsoft HDAudio driver serves as a practical fallback: it’s slower, but usually more stable than a broken or outdated third-party driver. ASIO4ALL can serve as a workaround if your device doesn’t have its own ASIO driver, but use it only temporarily. It runs as a layer on top of WDM drivers, which adds a small amount of extra latency and is less stable on some systems than a true native driver.
Pro tip: Always save the previous driver version as an installation file before updating. That way, you can revert within a minute if the new version causes more issues than it solves.
DAW Settings and Buffer Tuning for Low Latency
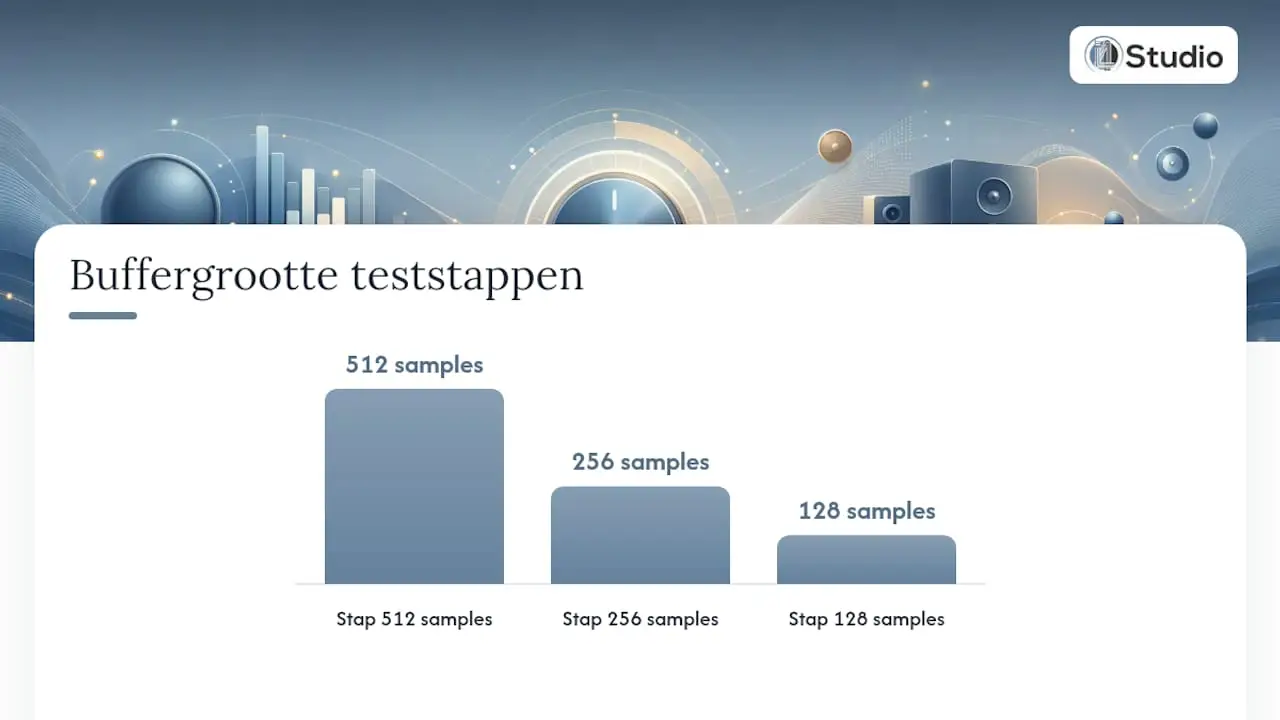
Always start with the interface driver, not the DAW itself. Once the correct driver is active, open your DAW’s audio settings and reduce the buffer size in steps: from 512 to 256, then 128, then lower, making a short test recording between each step. As soon as you hear clicks or dropouts, go back one step. That’s the point at which your system runs stably without any unnecessary latency.
Sample rate and buffer size work together: a higher sample rate (96 kHz instead of 48 kHz) requires more processing power per buffer, which means you’re more likely to experience dropouts at the same buffer size. Therefore, always test at the sample rate at which you’ll actually be recording.
To measure round-trip latency, use the latency test found in the audio settings of most DAWs, or a separate tool that sends the signal from the output back to the input and calculates the delay.
- Less than 10 milliseconds: excellent for live monitoring while recording vocals or instruments.
- Between 10 and 20 milliseconds: acceptable for most recording situations; noticeable but not distracting.
- Above 20 milliseconds: audibly delayed, particularly unpleasant for drummers and singers who rely on their own timing.
Direct monitoring, in which the signal is routed back through the interface itself, completely eliminates latency and is the best choice during recording. Software monitoring via the DAW does give you access to plug-ins and effects in real time, but it always adds some buffer latency. For recording vocals, you’ll usually choose direct monitoring; for testing a guitar effects chain during recording, software monitoring is often the better option.
System and BIOS tweaks that often make all the difference
Not every BIOS setting is worth adjusting, and some changes pose more risks than they offer benefits. Processor C-states, which put the CPU into power-saving sleep modes between tasks, are best disabled on a system used exclusively for audio: switching between sleep modes often causes brief spikes in DPC latency that are audible as clicks.
You can usually leave Turbo Boost and Hyper-Threading enabled, unless you’re specifically experiencing instability under high core load. In that case, it’s worth trying to disable them, but that shouldn’t be your first step.
More important than individual BIOS settings is the power management in Windows itself: by setting the minimum and maximum processor states to “fully high” and disabling processor parking, you can prevent the latency spikes that occur when Windows actively puts cores into and out of sleep mode during a session.
- Update your firmware and chipset drivers regularly, as outdated chipset software is a common cause of high DPC times.
- Use processor affinity sparingly: manually assigning cores to a DAW process may improve performance on one system but cause additional glitches on another.
- Test each change separately. Adjusting a BIOS tweak and a power setting at the same time makes it impossible to tell what actually helped.
First, follow the recommendations regarding energy settings and drivers before you start working on affinity or core allocation: that usually yields better results than more complex interventions.
Windows Audio Settings and the Classic Sound Panel
Windows 11 still hides the most useful audio settings for studio use in the classic Sound panel, not in the redesigned Settings app. You can access this panel by typing ” mmsys.cpl ” in the Start menu or the Run dialog.
- Open mmsys.cpl and go to the “Playback” tab. Select your interface, click “Properties,” and open the “Enhancements” tab.
- Uncheck all the enhancement options. These features, designed for consumer speakers, add processing that, in a studio environment, only introduces noise and latency.
- Check the “Advanced” tab for the device’s default sample rate and bit depth, and make sure they match your project settings.
- Manage exclusive mode from the same tab: Turn off “Allow applications to have exclusive control over this device” if you notice that other programs are interrupting your DAW, or turn it on if you need to ensure that your DAW always has priority.
- Adjust the volume mixer using the sound icon on the taskbar so that system sounds and notifications are separate from your DAW volume.
- Check your microphone and privacy permissions under Settings → Privacy & Security → Microphone to ensure that Windows doesn’t block your interface for certain apps.
This combination—properly configuring exclusive mode and disabling enhancements—is exactly what the classic sound panel is still intended for: advanced device settings that are missing from the modern Settings app.
Diagnosis and Troubleshooting: Tools and Measurement Methods
If you still hear clicks or dropouts after applying the basic settings, systematically investigate the cause. LatencyMon is the tool of choice: it shows which driver is causing the highest DPC (Deferred Procedure Call) times, and that’s usually the direct culprit behind audible glitches.
- Run LatencyMon for at least ten minutes while using your DAW normally, not just when it’s idle.
- Pay attention to drivers marked in red or yellow in the report; those are the ones you should update or replace.
- Then run the built-in Windows audio troubleshooter, which automatically checks for driver errors and misconfigured default devices.
- If in doubt, temporarily disable network adapters, Bluetooth, or USB hubs to isolate which component is causing the latency.
- If a specific manufacturer’s driver continues to malfunction, revert to the generic Microsoft driver, and only then contact the manufacturer for a solution.
Pro tip: For each test, make a note of which single setting you changed. Making multiple changes at once makes a LatencyMon report virtually unreadable.
i4studio Recommendations and When Customization Is Useful
Certain hardware choices prevent driver issues before they even arise. A motherboard with a chipset that is well-supported by the manufacturer, a power supply with sufficient headroom and separate power rails, and active cooling that remains stable during long sessions: these are the components that i4studio selects as standard in its custom configurations.
- Choose components from brands that regularly release driver updates, not the cheapest option available.
- Ensure sufficient cooling capacity, as thermal throttling causes the same kind of latency spikes as poor power management.
- Separate audio USB ports from ports that are heavily used by other devices.
Tuning the equipment yourself using the steps in this article is sufficient for most home studios. A custom configuration or consultation becomes worthwhile as soon as you continue to experience repeated dropouts despite correct settings, or when you switch to sessions with many plug-ins and high sample rates where the hardware itself lacks sufficient headroom.
What Should Be Prioritized When Optimizing
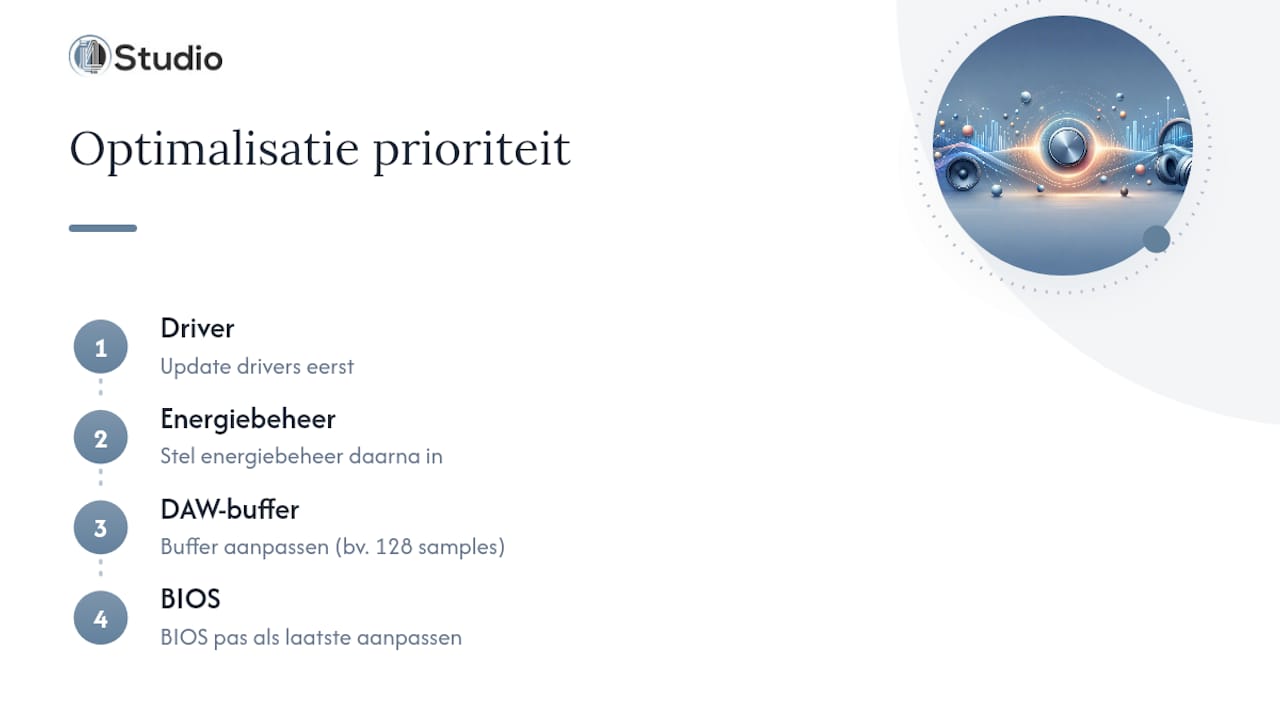
For me, stability always takes precedence over pure speed. A system that can handle a 64-sample buffer but stutters once an hour is useless for a recording session compared to a stable 128-sample setting. The order is no accident: driver first, then power management, then the DAW buffer, and finally the BIOS settings. Every step you skip makes the next one harder to evaluate.
A recurring pattern among developers who ask us for help: they’ve spent hours tweaking the registry before they’ve even updated their driver. That’s the opposite of what works.
– harold
i4studio: Ready-to-use cooling for your studio PC
All the settings in this article resolve most audio issues, but not every producer has the time or inclination to figure out every driver and BIOS setting on their own. I4studio builds custom studio PCs in which these optimizations—from power management to driver selection—are already correctly configured upon delivery.
Check out the sample configurations for studio PCs to see which setup suits your type of sessions, from light recording work to heavy mixing with dozens of plug-ins. Can’t decide between upgrading your current setup and buying a new machine? Check out our guide on the cost of a custom studio PC and request a configuration proposal tailored to your DAW and interface.
Sources
- Fix Sound or Audio Problems in Windows
- Comprehensive guide to optimizing audio latency in Windows 11
- How to optimize audio latency in Windows 11
Frequently Asked Questions
How can I troubleshoot audio issues in Windows 11?
Start with the built-in Windows audio troubleshooter, check the default device in Settings → System → Sound, and disable audio enhancements via the classic Sound panel. If that doesn’t work, use LatencyMon to determine which driver is causing the highest DPC times.
How can I optimize Windows 11 for audio?
Optimize your power plan for maximum performance with full processor capacity, use your interface’s native ASIO driver, and gradually reduce the DAW buffer until you can no longer hear any dropouts. Some custom configurations apply these settings by default upon delivery.
How can I improve the sound quality of my audio?
Disable system enhancements in the classic audio panel, set the correct sample rate and bit depth on the “Advanced” tab, and use direct monitoring during recording to avoid latency. Good room acoustics often make a bigger difference than additional system settings.
How do I update the audio driver in Windows 11?
Download the latest driver directly from your interface manufacturer’s website, first completely uninstall the old driver via Device Manager, and then install the new version with the device connected. Avoid using Windows Update for this type of driver, as it often installs a generic version instead of the manufacturer-specific ASIO driver.