TL;DR:
- An audio converter translates analog sound to digital and vice versa, which is essential for any digital studio. The quality of a converter directly affects sound resolution, imaging and dynamics, and can even make an artistic difference. Using an external word clock and standalone converters improves precision and reduces jitter for critical recording and mixing.
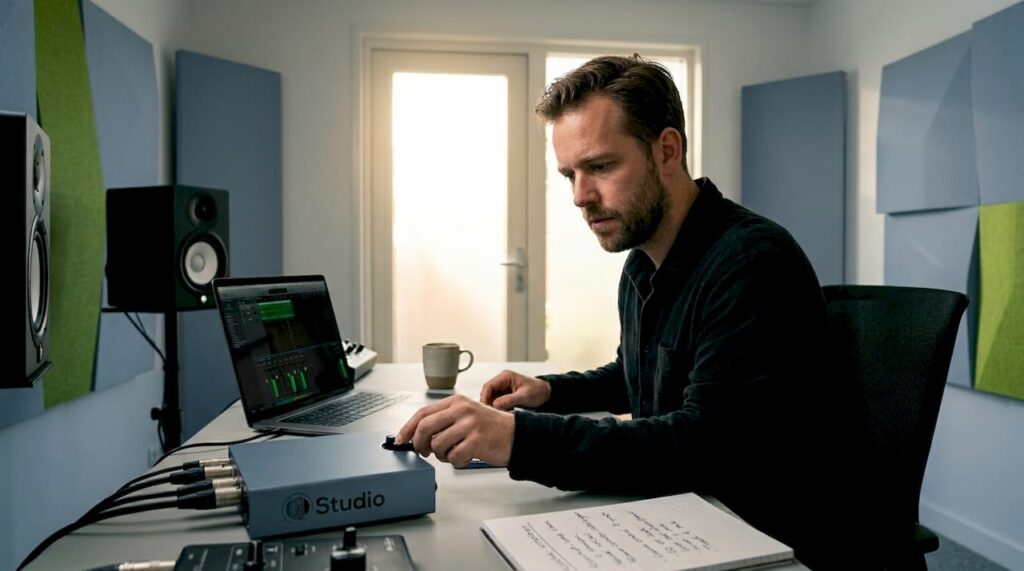
An audio converter is the device that converts analog audio signals to digital data and vice versa, thus forming the core of any digital studio production. Without this process, there is no connection between the analog world of microphones and instruments and the digital world of your DAW. The function of audio converters goes beyond mere conversion: the quality of that conversion directly determines how faithful your recordings sound, how reliable your monitoring decisions are, and how your mix ultimately translates to other systems. In this article, we explain how converters work technically, what types exist, and how to apply that knowledge to your daily workflow.
What is the function of audio converters in the signal chain?
The function of an audio converter is to translate sound between two domains: analog and digital. In practice, a signal in a digital studio chain continuously changes from sound pressure to electrical voltage, to digital samples, and back again. Each step in that chain depends on the accuracy of the converter providing the transition.

An ADC (Analog-to-Digital Converter) takes the analog output signal from a microphone or instrument and converts it into a series of binary numbers. A DAC (Digital-to-Analog Converter) does the opposite: it converts digital audio data back to an analog signal that you can hear through speakers or headphones. Both processes take place several times a second in every modern audio interface.
What many producers underestimate is that the converter is not only a technical link but also an artistic one. A bad converter colors the sound in a way you won’t recognize until you compare it to a better one. That makes knowledge about audio converter features indispensable for anyone who works seriously with sound.
How exactly does an audio converter work?
The conversion process of an ADC involves four recognizable steps. Each of those steps directly affects the final sound quality.
Signal conditioning. Before the analog signal reaches the ADC, it is conditioned through a preamp and anti-aliasing filter. Anti-aliasing filters remove frequencies above the Nyquist limit to prevent digital aliasing, which is crucial for clean digital recordings. Without this filter, false frequencies are created in the digital signal that cannot be removed.
Sampling. The ADC measures the analog signal at fixed time intervals. The sample rate determines how often that happens: at 44.1 kHz, the converter measures 44,100 times per second. The higher the sample rate, the more frequency information is preserved, although the difference above 96 kHz is negligible for most applications.
Quantization. Each measured value is converted to a binary number. The bit depth determines how many values are available. 24-bit offers a dynamic range of 144 dB versus 96 dB at 16-bit. In practice, that 48 dB difference is the difference between a recording with room for dynamics and one that runs into trouble even with slight peaks.
Clocking. An internal or external clock controls the timing of each measurement. Jitter due to an unstable clock causes loss of high frequency detail and smeared stereo imaging. This is one of the most underestimated causes of a fuzzy, blurred mix.
Pro-tip: Preferably use an external word clock such as those from Antelope Audio or Black Lion Audio if you have multiple converters in your setup. One stable clock source eliminates jitter between devices and gives you a noticeably sharper stereo image.
The D/A conversion at the DAC proceeds in reverse order: digital samples are interpolated, filtered and converted to an analog voltage signal. The quality of this process determines how transparent your monitoring sounds.
What types of audio converters are there?
Not every converter is the same, and choosing a particular type depends on your workflow and quality requirements. Below is an overview of the three most common categories.

| Type of converter | Application | Advantages | Limitations |
|---|---|---|---|
| Built-in interface converter | Focusrite Scarlett, Universal Audio Volt | Compact, affordable, all-in-one | Limited quality at higher price points |
| Standalone ADC/DAC | Audient ASP800, Prism Sound Lyra | Higher quality, lower noise floor | Additional investment, more cables |
| Converter in mixing console | SSL, Neve, API consoles | Integrated workflow | Expensive, less flexible |
The choice between these types is not just a matter of budget. AD/DA converters are often integrated into audio interfaces, mixing consoles or external converters that link the signal chain between analog and digital. That integration affects not only sound but also workflow through interface choices and connections.
Specific advantages of standalone converters for professional applications:
- Lower noise floor due to better component selection and power supply isolation
- More stable internal clock or support for external word clock
- Higher headroom on high SPL recordings such as drums or horns
- Better transient response, noticeable with percussion and acoustic instruments
- More flexibility in signal chain through modular design
Professional studios use standalone converters to achieve the highest quality conversion with lower noise floors and more stable clocking. This is especially true in mixing and mastering, where every nuance in the signal is visible and audible.
If you want to know more about how to correctly connect and integrate an audio interface into your signal chain, also read I4studio’s article on audio interface connection.
Why do audio converters affect sound quality so much?
The quality of your converter determines the quality of everything that comes after it. A weak link at the beginning or end of the signal chain cannot be compensated with better plugins or more expensive monitoring equipment.
The most common quality problems with bad converters can be traced directly to technical shortcomings:
- Smeared transients. A slow or imprecise ADC lacks the attack characteristics of percussion and plucked strings. The result is a mix that sounds soft and undefined, even though all other elements are good.
- Harsh highs. A low-quality DAC makes high-frequency reproduction more resinous and distorts the stereo image, leading to poor mixing decisions. Your EQ choices are then based on a distorted view of the signal.
- Increased noise floor. Too weak an input signal before the ADC degrades the effective resolution. Gain staging and preamp quality determine signal noise and headroom, not just bit depth.
- Frequency response anomalies. Cheap anti-aliasing filters introduce phase shift in the audible range, which degrades the spatiality of a recording.
Bit depth and sample rate are the most visible parameters, but they do not tell the whole story. Clocking and jitter remain essential factors in evaluating converter quality and recognizing audio errors. A converter with perfect specs on paper can sound bad because of an unstable clock.
Pro-tip: Don’t rely solely on marketing specifications. The Audio Engineering Society has developed objective criteria for professional ADC performance with the AES78id measurement methods. Use those as a reference when comparing converters, in addition to your own listening test.
A high-quality DAC gives a more transparent stereo image, fewer unwanted harmonics and better transient response, which is crucial for critical monitoring. That means your mix decisions about panning, EQ and dynamics are closer to reality. So the benefits of higher-quality audio converters are not only technical but also artistic.
How do you apply converter knowledge in recording and mixing?
Knowledge of how an audio converter works is not valuable until you translate it into concrete choices in your workflow. Here are the steps that make the most difference.
Set sample rate and bit depth consistently. Use a consistent sample rate and bit depth throughout your recording and mixing process to avoid latency, synchronization problems and quality loss. Do not switch between 44.1 kHz and 48 kHz within a single project. Choose 24-bit as the standard for recordings, even if the final delivery is 16-bit.
Optimize your input level. Always optimize your input level to the ADC with a quality preamp to minimize the noise floor and improve effective resolution. Aim for an average recording level of about -18 dBFS, with peaks reaching a maximum of -6 dBFS. In this way, you make the best use of the available bit depth without the risk of clipping.
Monitor via a high-quality DAC. The D/A route in monitoring is at least as important as the A/D route in recording. If you mix through a bad DAC, you will make decisions based on a distorted picture. Invest in a better DAC for monitoring rather than additional plugins.
Use an external word clock with multiple converters. When you have multiple devices in your setup, such as a standalone ADC and a separate DAC for monitoring, synchronize them via an external word clock. This eliminates jitter between devices and gives a more stable, crisper soundstage.
Consider a standalone converter when mixing and mastering. Converter quality should be looked at in the entirety of signal chain and gain staging. If your interface is the weakest link, a better preamp or more expensive microphone will not solve that. A standalone converter like the Audient ASP800 or a Prism Sound unit will give you a measurably lower noise floor and better transient response.
For home studio setups, there are also practical tips on home studio recording that will help you get the most out of your converter, even without a fully professional environment.
If you want to go deeper into the difference between analog and digital recording and how converters play a role in it, I4studio’s article on analog vs digital recording provides a good supplement.
Key insights
The quality of your audio converter determines the quality of your recording, monitoring and mix, and cannot be compensated for by better software or more expensive monitoring equipment.
| Item | Details |
|---|---|
| ADC and DAC are indispensable | Any digital studio production requires accurate conversion between analog and digital signal. |
| Bit depth and sample rate determine resolution | 24-bit gives 144 dB dynamic range, which gives recordings more room for dynamics and detail. |
| Jitter affects stereo imaging | An unstable clock causes smeared imaging and loss of high frequency detail in the mix. |
| Gain staging is part of conversion | Too weak a signal before the ADC lowers the effective resolution, regardless of the bit depth setting. |
| Standalone converters improve mixing and mastering | Lower noise floor and more stable clocking make a measurable difference in critical listening sessions. |
Why converter quality is overlooked more often than you think
As an audio expert at I4studio, I regularly see producers invest thousands of dollars in microphones and preamps, but never question the converter in their interface. This is understandable: converters are invisible in the chain and their influence is subtle until you put them next to a better version.
What strikes me most in practice is that gain staging for the ADC makes the biggest difference, more than any upgrade. A signal that reaches the converter too weakly loses effective resolution in a way that no plugin can recover later. This is not theory: it is audible as soon as you know how to recognize it.
My advice to producers considering upgrading: listen critically to your current monitoring via a better DAC before buying anything else. Chances are your mixing decisions for years have been based on a distorted view of your own work. That’s confronting, but also the fastest path to better results.
As for choosing between built-in and standalone converters, the limit is not a specific budget but when you notice that your mix sounds different on other systems than expected. That’s the signal that your converter has become the weakest link. At that point, investing in a standalone unit such as the Audient ASP800 or a similar option is not a luxury but a logical step.
– harold
Professional studio hardware for better conversion and workflow

The quality of your audio conversion starts with the hardware in your studio. I4studio provides specialized equipment that directly affects your conversion quality and productivity. The Audient EVO 16 audio interface combines high-quality AD/DA converters with extensive I/O for demanding recording and monitoring workflows. For those seeking standalone conversion, the Audient ASP800 offers eight channels of microphone preamp and ADC in one unit. In addition, I4studio delivers custom-built audio PCs that provide the processing power you need for stable, latency-free sessions with high sample rates and large channel numbers.
FAQ
What exactly does an audio converter do?
An audio converter converts analog audio signals to digital data (ADC) or digital data back to analog (DAC). This process is at the heart of any digital recording and playback in a modern studio.
What sample rate and bit depth should I use?
For professional recording, 24-bit at 44.1 kHz or 48 kHz is the standard. Use 96 kHz only if your project specifically requires it, and keep settings consistent throughout the project to avoid synchronization problems.
When is a standalone converter better than a built-in interface converter?
A standalone converter makes sense if you find that your mix sounds different on other systems than expected, or if your noise floor is too high despite good gain staging. Standalone units offer lower noise floors and more stable clocking, especially relevant in mix and mastering.
What is jitter and how does it affect my sound?
Jitter is the variation in timing of the clock driving the converter. An unstable clock causes loss of high frequency detail and a fuzzy stereo image. An external word clock or a converter with a high-quality internal clock solves this.
How do I improve my conversion quality without buying new hardware?
Optimize your gain staging so that the signal reaches the ADC at a healthy level of about -18 dBFS on average. An input signal that is too weak lowers the effective resolution of your converter, regardless of the bit depth setting.


