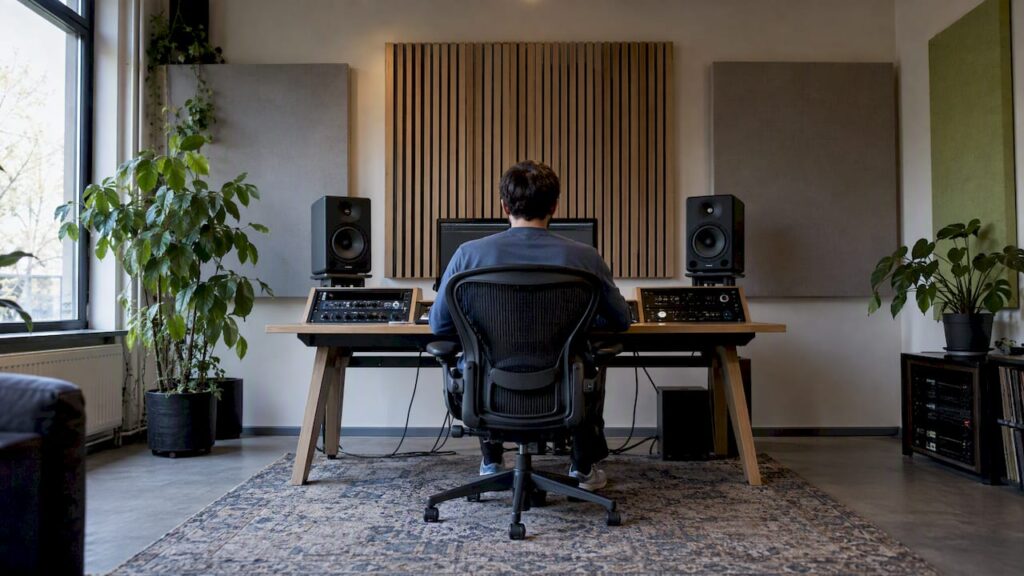
The top priority when designing a control room layout is symmetry around the listening position, a properly defined sweet spot, and control over early reflections. Start with a quick measurement and the mirror method: this immediately results in a more reliable stereo image and less listening fatigue.
In short:
- A symmetrical setup and proper placement of speakers and the listening position ensure a reliable stereo image and prevent listening fatigue.
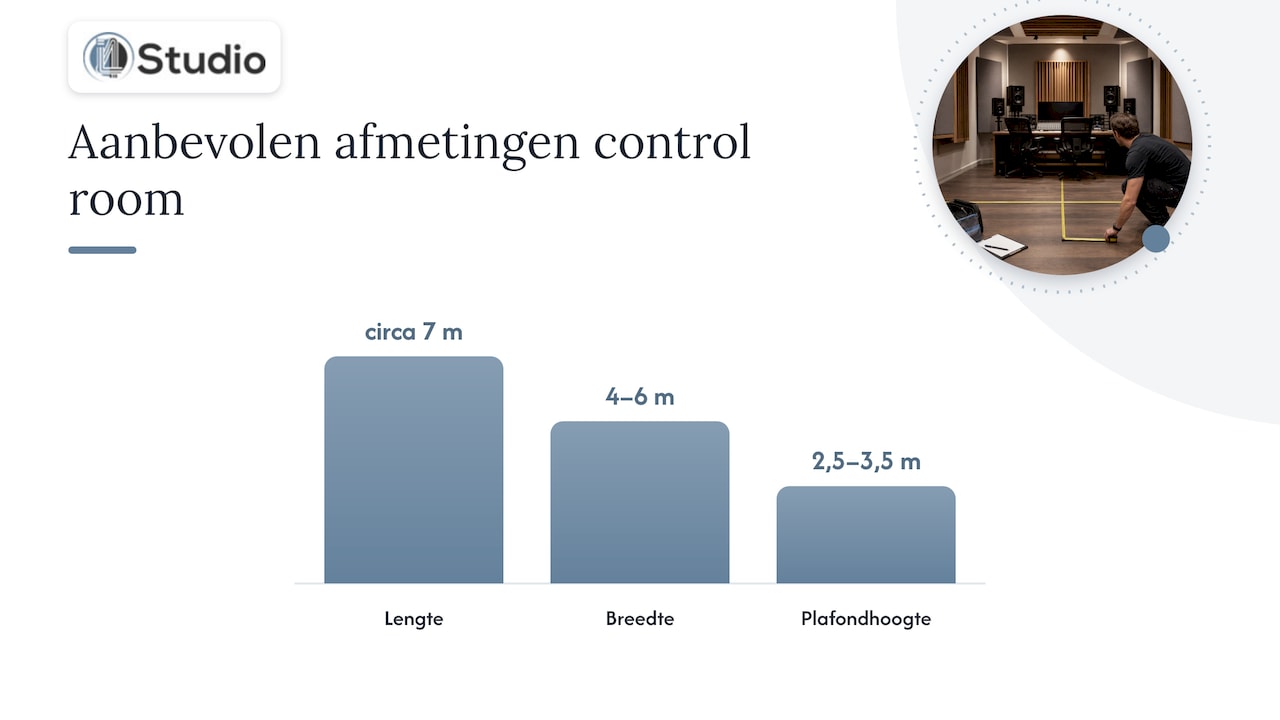
- Rooms approximately 7 meters long, 4–6 meters wide, and 2.5–3.5 meters high provide a good foundation; a larger volume helps with low frequencies.
- The use of a Reflection-Free Zone and a minimum early reflection time of 15 ms is crucial for accurate monitoring and mixing.
- Bass traps in the corners and a balanced acoustic treatment combining absorption and diffusion significantly improve sound quality.
- Customized advice is recommended for persistent acoustic problems or complex requirements, to ensure a quick and effective improvement.
Table of Contents
- Recommended Dimensions and Basic Space Planning for a Control Room
- Listening position and speaker placement: sweet spot and geometry
- Acoustic treatment: RFZ, LEDE, diffusion, and bass traps: where and why
- Practical layout and workflow: furniture, PCs, rack placement, and cable management
- Checklist and measurable steps: from measurement to procurement and validation
- Minimizing lighting and screen reflections within the control room
- Ventilation and climate control for a comfortable and stable working environment
- Soundproofing techniques for insulation against external noise
- Fire Safety and Emergency Exits in Control Room Design
- When is customized advice worth it for your control room?
- Need help with your control room? Here’s what we offer
- Frequently Asked Questions
- Sources
Recommended Dimensions and Basic Space Planning for a Control Room
The shape and volume of a room determine how many acoustic problems you’ll have to solve later on. A practical starting point is a room with a length of around 7 meters, a width ranging from 4 to 6 meters, and a ceiling height between 2.5 and 3.5 meters. A larger volume makes it easier to control low frequencies, as described in design guidelines for monitor environments: the more air there is in the room, the less standing waves will concentrate on a few problematic frequencies.
Symmetry around the longitudinal axis is just as important as volume. If doors, windows, or slanted walls are misaligned, it creates an uneven reflection pattern between the left and right sides, causing the stereo image to shift to one side and leading you to make mixing decisions based on incorrect information.
When you’re renovating an existing space, consider the following:
- Renovating is worthwhile if the room is highly asymmetrical or if the ceiling is too low to provide adequate volume.
- Treating the space is more cost-effective if the basic shape is reasonable but reflections and resonances are the problem.
- A combination of both is usually necessary, since even a well-shaped room benefits from targeted absorption and diffusion.
Practical design methods that combine architecture and acoustic treatment, as described in research on integrated studio design, confirm that a well-thought-out basic design significantly simplifies the subsequent acoustic treatment work.
Listening Position and Speaker Placement: Sweet Spot and Geometry
You determine your sweet spot on the longitudinal centerline of the room, at a distance from the front wall that forms an isosceles triangle with your two monitors. This geometry is defined in international guidelines for speaker placement, including the ITU-R recommendations for monitoring, which specify standard angles and distance ratios for reliable monitoring.
Follow these steps to verify your setup:
- Measure the distance between your two monitors and make sure it is equal to the distance to your listening position.
- Position each monitor so that the angle between the monitor’s axis and your ears is approximately 30 degrees.
- Position the tweeter at ear level when you’re seated, so that you’re listening directly along the speaker’s axis.
- For near-field monitors, maintain a minimum distance of one arm’s length, and for main speakers, use a greater distance appropriate for the room.
- Make sure you have a clear view of both monitors without a screen or rack blocking your view.
A tape measure, a mirror, and possibly a laser make it possible to perform this check in just a few minutes: place the mirror against the side wall at ear level and move your head until you see both monitors in the mirror. That’s where the first side reflection occurs, and that’s where your acoustic treatment begins.
Pro tip: First, draw the triangle on paper using actual measurements before moving your furniture—this will prevent you from having to readjust the listening position later.
Acoustic Treatment: RFZ, LEDE, Diffusion, and Bass Traps: Where and Why
The Reflection-Free Zone principle means that the area around your ears remains free of early reflections that distort the direct sound from your monitors. Research on control room design specifies an Initial Time Delay Gap of at least 15 ms as a practical design goal for the symmetrical layout of control rooms: reflections that reach your ear within that 15 ms interfere with your assessment of the stereo image and timbre.
According to Dolby guidelines, early reflections must be at least 10 dB lower than the direct sound within 15 ms, as described in technical documentation on the monitoring environment in professional studios. That level difference is what you aim to achieve through absorption at the first-order reflection points (side walls, ceiling, front of the mixing console).
There are three main strategies:
- RFZ keeps the area around your head completely free of early reflections through targeted absorption at the first-order points.
- LEDE (Live End Dead End) combines a dead front zone with a livelier, diffusely treated rear zone for greater spatial depth.
- A balanced approach combines absorption at the front with controlled diffusion at the back, which is the most practical solution for many home studios and smaller control rooms.
A completely dead room is counterproductive: too much absorption makes long mixing sessions tiring and robs you of your reference points for spatial awareness, as is also evident from explanations of absorption and diffusion in practice. A dead front zone combined with a diffuse rear wall keeps the stereo image sharp without making the room acoustically dead.
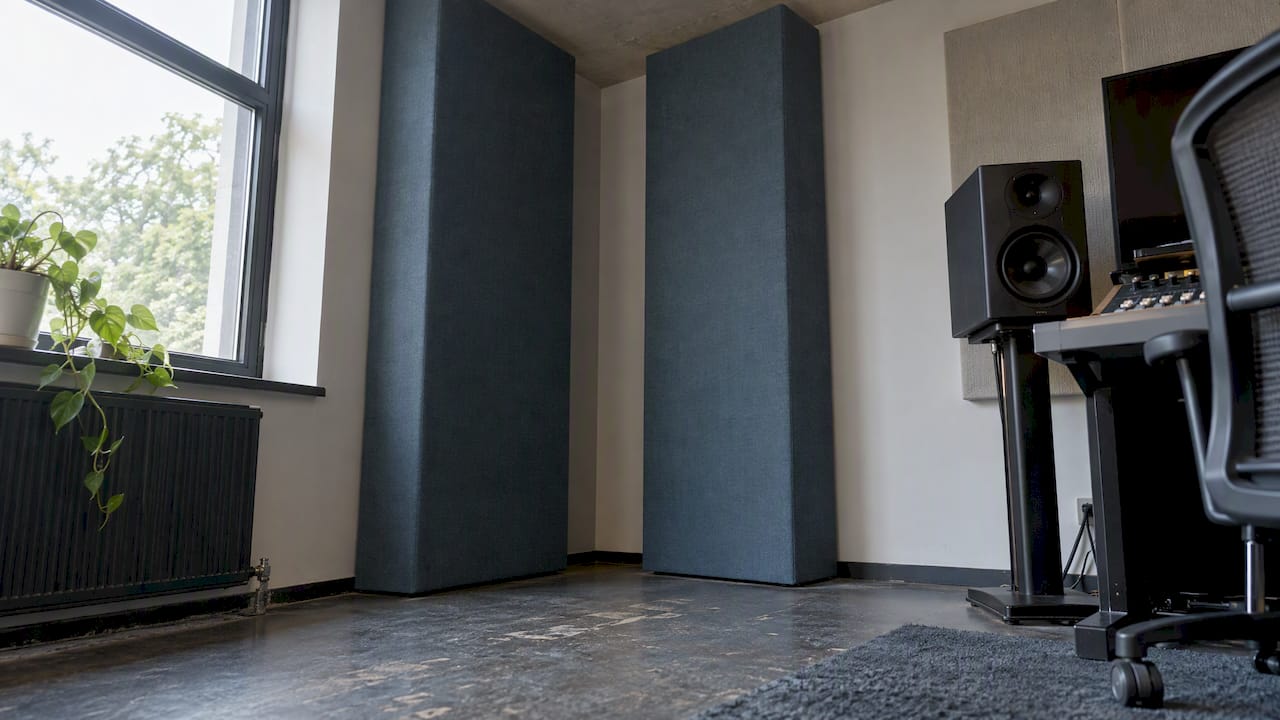
Bass traps should take priority over striving for perfect room proportions. Low frequencies behave like waves that build up in corners, and only deep absorption in those corners effectively tames them. According to practical guides such as Sound On Sound’s guide to control room design, budgets are often better spent on targeted treatment and monitor placement than on chasing ideal room proportions: a smaller room with good bass traps often performs better than a larger room without low-frequency treatment.
Practical layout and workflow: furniture, computers, rack placement, and cable management
Your workspace needs to be acoustically optimized and comfortable for long sessions. The height of your console or desk, your chair, and your monitors should be coordinated so that your ears remain at the same height as the tweeter at all times, even after hours of work.
Custom-built studio PCs do not belong within your immediate listening area. Place the case and any racks outside the RFZ, ideally in a separate equipment room or behind a sound-absorbing panel, so that fan noise and heat dissipation do not affect your monitoring.
For a neat and reliable setup:
- Keep audio cables separate from power cables to avoid inductive interference and humming noises.
- Label each cable at its source and destination to ensure that maintenance and future expansion remain straightforward.
- Use cable trays or Velcro instead of tightly bundled zip ties, so you can easily make adjustments later.
Pro tip: Keep at least ten centimeters of space between power and signal cables where they run parallel, and cross them at right angles when they need to pass each other.
Checklist and Measurable Steps: From Measurement to Procurement and Validation
A good design is only valuable if you can verify it. Follow the steps below in order before making any major purchases.
- Measure the room and draw a scale floor plan, including doors, windows, and fixed obstacles, and mark the suggested listening position.
- Apply the mirror method to both side walls and the ceiling to find the exact first-order reflection points, and use a simple time measurement to verify that the 15 ms ITDG is achieved, as recommended by standard practices for control room design.
- Follow a logical order of purchase: start with first-order absorbers on the side walls and ceiling, then invest in bass traps for the corners, and only then add diffusion to the back wall.
- After installation, validate the system by listening to familiar reference tracks and performing a low-frequency sweep to detect any remaining modal issues, and make adjustments as needed.
| Step | What you measure or check | Objective |
|---|---|---|
| Floor Plan | Dimensions, axis of symmetry, obstacles | Determining the Correct Listening Position |
| Mirror Method | First-order reflection points on walls and ceilings | Locating reflection points for treatment |
| Time Measurement | Initial Time Delay Gap at the listening position | Confirm a target value of at least 15 ms |
| Listening Session | Stereo image and low-frequency sweep | Validate Results After Installation |
For more background information on room analysis and the steps involved, see our guide to designing studio acoustics.
Minimizing lighting and screen glare in the control room
Lighting affects your concentration during long mixing sessions and can cause screen glare that makes it harder to see your work. Avoid bright, direct light above or behind your monitor: that light can easily fall on your screen and strain your eyes while you’re reading meters and software.
Use indirect lighting, such as wall-mounted fixtures that reflect light toward the ceiling or walls rather than directly onto your workspace. Dimmable LED strips behind the screen or monitors provide sufficient basic lighting without creating harsh contrasts between your screen and the rest of the room.
Position your screen at a right angle to windows and light sources—never in front of or behind them—to prevent glare. A matte screen coating or an adjustable screen hood provides additional help when artificial light inevitably hits the screen at an angle.
Keep the color temperature of your lighting neutral, around 4,000 to 4,500 Kelvin, so that your visual perception of colors during video editing isn’t distorted by a glow that’s too warm or too cool. A consistent lighting environment also helps reduce fatigue during long work sessions, which is just as important as the acoustic aspects of your setup.
Ventilation and climate control for a comfortable and stable work environment
A control room without proper ventilation becomes unbearably hot and stuffy within an hour, especially with multiple monitors, a studio PC, and studio equipment that constantly generate heat. A stable temperature is also important for the reliability of electronic components: excessively high temperatures shorten the lifespan of components in a custom-built studio PC and can lead to overheating during demanding rendering processes.
Choose an air conditioning or ventilation system that is quiet enough not to interfere with your monitoring. Many standard air conditioning units produce a continuous noise level that is audible in quiet areas, so a system with a low decibel level or a sound-attenuating duct design is worth considering.
Do not place the air vent directly at your listening position or on top of your equipment to prevent drafts and dust buildup on sensitive components. Maintaining a constant relative humidity between 40 and 60 percent prevents both static buildup and corrosion of connectors and circuit boards.
For smaller spaces without central climate control, an insulated ventilation opening with sound-absorbing baffles is a viable interim solution: it allows fresh air to enter without creating a direct acoustic leak to the outside.
Soundproofing techniques for insulation against external noise
Sound insulation and acoustic treatment are two different things: treatment determines how sound is perceived within the room, while insulation determines how much sound leaks in or out. A control room requires both, especially if it adjoins other rooms, a recording studio, or the outside world.
The most effective approach is a “box-in-box” construction: an inner wall that is mechanically decoupled from the outer wall, with an air cavity between them. Mass and decoupling work together: the heavier and more decoupled the construction, the fewer vibrations are transmitted.
Keep the following points in mind during construction:
- Double walls with an air cavity reduce sound transmission significantly more than a single, thicker wall.
- Spring rails or decoupled profiles prevent vibrations from traveling through the wall’s framework to the other side.
- Sealing gaps and openings around doors, electrical outlets, and cable penetrations is just as important as the wall itself, since even a small hole can greatly reduce the insulation’s effectiveness.
Doors are often the weakest link: a standard interior door provides much less insulation than the wall next to it, so a solid door with good weatherstripping around the frame makes a noticeable difference.
Fire Safety and Emergency Exits in Control Room Design
Acoustic treatment and soundproof structures must never compromise fire safety. A well-designed control room takes escape routes into account from the very first sketches, not as a later addition.
Make sure the door opens outward toward the escape route and that nothing—including shelves, cable trays, or acoustic panels—narrows the passageway. Use fire-retardant or fire-rated materials for acoustic panels and insulation, especially in areas where electronics and extensive cabling are concentrated.
Install smoke detectors in such a way that they are not obstructed by acoustic panels on the ceiling, as dense sound-absorbing materials can delay smoke detection. When installing a studio PC and other equipment, allow for sufficient ventilation space so that heat buildup does not become not only an acoustic hazard but also a fire safety hazard.
Check local regulations regarding escape route lengths and emergency exits before converting an existing space into a control room: these vary by building and municipality, and a professional can assess this for your specific situation.
When is customized advice worthwhile for your control room?
Taking your own measurements and following the steps in this article will already get you a long way, but not every space can be tamed with standard solutions. When dealing with persistent technical issues, complex routing requirements, or integration with video editing, we’ve found that targeted advice and custom solutions lead to a workable result more quickly than further experimentation.
Start by doing your own measurements and using the mirror method, and only seek advice afterward if the results are disappointing or if you’re considering a custom-built studio PC or a complete system build. This combination of self-assessment and professional input prevents you from making duplicate investments in the wrong solutions.
– harold
Need help with your control room? Here’s what we offer
Once you know where your first reflections are and what volume your space requires, the next step is to fill that layout with the right equipment. We provide custom-built studio PCs for audio and video, acoustic panels, and personalized advice on combining hardware and room treatment, optimized for stability and low latency.
On i4studio, you’ll find the categories that directly relate to this article:
- Studio PCs Starting at €1,099.00 (one-time fee), configured for audio and video work.
- Acoustic panels and advice for absorption, diffusion, and bass traps tailored to your space.
- Studio monitors that match the geometry you’ve determined in this article.
- Audio interfaces for a stable signal chain without noise or latency.
Not sure which combination is right for your space? Request a consultation through I4studio, and we’ll work with you to figure out the next step.
Frequently Asked Questions
What is the most important rule of thumb for control room dimensions?
A practical starting point is a room approximately 7 meters long, 4 to 6 meters wide, and with a ceiling height between 2.5 and 3.5 meters, as described in the guidelines for the monitoring environment. A larger volume makes it easier to control low frequencies, but symmetry around the listening position is at least as important as the exact dimensions.
What does RFZ mean, and why do you aim for 15 ms?
RFZ stands for Reflection Free Zone, the area around your listening position that remains free of early side reflections. Design guidelines for symmetrical listening rooms specify an Initial Time Delay Gap of at least 15 ms as a practical target, so that your ears receive the direct sound from the monitor first and unaltered.
Is LEDE better than a balanced acoustic approach?
Neither approach is universally better: LEDE combines a dead front zone with a lively rear zone, while a balanced approach mixes absorption in the front with controlled diffusion in the rear. For many smaller control rooms, the balanced approach is more practical, because, as explained in the section on absorption and diffusion, a completely dead room leads to listening fatigue more quickly.
Should I renovate the room first, or apply acoustic treatment first?
Start by taking measurements and using the mirror method to determine whether the problem lies in the room’s shape or in the lack of treatment. Practical guides, such as the control room design guide, indicate that targeted treatment and monitor placement often yield results more quickly than striving for perfect room proportions.
How much does a custom-built studio PC for a control room cost?
A custom-built studio PC starts at €1,099 and is designed for stable audio and video processing. The exact configuration and price depend on your specific workload, such as the number of tracks, plugins, or video editing tasks you’re running.
Sources
- Room Acoustic Design for Phase 2 of the Queensland University of Technology Creative Industries Precinct (CIP2)
- CONTROL ROOM DESIGN: THE MONITORING ENVIRONMENT — George L. Augspurger
- ITU-R Recommendations for Broadcast Sound Production (BS Series)
- Integrated Architectural and Acoustical Design of Media Recording Studios — AES
- The SOS Guide to Control Room Design — Sound On Sound