Do you want to build a quiet studio PC that doesn’t add noise to your recordings? Then opt for air cooling with large heatsinks running at low RPM, a semi-passive power supply, and a carefully tuned fan curve. That combination accounts for ninety percent of the difference between a PC you can hear and one you’ll forget is even there.
For those who want to make a quick decision, here are three approaches that work in practice, in which specialists in the audiovisual sector also contribute their expertise:
- Compact: A Mini-ITX build featuring a Noctua NH-L9i, an air tunnel, and an efficient processor. Ideal for a mobile producer who records on location.
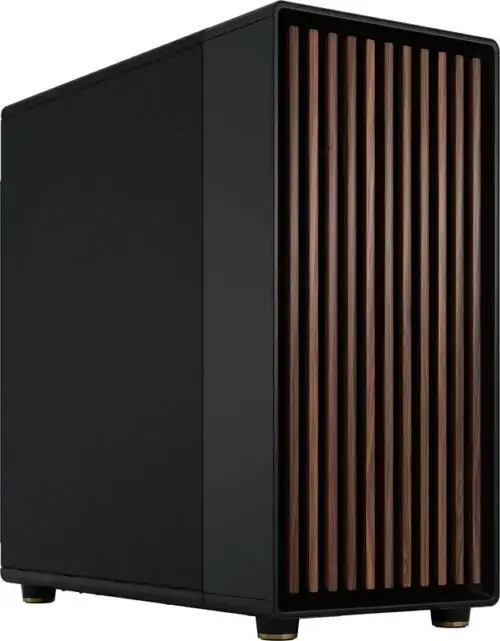
- Mid-range: a Fractal Design Meshify 2 Compact with an AMD Ryzen 7 7800X3D and a dual-tower cooler. The sweet spot for most project studios.
- High-end: a fully tuned workstation build with a semi-passive power supply, large 140 mm fans, and a custom fan curve. For those who mix and master at a professional level.
Three quick wins you can implement today: replace every hard drive with an SSD, choose a graphics card with a 0 dB idle mode, and, as your first tuning step, set a custom fan curve in the BIOS. The latter takes just ten minutes and often yields better results than a more expensive cooler.
Key insights
You can build a quiet desktop PC by treating the CPU cooler, power supply, and fan curve as a single, integrated system rather than as separate components.
| Item | Details |
|---|---|
| The cooler has the greatest impact | A large tower cooler like the Noctua NH-D15 reduces noise more than any other component. |
| Choosing a Power Supply for a Semi-Passive Setup | A unit like the be quiet! Pure Power 12 M keeps the fan off until the load exceeds 40 to 50%. |
| SSD vs. Hard Drive | A Samsung SSD 980 completely eliminates mechanical noise, unlike an HDD. |
| Fan Curve as the First Tuning Step | Set the curve in the BIOS and test it in a DAW session with a buffer size of 128 and 256 samples. |
| Custom Solutions for Complex Requirements | I4studio tests acoustics, bios tuning, and DAW stability specifically for your space and workflow. |
Table of contents
- Why Silence Really Matters in a Recording and Mixing Environment
- What components determine the sound of your studio PC?
- Air cooling, AIO, or passive cooling: which works best in a studio?
- Identifying and resolving vibrations and coil whine
- BIOS settings and DAW tuning for a quieter system
- Three sample builds: from compact to high-end
- Assembly and Testing Checklist for a Quiet, DAW-Stable System
- What I’ve Learned from Years of Building Quiet Studios
- When to Opt for Custom-Built Systems
- Resources
- Frequently Asked Questions
Why Silence Really Matters in a Recording and Mixing Environment
Background noise from your computer affects more than just your comfort. It affects what you hear—and therefore the decisions you make while mixing.
A fan running continuously at 35 dB masks subtle details in your mix: a slight sibilance, a hi-hat that’s just a bit too sharp, low-frequency noise below 80 Hz. You unconsciously compensate for that noise by turning up the volume or making EQ decisions that wouldn’t have been necessary with a quieter background. When recording with a sensitive microphone one meter away, the problem is even more immediate: the computer itself leaks audibly into the recording.
A well-tuned build can achieve a noise level below 25 dB(A) under load, as shown by measurements taken on a carefully assembled quiet PC. By way of comparison: a quiet bedroom typically measures around 20 dB, and an average open-plan office easily exceeds 50 dB. Every few decibels below 25 dB is therefore noticeable in a recording studio.
There are also practical, less obvious consequences:
- Latency issues are more likely to occur when a system overheats and the processor starts to throttle, which destabilizes your DAW buffer.
- Background processes that unnecessarily consume CPU cycles, such as cloud synchronization or license checkers, can cause fans to spin up unnecessarily during a session.
- When close-miking acoustic instruments, even an idle noise of 0.5 sone is audible on the recording as soon as you increase the gain.
Which components determine the noise level of your studio PC?
Not every component carries the same weight. In order of impact on the final noise level:
- CPU cooler — the most important factor. A large air cooler like the Noctua NH-D15 dissipates the same amount of heat at a much lower RPM than a small cooler, and therefore remains quieter under load.
- Case and airflow — a case with good sound insulation and sufficient space for air circulation prevents your fans from having to work harder to maintain the same temperature.
- Power Supply — A semi-passive unit like the be quiet! Pure Power 12 M keeps the fan off until your system is under heavy load.
- Fans — the brand, size, and speed all work together to determine the nature of the noise, not just the volume.
- Storage — An SSD like the Samsung SSD 980 is literally silent, unlike a spinning hard drive.
- Graphics card — especially important if you also do video editing or use GPU-accelerated plug-ins.
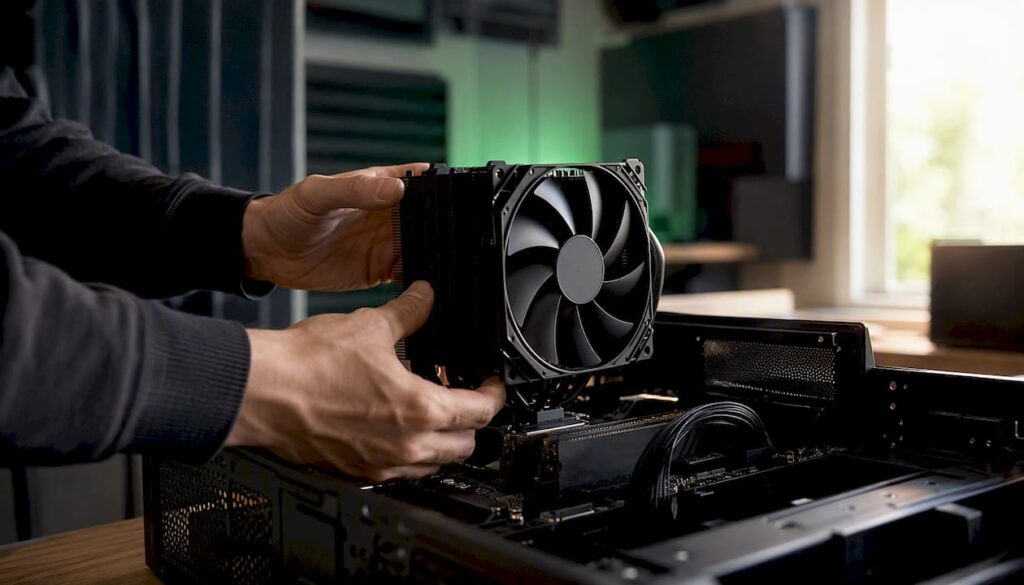
When it comes to the CPU cooler, choose a large tower cooler like the Noctua NH-D15 or a dual-tower model if your case size allows it. In a compact Mini-ITX build, the Noctua NH-L9i is often the only option that fits, and it performs surprisingly well as long as you choose a lightweight CPU and don’t aim for extreme overclocking.
When it comes to power supplies, it’s not just whether it’s semi-passive that matters, but also the 80 PLUS efficiency rating. A power supply that operates more efficiently produces less residual heat, and less heat means less need for active cooling. When it comes to storage, the choice is really a no-brainer: an SSD has no moving parts and therefore no mechanical noise, while a hard drive always produces an audible click and hum as soon as it reads data.
Pro tip: When in doubt, always choose the larger case size with bigger fans. A 140 mm fan running at 800 RPM moves about as much air as a 120 mm fan running at 1,100 RPM, with a noticeable difference of three to five decibels, as shown in techniques for a quiet PC. Larger, slower-spinning fans are inherently quieter than small, fast ones.
Air cooling, AIO, or passive cooling: which works best in a studio?
For studio environments, air cooling is usually the most reliable choice. No pump to buzz, no risk of leaks, and tower coolers can achieve the same heat dissipation at lower fan speeds than an AIO water cooler requires. That makes a difference in audible airflow.
| Cooling Option | Noise Profile | Complexity | Suitable for |
|---|---|---|---|
| Tower air cooler (e.g., Noctua NH-D15) | Very low with the correct fan curve | Low | Mid- and high-end studio builds |
| Compact air cooler (e.g., Noctua NH-L9i) | Low, provided the CPU is lightweight | Low | Compact Mini-ITX builds |
| AIO Water Cooling | May produce pump noise and resonance | Medium to high | Rarely needed in a studio setting |
| Fully passive | As quiet as possible, but limited in cooling capacity | High | Light workloads only |
Choose the Noctua NH-D15 if your case has enough space and you’re using a powerful processor, such as the AMD Ryzen 7 7800X3D. Opt for the more compact Noctua NH-L9i in a Mini-ITX case, paired with a more energy-efficient processor. We rarely recommend an AIO in a studio setup: the pump introduces an additional, often high-frequency noise source that’s harder to mitigate than a simple fan.
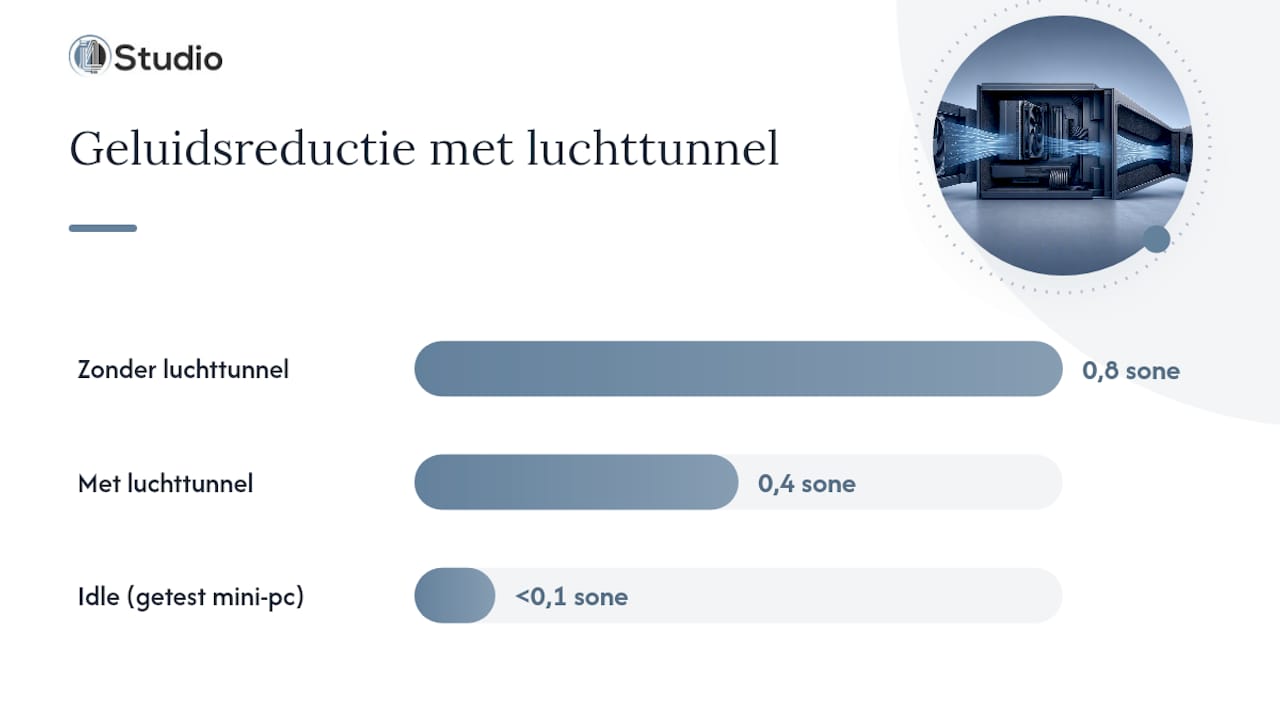
Installation tip: Whenever possible, use a push-pull configuration on your tower cooler for a more even airflow at lower RPMs. In compact builds, an air tunnel like the Noctua NA-FD1 makes a noticeable difference: it directs cool air directly from the case panel to the CPU fan and reduces internal recirculation of warm air. In one mini-PC we tested, this reduced the noise level from 0.8 sone to 0.4 sone, with an idle value below 0.1 sone, as shown in a test of a compact, quiet mini-PC.
Pro tip: If you do decide to go with an AIO, install the radiator using rubber spacers between the fans and the frame. This prevents vibrations from the pump from spreading throughout the entire case.
Identifying and Resolving Vibrations and Coil Humming
Even a perfectly selected list of components can still be audible due to two often-underestimated sources: mechanical vibrations and coil whine.
Vibrations are usually caused by a fan or hard drive making direct contact with the case frame, causing the frame to resonate. Here are a few installation practices that can prevent this:
- Use rubber mounts or silicone pins when mounting fans instead of metal screws.
- Place anti-vibration pads under any hard drive or under the entire case.
- Tighten the screws in a crisscross pattern instead of fully tightening them one by one, so you don’t apply uneven stress to a component.
Coil whine is a different story. That high-pitched, whistling sound is caused by vibrations in the coils of your graphics card, power supply, or motherboard VRMs under specific load conditions. It’s not dangerous, but in a quiet recording room, it’s extremely distracting.
Follow these steps to isolate and resolve the issue:
- Isolate the source. Temporarily unscrew loose components or replace them one by one to determine whether the noise is coming from the GPU, the power supply, or the motherboard.
- If you have one available, try using a different power supply or graphics card to rule out the possibility that the problem is with a specific unit.
- Adjust your BIOS settings. Lowering the power limit on your GPU or disabling aggressive boost modes often reduces the load spikes that cause coil whine.
- Consider slight undervolting. Lowering the voltage while maintaining the same clock speed often reduces both heat generation and coil hum.
- Consider an RMA if the noise is extreme and persists after all adjustments have been made. Some units of the same model are simply louder than others due to manufacturing tolerances.
BIOS Settings and DAW Tuning for a Quieter System
As a first step, set a custom fan curve in your BIOS and keep your temperature limits realistic. A curve that’s too aggressive—one that doesn’t ramp up until 70 degrees—may seem quieter on paper, but it causes temperature spikes that will cause your processor to throttle during a long session.
A practical starting point for a fan curve on your CPU cooler:
- Below 40 degrees: fan at 20 to 30 percent, barely audible.
- Between 40 and 60 degrees: gradually increase to 40 to 50 percent.
- Between 60 and 75 degrees: increase further to 60 to 70 percent.
- Above 75 degrees: ramp up to 100 percent as a safety measure.
You can configure these settings in your motherboard’s BIOS—for example, on an ASRock B650M model—or using the manufacturer’s software if you prefer to work within Windows.
Undervolting is the most underrated tuning step. For both CPUs and GPUs, you can often reduce the voltage by 10 to 15 percent while maintaining the same clock speed, which immediately results in less heat and, therefore, less fan activity. Do this gradually and test stability each time with a short render job before proceeding.
There are specific considerations for your DAW itself. Always connect your audio interface—such as a MOTU M2, Steinberg UR22C, or a professional RME interface—to a direct USB port on the motherboard rather than through a hub. Set your buffer size to 128 samples at 44.1 kHz for low latency during recording, and increase it to 256 samples while mixing if you’re working with a lot of plug-ins. Close any unnecessary background tasks, such as cloud synchronization, before starting your session, as these processes can both strain your CPU and cause your fans to spin up unnecessarily.
Pro tip: Before making any changes in the BIOS while your DAW is running, test each one individually with a simple 10-minute stress test. That way, you can be sure a setting is stable before using it during an important recording session.
Three sample builds: from compact to high-end
Below are three configurations that you can use right away as a checklist or as a starting point for a customized quote.
Compact design, for the mobile producer
This combination results in a system that fits in a backpack and adds virtually no noise to the recording quality, as previous measurements of similar compact mini-PCs have shown.
Mid-range setup, for the project studio
This setup combines one of today’s fastest gaming and production CPUs with robust cooling. For most project studios, this strikes the right balance between price, quiet operation, and processing power.
High-end setup, for mixing and mastering
For this class, you’ll need: a large dual-tower cooler, a spacious Fractal-style case with multiple 140 mm fans, a higher-wattage semi-passive power supply, and 32 GB of RAM. According to measurements, such a setup with a Ryzen 7 7800X3D and a well-tuned fancurve can run virtually silently, according to measurements taken on a comparable music production PC, even during demanding DAW sessions with dozens of plugins active on a 128-sample buffer.
For a mid-range to high-end build, expect a total budget between €900 and €1,800, depending on RAM, storage capacity, and whether you add a dedicated graphics card. With custom builds from i4studio, you’ll also get acoustic measurements taken with a sound level meter at a distance of one meter and BIOS tuning fully tailored to your DAW workflow—something you can’t always replicate yourself with a list of individual components. Check out our ready-to-use studio PC examples if you’d prefer to order a fully tested system.
Assembly and Testing Checklist for a Quiet, DAW-Stable System
If you’re building it yourself, follow these steps to prevent vibrations and cable clutter:
- First, install the power supply and route all cables through the back of the case so that no cables can come into contact with fan blades.
- Install the CPU cooler before screwing the motherboard into the case; this is often easier.
- Install fans using rubber decoupling pins instead of standard screws.
- Connect the SSD with a short cable and secure it so it can’t vibrate loose.
- Test your cable management by gently running your hand along the side panels during startup to check for any resonance.
For the test phase, use a simple but effective procedure:
- Place a sound level meter or your phone about one meter away from the cabinet and note the idle level.
- Start a DAW session with multiple audio tracks and plug-ins, and test with a buffer size of 128 and then 256 samples.
- Monitor temperatures and power consumption during a render or bounce operation lasting ten to fifteen minutes.
- Note whether the noise level rises noticeably under full load, and compare that to your idle measurement.
Allow two to four hours for assembly, depending on your experience, and another one to two hours for BIOS tuning and sound tests. If the system is still louder than expected after tuning, first check whether an individual fan is defective before considering returning a component.
What I’ve learned from years of building quiet studio PCs
At i4studio, we don’t just build a PC and label the box “quiet.” Every build that leaves our shop has been tested with a sound level meter in the exact location where it will eventually be placed: next to a desk, under a monitor, or in a cabinet with limited ventilation. This is a different test than the one a manufacturer performs in a laboratory with unrestricted airflow, and it often yields different results.
What we add to a standard parts list is exactly the work that most DIY builders skip: an acoustic measurement before and after tuning, a BIOS profile tailored to your specific DAW and average session duration, and a fan curve that isn’t based on a factory setting but is customized to your space. A build that’s quiet in a cool, well-ventilated studio can suddenly become audible in a small, warm recording booth. You’ll only notice that difference when you test it in the actual environment, not on paper.
You can find examples of previous configurations and the corresponding sound measurements in our studio PC examples.
When It’s Better to Have Custom Work Done
Building your own PC works great if you have the time, patience, and a little experience with BIOS settings. But if you want to combine maximum silence with long sessions, reliable performance, and a system that’s precisely tailored to your DAW, a custom-built system is the logical next step.
When you request a quote, we routinely test three things: the acoustic profile of each component individually, its stability under a realistic DAW load, and the heat generated in your specific space. To provide a reliable quote, it helps if you already know which DAW you use, the average size of your sessions in terms of tracks and plug-ins, where the PC will be located (on your desk, next to it, or in a separate cabinet), and your target budget range.
Still unsure about the right specifications for your workflow? Start by checking what specs are needed for a good studio PC, or read about which studio PC is the best fit for you. We can usually provide a customized quote within a few business days, and the build itself typically takes one to two weeks, depending on our workload and component availability. Request a quote today and let us know which DAW and session size you use, and we’ll suggest a configuration that fits your budget and space.
Sources
Anyone who wants to delve deeper into the technology behind silent builds will find useful background information in the following sources:
- Build Your Own Mini PC – How to Build a Powerful, Quiet Computer
- Techniques and Tips for a Quiet PC
- Building a Truly Quiet PC: Under 22 dB Under Load
I4studio uses similar testing methods—ranging from sound measurements at a distance of one meter to DAW stress tests at various buffer sizes—as the basis for every custom-built studio PC that leaves our facility.
Frequently Asked Questions
What is an acceptable noise level for a studio PC?
Less than 25 dB(A) under load is acceptable for most recording situations, and a well-tuned build can even stay around 21 to 24 dB(A) under load.
Is air cooling quieter than water cooling in a studio environment?
Yes, generally speaking: a tower air cooler like the Noctua NH-D15 dissipates heat at a lower fan speed than an AIO requires, and doesn’t have a pump that can start to hum or resonate.
How much does a quiet studio PC cost on average?
A mid-range to high-end configuration with an AMD Ryzen 7 7800X3D and full acoustic tuning costs between €900 and €1,800, depending on memory and storage.
What causes coil whine, and is it harmful?
Coil hum is caused by vibrations in the coils of your graphics card, power supply, or motherboard under specific load conditions, and while it can be annoying, it isn’t harmful to your hardware.
When should I choose a custom-built system instead of building it myself?
Choose a custom-built system from i4studio if you want maximum silence, long sessions, and a system that has been specifically tested and tuned for your DAW and recording space.