TL;DR:
- Acoustic foam absorbs reverberation but does not provide sound insulation. True insulation stops sound leakage through walls, floors and ceilings. A good studio combines structural insulation with interior acoustic treatment for optimal sound quality.
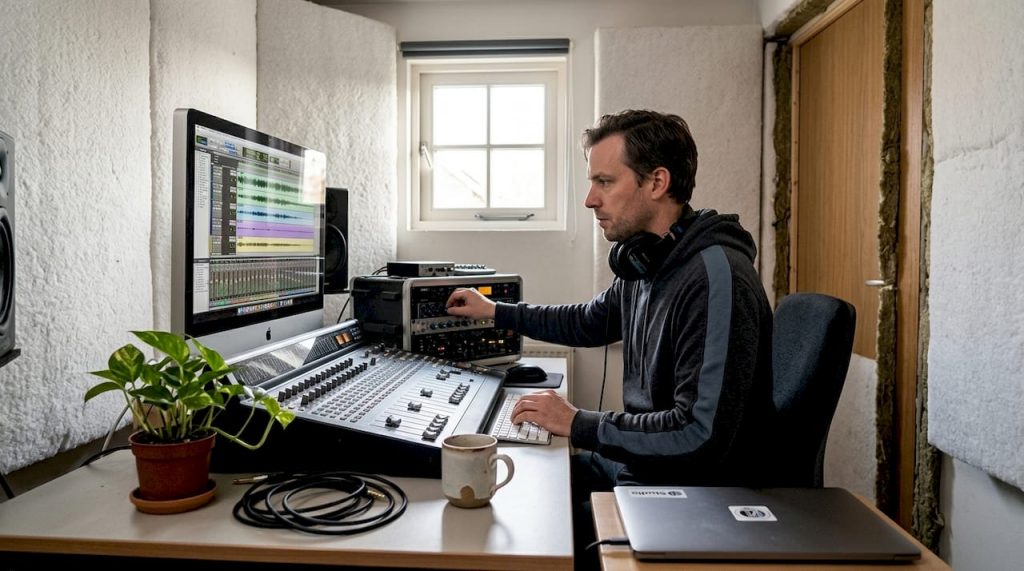
Many producers and video editors start by hanging acoustical foam and thinking that this will insulate their studio. This is the biggest misconception in the world of home studios. Foam absorbs reverberation, but it does not keep any sound out or in. True audio isolation is a completely different business, and the confusion between the two terms will cost you recording quality, mixing ratio AND neighborhood peace. This article explains exactly the difference, teaches you which materials and techniques really work, and gives you a practical framework for optimizing your space step by step.
Table of contents
- What is audio isolation (and what is not)?
- How does audio isolation work in practice?
- Acoustic treatment: absorption, diffusion and bass traps
- Common mistakes and do’s & don’ts
- Why every serious studio starts with measurement and treatment
- Want to get started with studio insulation & acoustics yourself?
- Frequently asked questions about audio insulation
Key Insights
| Item | Details |
|---|---|
| Insulation blocks sound | Audio insulation keeps sound from leaking into or out of your studio and prevents recording problems. |
| Absorption and diffusion optimize sound | Panels and bass traps are necessary to control echoes and bass problems within your studio. |
| Measuring = knowing | Before you begin: measure your space to target treatment and avoid mistakes. |
| Avoiding pitfalls | Don’t start with foam alone and avoid over-absorption without measuring. |
What is audio isolation (and what is not)?
Audio insulation means that sound does not leak through walls, floors or ceilings. Audio insulation prevents external sound from entering the studio and internal sound from leaking out. Think of heavy traffic outside, the neighbor with a drill or your own kick drum reverberating through the wall. Insulation stops that sound transmission at the construction level.
Absorption and diffusion are something completely different. Insulation and absorption are completely different approaches: absorption tackles reverberation and reflections within the room, diffusion diffuses sound to break up rigid echoes. Neither stops sound from outside or prevents your bass from sinking through the floor to the floor below.
The dangerous thing about this confusion is that you spend a lot of money on panels that solve the wrong problem. A studio full of foam sounds drier, but when an ambulance drives outside, that recording is still through noise.
Common mistakes in home studios:
- Hanging only acoustic foam and expecting sound to be blocked to the outside
- Think thicker foam also insulates better
- Forgetting that sound also leaks through the floor and ceiling
- Treating a room without first measuring what the problem is
- Start improving studio acoustics without a clear plan
Equation: insulation, absorption and diffusion

| Technique | Purpose | Typical material | Effect |
|---|---|---|---|
| Insulation | Sound blocking | MLV, drywall, mass | Prevents sound leakage |
| Absorption | Reducing reverberation | Foam, mineral wool | Shorter reverberation |
| Diffusion | Diffusing reflections | Wooden diffusers | More natural sound image |
If you understand the basics of acoustics, you can immediately see that structural insulation requires a very different approach than hanging panels.
Pro-tip: Always check the product label or specifications to see whether a panel is intended for absorption or insulation. Manufacturers sometimes use these terms interchangeably, but the technical application is fundamentally different.
How does audio isolation work in practice?
True insulation revolves around three mechanisms: mass, decoupling and the mass-spring-mass principle. Double the mass of a wall and you gain +6 dB in transmission loss. That’s not a huge leap, but when combined with decoupling and air cavities, the results quickly become significant.

The mass-spring-mass principle works as follows: two solid layers, separated by a resilient layer or air cavity, inhibit sound vibrations. Each layer acts as a filter. The energy leaking through the first wall is dissipated in the air layer and the second wall allows only a fraction to pass through.
Materials that really work:
MLV (Mass Loaded Vinyl) is a thin, heavy material that you put over walls or floors for extra mass without much thickness. Double drywall construction with an air cavity of at least 5 cm already gives a marked improvement. Insulation clamps, also called resilient channels or iso clamps, decouple the interior wall from the exterior wall so that vibrations are not directly transmitted.
Steps for studio insulation:
- Measure current sound levels inside and outside the room with a decibel meter or app
- Identify weakest spots: doors, windows, pipe penetrations
- Reinforce the mass of walls with an additional layer of plaster or MLV
- Apply an air cavity between layers for decoupling
- Seal all gaps with acoustic sealant or special door weather stripping
- Check floor and ceiling because low frequencies travel everywhere
NRC values of materials indicate how well a material absorbs, not how well it insulates. Don’t confuse the two when choosing practical insulation materials. Basic acoustical principles are the basis for any smart material choice.
Indicative dB gain per approach:
| Measure | Estimated dB gain |
|---|---|
| Additional plaster layer (12.5 mm) | +3 to +5 dB |
| MLV over existing wall | +5 to +8 dB |
| Double wall with cavity | +15 to +25 dB |
| Decoupled inner wall | +20 to +35 dB |
Acoustic treatment: absorption, diffusion and bass traps
After the insulation is in order, the second part of the puzzle begins: treating the inside of your studio. A well-insulated room without treatment sounds like an empty box, full of flutter echoes, room modes and uncontrollable bass.
Absorption panels and bass traps resolve room modes and standing waves; the ideal RT60, the time it takes for sound to drop 60 dB, is between 0.3 and 0.5 seconds for a mixing room. Too high means too much reverb; too low sounds unnatural and tiresome.
Bass traps are the most underrated treatment. Low frequencies pile up in corners of the room, giving you a huge peak at some frequencies and a deep null at others. That makes mixing on bass unreliable. Applying bass traps in all four floor corners is always the first step.
“Excessive absorption makes the room dead; foam treats only high frequencies.” Balance is everything: a mix of absorption and diffusion produces a room that sounds good as well as works pleasantly.
Placement tips for each element:
- Bass traps: always in the corners, preferably floor-to-ceiling
- Absorption panels: at the first reflection points on the sides and ceiling above the mix position
- Diffusers: on the back wall behind the listener for an open, live feel
- Combination panels: in places where both middle and high need to be controlled
Addressing the reflection points is essential for a stereo image you can trust. Without treating those points, you’ll hear the room as loud as your mix. Home studio acoustics principles make it clear that each treatment must have a specific purpose.
Pro-tip: Always measure your room before installing panels. Free software like REW (Room EQ Wizard) shows exactly where the problem frequencies are. That way you give each panel a targeted spot instead of distributing them randomly.
Common mistakes and do’s & don’ts
Now that the mechanics are clear, let’s conclude with the pitfalls we see time and time again and how to avoid them. Placing panels randomly, not using bass traps and confusion between absorption and isolation are the most common mistakes made in studio setup.
Top 5 mistakes producers make:
- Hanging foam without measuring: you’re treating a problem you don’t know about
- Do not install bass traps: the lowest frequency range remains uncontrolled
- Swapping insulation and absorption: buying the wrong products for the wrong purpose
- Ignoring door cracks and windows: one small leak undercuts all insulation efforts
- Stuffing everything with foam: the room sounds dead and high frequencies are over-absorbed
What you do need to do:
- Start with a space measurement via REW, FuzzMeasure or Sonarworks
- Apply insulation where needed first, then acoustic treatment
- Put bass traps in all corners as first step of treatment
- Use studio analysis tips to target your space
- Review the difference insulation and absorption explanation again if you are unsure about product selection
- Consult the studio acoustics guide for a complete overview
The order is crucial: first isolate, then treat, then measure and adjust. Those who reverse that order have the work done twice.
Pro-tip: Always start with measurement. REW is free, works with a simple USB microphone and shows within ten minutes where your space needs the most attention. Measuring is cheaper than starting over.
Why every serious studio starts with measurement and treatment
We see it all the time: a producer buys hundreds of dollars worth of foam panels, hangs them on the walls, and then wonders why the bass still sounds messy and recordings contain buiteномер sound. The answer is almost always the same. The order wasn’t right.
The difference between a professional studio and a hobby room is not just in the budget. It’s in the approach. Professionals measure first, then choose targeted treatment and scale based on results. Hobbyists buy by feel and keep puzzling.
Moreover, good insulation is rarely something you can do entirely by yourself. Structural modifications to walls and floors require knowledge of structural engineering and acoustics at the same time. Smart studio optimization always begins with proper analysis. Acoustic treatment has an immediate effect and is more scalable than insulation. Start there if budget is limited, but don’t ignore insulation if you really want professional results.
Want to get started with studio insulation & acoustics yourself?
You now know what insulation means, what materials work and how to avoid the pitfalls. The next step is to translate that knowledge to your specific space.

At i4studio you will find everything you need: from diffusers for optimal acoustics to an extensive bass traps assortment and a practical soundproofing manual. We help you not only with the products, but also with tailored advice: from room measurement to placement. Whether you are optimizing a small home studio or setting up a full-fledged recording room, we are happy to think along with you.
Frequently asked questions about audio insulation
What is the difference between insulating and absorbing?
Insulating and absorbing are completely different approaches: insulating keeps sound in or out, absorbing minimizes reflections in the space itself.
Can I effectively insulate my studio with foam alone?
No. Foam absorbs reverberation but does not insulate. Mass and construction are essential against sound leakage. The ideal RT60 is between 0.3 and 0.5 seconds, which you only achieve with a combination of insulation and treatment.
How do I know how much insulation I need?
First, measure sound leakage with measurement software. Measure with REW or FuzzMeasure for targeted treatment, and consider room type, neighbor noise and desired recording quality.
What exactly do bass traps do?
Bass traps reduce standing waves, peaks and zeros in the low frequencies for more reliable bass reproduction in your mix.
Should I hang everything full of panels?
No. Too much absorption sounds unnatural and tiresome. Excessive absorption makes the room dead; a balance of absorption, diffusion and a living feeling in the room is the ideal end result.