Are you hearing sudden dropouts, clicks, or crackling in your DAW on a 12th-generation Intel processor or newer? If so, disabling the E-cores (efficiency cores) might help. You can do this in your motherboard’s BIOS or UEFI, usually under the advanced CPU settings. Keep in mind, though, that this is a targeted adjustment and not a standard tweak. It solves one specific problem: Windows assigning real-time audio tasks to the wrong cores. In this article, you’ll learn when it’s worth doing, how to do it for different motherboard brands, what alternatives are available, and what to do if the problem persists.
In a nutshell
- E-cores are energy-efficient cores designed for background tasks. P-cores are intended for demanding, latency-sensitive processes such as your DAW and plugins.
- Disabling them is especially helpful if you experience irregular dropouts while the CPU meter is low—for example, when your DAW goes into the background.
- You can disable E-cores in the BIOS/UEFI. The name and location of the option vary by motherboard. On many boards, you can also disable only some of them.
- There’s also an alternative that doesn’t require the BIOS: you can route processes to the P-cores via software.
- Is the stuttering still happening? Then the cause is often a driver, Wi-Fi, or USB issue. Check that first with LatencyMon.
Table of contents
- What are E-cores, and why does your DAW notice them?
- When does disabling them help, and when doesn’t it?
- Check first, then adjust the BIOS
- Disabling E-cores in the BIOS: Step by Step
- Disabling only some of the E-cores
- An alternative without using the BIOS: routing processes to the P-cores
- How will this affect latency and performance?
- Will the dropouts persist? Here’s how to troubleshoot further
- Our take on E-cores in the studio
- A studio PC that runs stably from day one
- Frequently Asked Questions
- Sources
What are E-cores, and why does your DAW notice them?
Since Alder Lake (the 12th-generation Core), Intel has been using a hybrid architecture with two types of cores in consumer processors. P-cores and E-cores each have their own role: E-cores are designed for energy efficiency and background tasks, while P-cores are designed for demanding tasks where every millisecond counts.
In most software, you won’t notice this at all. Intel’s Thread Director provides hints to the Windows scheduler, which determines which thread runs on which core. According to Tweakers, Microsoft has modified the scheduler for this purpose, but this task allocation is complex and is still being further improved.
Audio is a special case. Your DAW must deliver each buffer on time. If even one audio thread happens to land on an E-core that can’t finish the task within that buffer time, you’ll hear it immediately as a click or a gap in the sound—even if the rest of the processor is doing almost nothing.
You can see this behavior reflected in real-life stories from the studio world:
- A Cubase user on the Steinberg forum reports that sudden dropouts disappeared after he disabled the E-cores.
- On Microsoft Q&A, users describe how programs slow down as soon as they are minimized. Windows treats a window running in the background as less important, and this also affects a DAW that you temporarily minimize.
- A Dutch Cubase user writes that the Thread Director also works with Windows 10, but isn’t optimized for it, which increases the likelihood of problems.
When is it helpful to switch it off, and when isn’t it?
Not every cracking sound is caused by E-cores. Use this table to match your symptom to the most likely cause.
| What you hear or see | Probable cause | Does turning off the E-cores help? |
|---|---|---|
| Dropouts at low CPU load, often irregular | Audio threads on E-cores | High probability that this is the case |
| Problems occur as soon as the DAW goes into the background | The scheduler gives priority to the active window | Highly likely |
| Crackling only occurs during a full session with heavy plugins | Insufficient processing power or buffer size | Minimal; use a larger buffer or a more powerful system |
| Ticks that coincide with Wi-Fi, USB, or network activity | High DPC latency caused by a driver | No, fix the driver first |
| Delay when playing back a plugin or a bus | Plugin latency or delay compensation | No, this is a mix setting |
| Clicks after waking up from standby | Power Management and Core Parking | Sometimes, check the power settings first |
XDA Developers offers some practical advice: try disabling cores if you experience inconsistent performance with a specific workload, and re-enable them if it doesn’t make a difference. That way, you won’t sacrifice processing power for nothing.
Check first, then enter the BIOS
Before you start messing with the BIOS settings, you should check a few quick things. Often, the solution is right here.
- Update your DAW. Newer versions often handle hybrid processors better.
- Check your Windows version. Windows 11 is better suited to the hybrid architecture than Windows 10.
- Set the power plan to “High Performance. ” An energy-saving profile parks cores and allows them to scale back to lower clock speeds.
- Check your buffer size. If it’s very small, try increasing it by one step first and see if that changes the problem.
- Measure the DPC latency using LatencyMon. If it points to a specific driver, then the problem lies there and not with the E-cores.
- Update the BIOS and chipset drivers. Manufacturers are improving support for hybrid CPUs with new firmware.
In our guide on optimizing Windows 11 for audio, you can read about the effect of each setting. If you specifically want to reduce latency, be sure to check out the Windows settings for a low-latency audio PC.
Disabling E-cores in the BIOS: Step-by-Step Guide
The basic steps are the same on every motherboard. Only the name and location of the option differ depending on the manufacturer and BIOS version.
- Restart the PC and press Del or F2 during startup to open the BIOS.
- Switch to advanced mode (usually with F7).
- Find the menu with CPU settings, usually under Advanced, Overclocking, or Tweaker.
- Find an option for the E-cores or efficient cores and set it to 0 or disabled.
- Save with F10 and restart.
- In Task Manager, under Performance and then CPU, check whether the number of logical processors has decreased.
ASUS
On ASUS motherboards with an Intel chipset, you’ll find this setting under “Advanced” and then “CPU Configuration.” According to ASUS, you can disable E-cores on a per-core basis or set the number of active E-cores there. So you can choose whether to turn them all off or let some of them run.
MSI, Gigabyte, and ASRock
On MSI motherboards, this option is usually found under “Advanced CPU Configuration” in the Overclocking menu. On Gigabyte and ASRock motherboards, look in the advanced CPU settings for an option listing the number of active E-cores. The exact name varies by BIOS version. Can’t find it? Then look up “E-core” or “efficient core” in your motherboard’s manual. On motherboards with a B-chipset, the options are sometimes more limited than on Z-chipset motherboards.
Laptops, mini PCs, and pre-built systems
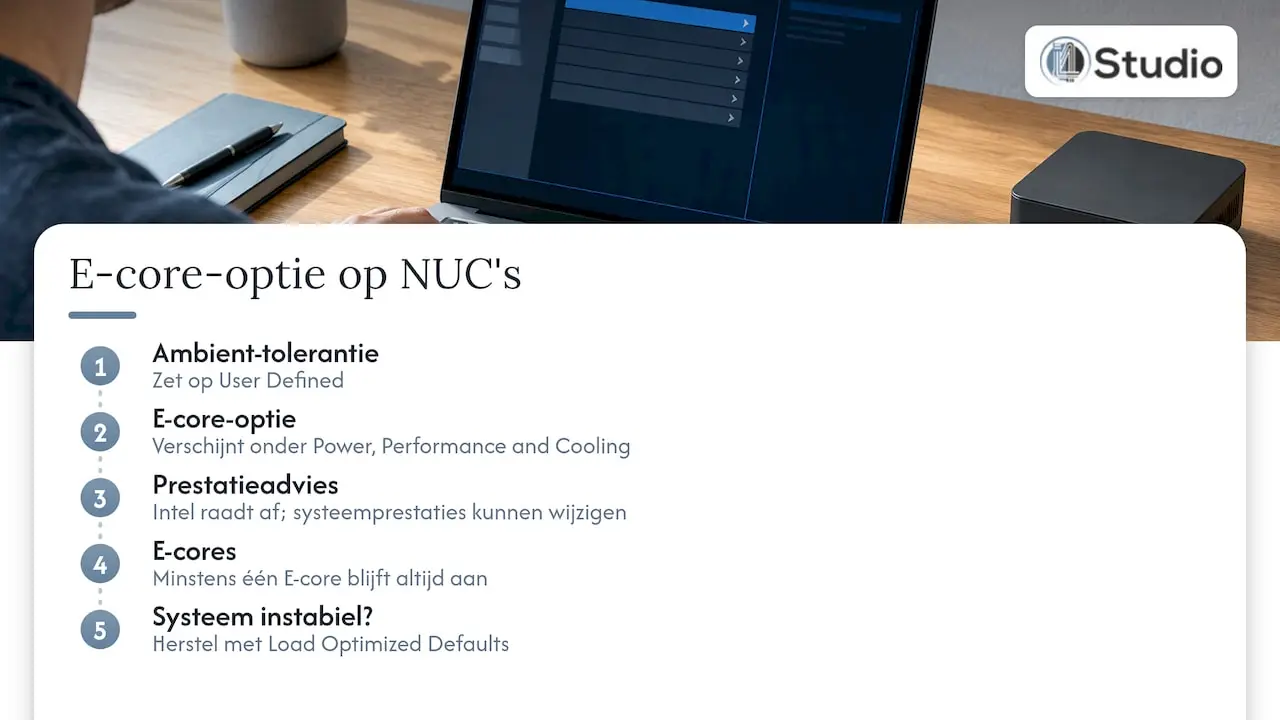
On laptops and pre-built PCs, the BIOS is often stripped down, and the option may not be available at all. On Intel NUCs, the setting is available but hidden. You must first set the External Ambient Temperature Tolerance to “User Defined ” before the E-core option becomes visible under “Power, Performance, and Cooling.”
Please note: ASUS, which has taken over Intel’s NUC line, states that Intel does not recommend disabling E-cores on NUCs, as this can affect system performance. Additionally, at least one E-core will always remain active. If you disable them and the system becomes unstable, you can reset the BIOS to its default settings using “Load Optimized Defaults.”
Disable only some of the E-cores
Many readers wonder if it’s all or nothing. That depends on your motherboard. As described above, ASUS lets you choose per core or set a specific number. Other manufacturers often offer a similar option for the number of active cores.
A middle ground can work well for producers who also edit video or do a lot of exporting:
- Reserve some of the E-cores for Windows, updates, cloud synchronization, and antivirus scanners.
- Keep the P-cores free for your DAW and resource-intensive plugins.
- Test step by step: rearrange the E-cores into groups and run the same resource-intensive session each time. This way, you’ll find the point where performance remains stable while maximizing computing power.
Alternative without BIOS: Directing processes to the P-cores
If you don’t want to disable the E-cores in the BIOS, you can specify where your DAW runs in Windows. The CoreDirector program keeps processes off the E-cores using Efficiency Mode, CPU sets, or CPU affinity. With affinity, you can restrict your DAW to the P-cores, while the E-cores remain available for the rest of the system.
You can also manually set a process’s affinity using Task Manager. However, this setting only applies per session: you’ll need to do it again after restarting the DAW. A tool that applies this automatically is more convenient in practice.
The advantages of this approach:
- You retain full computing power for rendering, exports, and video.
- You can choose on a per-program basis.
- You don’t have to work in the BIOS, which often isn’t possible on laptops anyway.
Be careful with plugins that run outside the DAW process, such as some bridges and sandboxed plugins. These have their own process and must be configured separately.
How does this affect latency and performance?
Disabling e-cores is a trade-off. You gain predictability for real-time audio and sacrifice computing power for tasks that scale across many cores.
| Component | E-cores on | E-cores off |
|---|---|---|
| Real-time audio and low buffers | Risk of occasional dropouts due to incorrect allocation | More predictable; all audio threads on P-cores |
| Offline rendering and bouncing | Fastest, all cores are used | Slower, fewer cores |
| Video Export and Encoding | Takes full advantage of all cores | Significantly slower with multithreaded encoders |
| Background Tasks | Running smoothly on the E-cores | Share the P-cores with your DAW |
| Power Consumption and Heat | More energy-efficient under light load | May be slightly higher |
For those who only create music, the benefits often outweigh the drawbacks. If you also edit video, the middle ground—using some of the E-cores or an affinity tool—usually offers the best balance. You can read more about how processors from different generations perform in a studio in “The Best Intel Processor for an Audio PC” and in our comparison of the Intel 14900K vs. Ultra 9 for audio and video. If you’re unsure about which platform to choose, our guide “Intel or AMD for Music Production ” lays out the options.
Will the dropouts stay? Here’s how to continue your search
If the E-cores are off and you can still hear a clicking sound, the problem lies elsewhere. Work through this list from top to bottom.
- Run LatencyMon. Let the program measure for a few minutes while your DAW is playing. It will show which driver has the highest DPC or ISR time.
- Update or temporarily disable those drivers. Common culprits include Wi-Fi adapters, Bluetooth, network cards, and graphics drivers.
- Check the USB connection. Connect your audio interface directly to the PC—not through a hub—and try a different port or controller.
- Check your power settings. Disable “Selective USB Suspend” and choose a “High Performance” power plan. Core parking can also cause glitches if parked cores take too long to become active again.
- Consider plugin latency separately. A delay that you hear as a timing difference between tracks is different from a dropout. To learn how to handle this during a mixing session, read this article on plugin latency in mixing sessions.
- Update the ASIO driver for your interface. An outdated driver often causes exactly this kind of problem.
For issues related to the interface itself, we have a separate guide: Troubleshooting Audio Interface Problems. If you’re working in Cubase and notice peaks in the ASIO meter, read our guide on how to prevent CPU spikes in Cubase.
If your audio interface is getting old and you keep running into driver issues, it might be worth considering a new audio interface with well-maintained ASIO drivers. Check out our selection of audio interfaces, such as the Audient EVO 8 USB audio interface for a home studio with multiple inputs.
Our Take on E-cores in the Studio
We build studio PCs for producers, video editors, and studio owners, and stability is our top priority. A hybrid Intel processor offers plenty of processing power, but in a studio, it’s not just about how many cores you have. What matters is that every audio buffer is ready on time, even at low latency.
That’s why we look at the entire system: the processor, the motherboard, the BIOS settings, the Windows configuration, and your audio interface’s drivers. Disabling E-cores is just one part of that whole process. If you toggle that setting without considering the context, you might solve one problem only to encounter another, such as longer export times.
Our approach is to tailor the setup to your workflow. If you only make music with a lot of real-time instruments, we’ll configure the system differently than we would for someone who also edits 4K video. And if you do run into any issues, you’ll receive personalized support from someone who understands how a DAW works.
Harold
A studio PC that runs smoothly from day one
Would you rather not spend your evenings in BIOS and LatencyMon? Our custom-built studio PCs start at €1,099 and are assembled and configured for audio and video, with a focus on stability, low latency, and personalized support from industry experts.
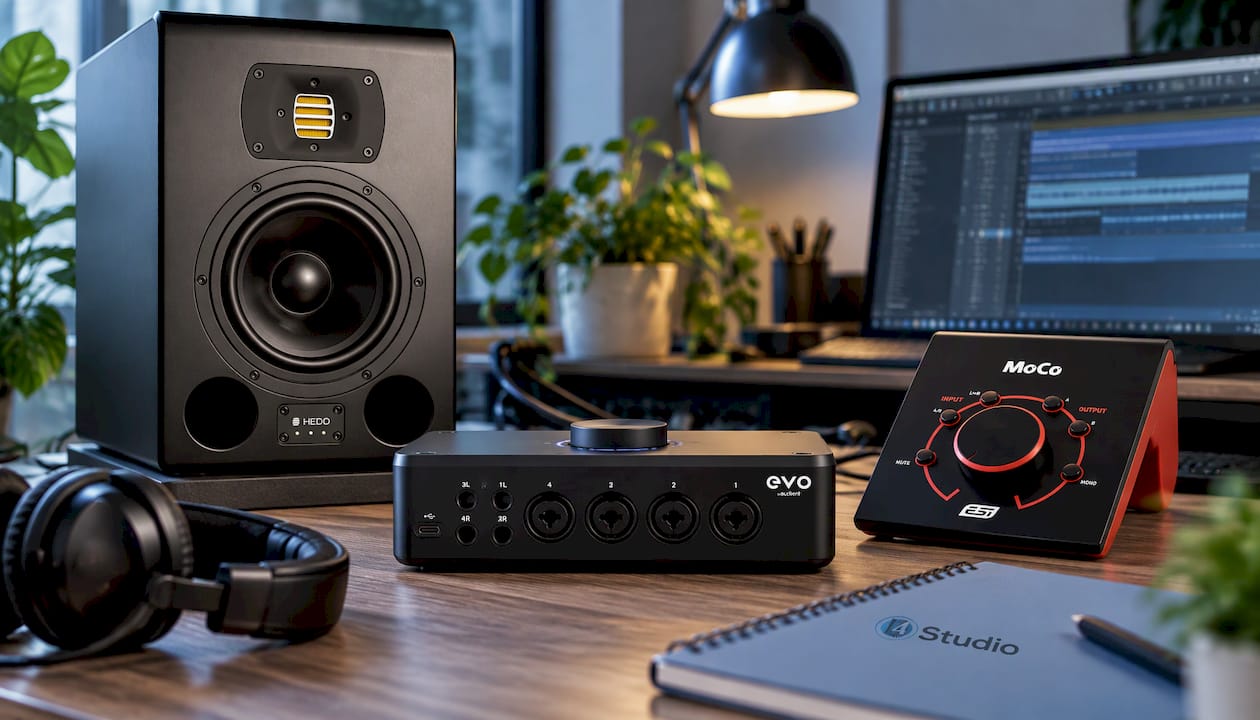
You choose the configuration that best suits your sessions, and we’ll make sure the hardware and settings are optimized for each other. Check out the options available on our studio PCs. If you’re setting up your studio, be sure to also check out our studio monitors, studio equipment, and music production software.
Frequently Asked Questions
Will disabling E-cores damage my processor?
No, you can only disable cores through an official BIOS setting. Nothing will be physically damaged. If the system becomes unstable or slows down, simply revert the setting or restore the BIOS default settings.
Can I disable E-cores in Windows itself?
Windows does not have a setting to completely disable E-cores. However, you can control which cores a program uses by adjusting the affinity in Task Manager or using a tool like CoreDirector. To completely disable them, you’ll need to access the BIOS.
How many achievements do I submit?
For real-time audio, you’ll usually notice the biggest improvement in stability. However, offline rendering, bouncing, and video export will be slower because fewer cores are involved. Exactly how much slower depends on your processor and how well the software scales across multiple cores.
Should I also turn off Hyper-Threading?
That’s a personal choice. Some producers turn it off for more predictable latency, while others keep it on for more processing power. Test it with a resource-intensive session and change one setting at a time so you can see the effect.
I can’t find the option in my BIOS. What should I do?
First, update your BIOS, as newer versions sometimes include this option. Then check the section on CPU settings in your motherboard’s manual. If the option isn’t there—as is often the case with laptops—use an affinity tool to keep your DAW running on the P-cores.
Sources
Tweakers: Here’s the difference between P-cores and E-cores
Steinberg Forums: Cubase 14, Plug-ins, and E-cores
Microsoft Q&A: Windows 11 22H2 Thread Director Issues with Intel 12th Gen
Skippy Studio: Cubase Configuration
XDA Developers: 3 Ways Disabling CPU Cores Can Make Your System Faster
ASUS: How to Disable Some CPU Cores in the BIOS
William Lam: How to Disable the E-cores on an Intel NUC
ASUS: Is it possible to disable E-cores on a NUC?
Bitsum: CoreDirector