
An audio synthesizer is an electronic instrument that generates sound using oscillators, shapes that sound with filters, and controls the dynamics using envelopes and LFOs. Whether you’re making beats in Ableton Live, exploring hardware at a music store, or expanding your home studio with I4studio: once you understand how the signal path works, everything will click into place. Experts consider the filter to be the most important creative control within a synthesizer, and that’s exactly where this guide begins.
What you’ll learn here:
- The core components of a synthesizer and how the signal flows from the source to the output
- The Main Types of Synthesizers and When to Choose Each One
- Three reproducible patches (bass, lead, pad) that you can try out right away
- Practical purchasing and setup criteria for the Dutch market
Pro-tip: Read the sections on the filter and the patch walkthroughs together. That’s where theory is immediately put into practice.
Table of contents
- How does a synthesizer work on the inside?
- What types of synthesis are there, and when do you use them?
- Why is the filter the most creative part?
- Three reproducible patches: bass, lead, and pad
- How do you choose your first synthesizer?
- What do you need to get started with a synth at home?
- Key insights
- What Producers Often Overlook
- I4studio can help you with hardware and studio setup
- Recommended Resources
- Frequently Asked Questions
How does a synthesizer work on the inside?
Basic waveforms—sine, sawtooth, square/pulse, and noise—determine the harmonic content and serve as the starting point for every synthesized sound. From the oscillator, the signal passes through the filter, then through the amplifier (VCA), and finally to the output.
Here is a list of the key components:
- Oscillator: generates the raw waveform and determines the pitch
- Filter: cuts or boosts frequency bands; controls the timbre
- Envelope (ADSR): controls how a sound begins (attack), continues (sustain), and fades out (release)
- VCA: determines the final volume based on the envelope
- LFO: a low-frequency oscillator that modulates other parameters, such as filter cutoff or panning
- Modulation Matrix / CV/Gate / MIDI: connects all these elements to each other or to external equipment
Imagine the signal path as a short chain: oscillator → filter → VCA → effects → output.
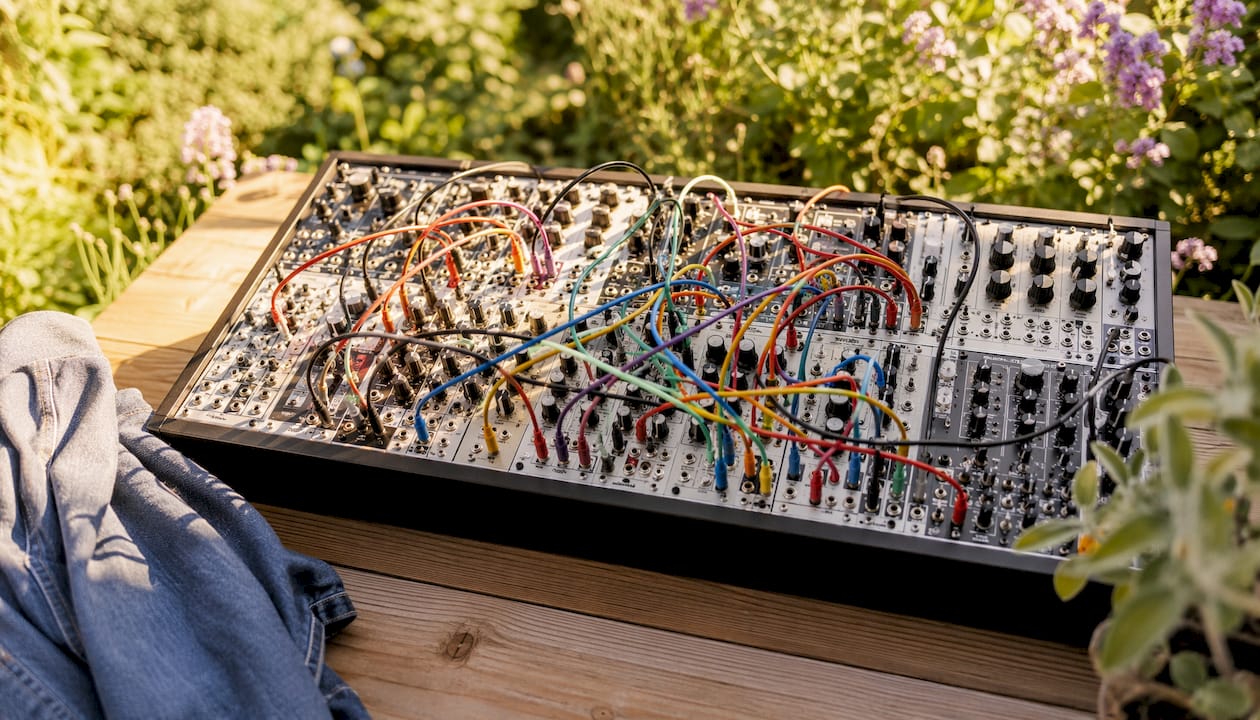
Patching means you decide which source modulates which destination. An LFO that modulates the filter cutoff gives you an automatically varying sound. An envelope that modulates the VCA determines whether a note sounds short and percussive or has a long decay.
Pro-tip: Start by building the track “dry“: set up the oscillator, filter, and envelope without any effects. Only once the basic sound is right should you add reverb or delay. That way, you can hear exactly what each component contributes.
What types of synthesis are there, and when do you use them?
Several synthesis principles coexist, each with its own sonic character and application.
- Subtractive: starts with a rich waveform and filters out frequencies. A classic choice for basses, leads, and pads. Moog and Korg are the leading brands in this segment.
- FM (frequency modulation): one oscillator modulates another, producing metallic and bright sounds. Think of the Yamaha DX7 sound you hear in ’80s pop and modern house music.
- Wavetable: uses stored waveforms that you can scan through to create dynamic textures. Xfer Serum is the go-to choice for producers who want to create complex leads and pads in a DAW like Ableton Live.
- Granular: breaks a sample down into small granules and rearranges them. Ideal for atmospheric textures and experimental sounds. Electron sequencers work well with granular plugins.
- Modular: You build your own signal path using individual modules. Utility modules such as mixers and attenuators are essential for managing signal levels. Arturia’s modular software environment (Pigments) and Eurorack hardware systems are popular entry points.
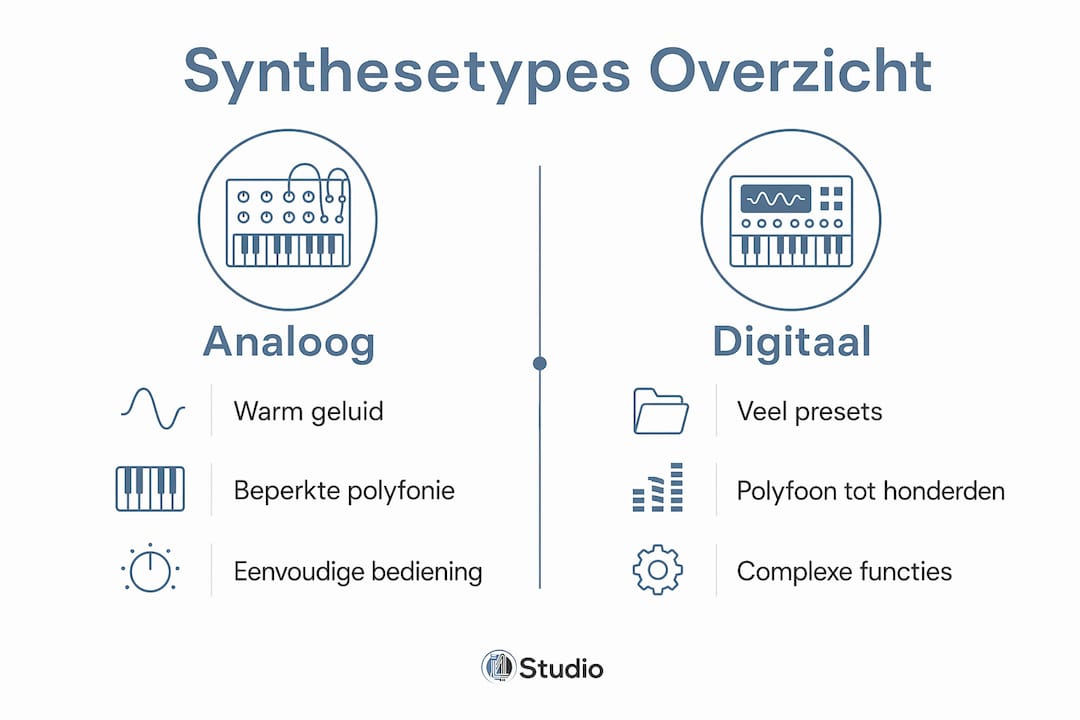
- Digital vs. analog: Digital synthesizers offer a wider range of sounds thanks to complex algorithms and can produce sounds that are physically impossible with analog technology. Analog remains popular for its character and natural “drift.” Polyend combines the best of both worlds in hybrid hardware.
| Synthesis Type | Best for | Budget Class | Polyphony | Analog/Digital | Operation | Connectivity | Portability |
|---|---|---|---|---|---|---|---|
| Subtractive (Moog, Korg) | Bass, leads, live | entry-level to advanced | Mono to Poly | Analog | Buttons, keyboard | MIDI, CV/Gate, audio | Desktop/rack |
| FM (Korg Opsix, DX7) | Bright, metallic, electric piano | entry-level to mid-range | Polyphonic | Digital | Screen + Buttons | MIDI, USB | Desktop |
| Wavetable (Xfer Serum) | Leads, pads, sound design | entry | Polyphonic | Digital | Screen/DAW | VST/AU in DAW | Software |
| Granular (Arturia Pigments) | Textures, ambient | entry | Polyphonic | Digital | Screen/DAW | VST/AU in DAW | Software |
| Modular (Eurorack) | Experimental, live | moderate to high | Variable | Analog/Digital | Patch cables, buttons | CV/Gate, MIDI, audio | Rack |
| Hybrid (Polyend, Elektron) | Live, studio, sequencing | on average | Paraphonic/poly | Hybrid | Screen + Buttons | MIDI, USB, CV | Desktop/laptop |
Why is the filter the most creative part?
Filters are the most important creative tool in a subtractive synthesizer because they enable dynamic movement and dramatic tonal shifts. While the oscillator provides the raw material, the filter gives the sound its character.
Three parameters you need to know:
- Cutoff frequency: determines which frequencies are passed. Low = dark and muffled; high = bright and crisp.
- Resonance: amplifies the frequencies around the cutoff, producing a characteristic peaking or “singing” effect.
- Poles/slope: A 24 dB/octave filter (4-pole, as in the Moog ladder) has a steeper roll-off than a 12 dB filter and sounds fuller.
A Simple Four-Step Filter Sweep:
- Select a sawtooth waveform on your oscillator
- Set the resonance to 30–60%
- Link an envelope to the cutoff: short attack, medium decay, low sustain
- Slowly increase the envelope depth and listen to how the sound opens and closes
Pro-tip: Next, route an LFO to the cutoff at a slow speed (0.1–0.5 Hz). The sound will start to breathe without you touching a thing. This is the foundation of moving pads and lively basses.
Three reproducible patches: bass, lead, and pad
Patch 1: Solid Bass
- Oscillator: sawtooth wave, tune to 0 cents; optionally, blend in a suboscillator an octave lower
- Filter: low-pass, cutoff at 30–40%, resonance at 20%
- Amp envelope: attack 0 ms, decay 200 ms, sustain 50%, release 80 ms
- Drive: Add a touch of overdrive for extra body
Variations:
- Increase resonance to 50% for an acid-bass sound
- Set the cutoff and envelope depth high for a classic “wah” bass sound
- Test in Ableton Live using a MIDI clip with low notes (C1–C2)
Patch 2: Clear Lead
- Oscillator: Mix sawtooth and square waves (50/50), or use a wavetable position in Xfer Serum
- Filter: cutoff at 60–70%, resonance at 35%
- Amp envelope: attack 5 ms, decay 300 ms, sustain 70%, release 150 ms
- LFO: linked to pitch for vibrato, speed 5–6 Hz, depth subtle (5–10 cents)
Variations:
- Add unison (2–4 voices, slight detuning) for a broader sound
- Increase the filter envelope depth for a more expressive touch
- Use a MIDI controller with aftertouch to dynamically control vibrato
Patch 3: Wide Path
- Oscillators: three oscillators, slightly detuned (±8–12 cents), or unison mode
- Filter: cutoff at 50%, low resonance (10–15%), slow filter LFO (0.1 Hz)
- Amp envelope: attack 800 ms, decay 1 s, sustain 80%, release 2 s
- Effects: reverb with a long decay (3–5 s), subtle stereo delay
Variations:
- Pan the oscillators slightly apart to create width
- Modulate the LFO speed with a second LFO to create organic movement
- Export the track as an audio clip in Ableton Live and use it as a sample in a granular plugin
How do you choose your first synthesizer?
Purchasing Checklist:
- Budget: Set a realistic budget that includes cables, an interface, and any necessary software
- Polyphony: mono for bass and leads, poly for chords and pads
- Analog or digital: analog for character and tactile controls, digital for versatility and memory
- Interface: lots of buttons = more direct; screen = more features but a steeper learning curve
- Connectivity: MIDI, USB, and CV/Gate determine how you integrate the synth into your setup
- Size: desktop, keyboard, or rack — choose based on your workspace
Budget Zones:
| Zone | Price Range | What to Expect |
|---|---|---|
| Entry Level | — | Limited polyphony, solid basic sound, good learning features |
| Mid-range | — | More voices, better connectivity, more extensive modulation |
| Pro | — | Full polyphony, high build quality, extensive I/O |
Practical buying advice: always try it out before you buy. Ask the store to let you edit a preset, test the MIDI latency, and check that the knobs feel comfortable to use. The secondhand market in the Netherlands (Marktplaats, local music stores) offers good opportunities, but pay close attention to the condition of the potentiometers and the functionality of all connections.
Pro-tip: Virtual synths run within your DAW and are ideal for home studios with limited space. Start with a free or inexpensive VST to learn the basics, and then invest in specific hardware.
What do you need to get started with a synth at home?
Minimum setup:
- Synthesizer (hardware or VST plugin)
- Low-latency audio interface
- Headphones or studio monitors
- DAW (Ableton Live or similar)
- USB or MIDI cable
Minimum vs. Recommended:
| Part | Minimum | Recommended |
|---|---|---|
| Audio interface | Stereo input/output, 24-bit | Multiple inputs/outputs, 24-bit, low latency |
| Monitors/Headphones | Closed-back headphones | Studio Monitors + Acoustic Treatment |
| Computer | 8 GB RAM, quad-core | enough RAM, fast SSD, dedicated audio PC |
| MIDI controller | Optional | keys with aftertouch |
A stable, low-latency computer is essential for MIDI routing and DAW integration. Anyone who runs a lot of VST synths at the same time will quickly realize that a standard laptop isn’t up to the task. A high-quality audio converter makes the difference between a muddy, flat mix and a clear, detailed recording. In the Netherlands, USB and MIDI are the most common connections; CV/Gate is relevant if you want to connect modular hardware modules.
Key insights
A synthesizer only sounds good once you understand the signal path: the oscillator provides the raw material, the filter gives it character, and the envelope and LFO add movement.
| Item | Details |
|---|---|
| Signal Path | Oscillator → filter → VCA → effects → output is the standard signal path in every synth. |
| The Filter as the Creative Core | The cutoff and resonance determine the character; connect an LFO for dynamic sounds. |
| Dry Building | Set up the oscillator, filter, and envelope without any effects to fully understand each component. |
| First Purchase | Choose based on polyphony, connectivity, and budget; always try it out before you buy. |
| I4studio as a Partner | I4studio provides DAW PCs, audio interfaces, and acoustic solutions for a complete synth setup. |
What Producers Often Overlook
Many beginners immediately invest in expensive hardware even though they haven’t mastered the basics yet. That’s understandable, because a nice synthesizer can be a great source of motivation. But the reality is that a free VST synth in Ableton Live will teach you more about filters, envelopes, and modulation than a week of watching YouTube videos about hardware.
What I see producers missing in practice: they skip the “dry build” phase. They load a preset, add reverb and delay, and then wonder why their mix sounds muddy. The solution is simple: always start with a bare oscillator and build from there. Only once the fundamental tone is in place does the sound deserve its effects.
For anyone serious about growing: a good computer is just as important as a good synth. If you’re running ten VST synths at once with low latency, you need a machine that can handle it. That’s exactly where I4studio makes a difference, with custom-built studio computers tailored for audio production.
I4studio can help you with hardware and studio setup
Want to build a professional synth setup? I4studio offers custom DAW PCs configured for low latency and heavy plugin loads, audio interfaces, acoustic panels, and an ergonomic studio desk to complete your workspace.

Whether you’re just starting out with your first synthesizer or looking to expand an existing studio, check out the selection at I4studio.nl and get immediate advice on the setup that best fits your workflow.
Recommended Resources
- Synthesizer — Wikipedia: A comprehensive historical and technical overview of the development of synthesizers, from Moog to modern digital systems.
- Subtractive Sound Synthesis — Thomann Netherlands: A clear explanation of oscillators, filters, and envelopes with practical examples for beginners.
- How Does a Synthesizer Work — eMastered: An Overview of Synthesizer Types and the Advantages of Digital Versus Analog Systems.
- The Basics of Synthesis — Finetune.audio: Practical Patch Tips and the “Build from Scratch” Approach for Beginners.
- Synthesizers for Beginners — KeyboardKopen.nl: buying advice that focuses on budget, connectivity, and questions to ask when testing.
- Modular synthesizer — Wikipedia: an explanation of utility modules and how modular systems work.
- I4studio: resources and products for producers who want to integrate synths and studio PCs.
See also the official Ableton Live documentation for MIDI routing and workflow integration with hardware synthesizers.
Professionals in the audiovisual sector who work with synthesizers can also find flexible assignments in sound and production through Nowjobs.
Frequently Asked Questions
What is the difference between analog and digital synthesizers?
Analog synthesizers use electrical voltages to generate sound and are known for their warm character and natural drift. Digital synthesizers use algorithms and offer a much wider range of sounds, including sounds that are physically impossible to produce with analog technology.
Which synthesizer is best for beginners?
Start with a VST synth in your DAW, such as Xfer Serum or a free alternative, to learn the basics without a major investment. If you want hardware, choose a model with direct controls and a clear interface, such as the Korg MicroKORG or an entry-level model from Arturia.
How do I use an LFO to create moving sounds?
Connect the LFO to the filter cutoff at a slow speed (0.1–0.5 Hz) and a moderate depth. The sound will automatically begin to breathe, instantly making pads and basses more lively.
What’s the minimum I need to use a synth at home?
A synthesizer (hardware or VST), an audio interface, headphones or monitors, and a DAW are all you need to get started. A stable computer with enough RAM is essential if you want to run multiple VST synths at the same time.
What exactly does the filter do in a synthesizer?
The filter determines which frequencies are passed and which are cut off. By modulating the cutoff and resonance with an envelope or LFO, you can give a sound movement and character.