Many music producers treat their studio with so much absorption material that the end result is counterproductive. A space that is too “dry” sounds unnatural, lacks energy and makes it difficult to make good mixing decisions. Too much absorption literally makes a studio “dead,” and that’s a trap that many home studio owners underestimate. In this article, we explain exactly what absorption does, how to find the right balance with diffusion, what materials work best, and how to apply it step by step in your own studio.
Table of contents
- What is absorption and why is it important in a studio?
- The balance between absorption and diffusion: a vibrant studio
- Materials and methods: which absorption works best?
- Using absorption strategically: here’s how to improve sound quality
- Optimize your studio: solutions and products
- Frequently asked questions about absorption in studios
Key Insights
| Item | Details |
|---|---|
| Absorption prevents reflections | Absorption materials reduce reverberation and echo, instantly improving your recording and mix. |
| Balance is crucial | Too much absorption makes a studio unpleasant; diffuse for a lively sound. |
| Material choice is decisive | Different panels and materials affect the sound image, choose consciously for each situation. |
| Strategic placement. | Absorption works best at primary reflection points and appropriate heights. |
| Measuring and fine-tuning | By listening and measuring, you achieve the perfect balance for your studio. |
What is absorption and why is it important in a studio?
Absorption is the process of converting sound waves into heat through contact with a porous or soft material. In a studio, this reduces unwanted reflections, so you hear clearer and more accurate sound from your monitors. Without absorption, sound bounces from wall to wall, leading to colorful reflections and a distorted view of your mix.
The basics of acoustics teach us that every room has its own acoustic character, determined by dimensions, materials and furnishings. Absorption prevents unwanted reflections and echo, which directly affects the quality of your recordings and mixes. Without proper treatment, you will not hear what is really on your recording, but a colored image of the room itself.
Here are the main acoustical problems that absorption solves:
- Flutter echo: Fast, repeating echo between two parallel walls
- Standing waves (modes): Frequencies that accumulate in corners and along walls
- Early reflections: Direct reflections from walls next to and behind your monitors
- Reverberation (RT60): The time it takes for sound to die away in a room
The difference between absorption and diffusion is crucial. Absorption removes energy from the room. Diffusion actually disperses that energy, keeping the sound alive without distracting reflections. Both processes are necessary for a good-sounding studio.

| Acoustic problem | Cause | Solution |
|---|---|---|
| Flutter echo | Parallel hard walls | Absorption panels or diffusers |
| Standing waves | Room resonance | Bass trap in corners |
| Early reflections | Side walls next to monitors | Absorption panels at reflection points |
| Excessive reverberation | Too little treatment | Combination absorption and diffusion |
Want to know how to correctly tackle soundproofing in studio? Then it’s important to first understand what problems you want to solve before buying materials.
“A well-treated studio sounds neutral, not quiet. The goal is control of reflections, not elimination of all sound.”
The balance between absorption and diffusion: a vibrant studio
Here is the biggest misconception in studio acoustics. More absorption is not always better. A room completely lined with absorption material sounds unnatural and exhausting to work in for long periods of time. You lose the sense of space and depth in your mix.

The balance between absorption and diffusion is crucial: too much absorption makes the room “dead,” while diffusion at the back wall creates liveliness. A good rule of thumb is to treat the front of the room (around the monitors) with absorption and the back with diffusers.
Common mistakes when dealing with a studio:
- Only use absorption without diffusion
- Panels placed too high or too low relative to the listening position
- Ignore corners where bass frequencies accumulate
- Ceiling not included in treatment
- Use cheap thin foam that absorbs only high frequencies
| Position in space | Recommended treatment | Reason |
|---|---|---|
| Side walls next to monitors | Absorption (early reflections) | Prevents coloring reflections |
| Back wall listening position | Diffusion | Retains liveliness and depth |
| Corners | Bass trap (low frequency absorption) | Reduces accumulation of bass |
| Ceiling above mix position | Absorption | Eliminates vertical reflections |
| Front behind monitors | Absorption or combination | Reduces direct rebound |
Pro-tip: Clap your hands at the listening position. Do you hear a sharp, metallic echo? Then there are too many hard parallel surfaces. Do you hear nothing at all? Then the room is probably too dry and you’re missing diffusion.
Good acoustic panels for studio combine absorption and diffusion in one product, which is ideal for smaller home studios where space is limited. Also look for effective acoustic panels designed specifically for the frequency ranges most problematic in music production.
Materials and methods: which absorption works best?
Different materials absorb frequencies differently. This is an important fact, because cheap acoustic foam 5 cm thick absorbs almost only high frequencies above 1 kHz. For balanced treatment, you need materials that also address mid and low frequencies.
Here is an overview of the most commonly used materials:
- Glass wool (50 to 100 mm): Excellent broadband absorption, effective from mid to high frequencies. Must be wrapped in fabric for studio use.
- Acoustic foam (melamine or polyurethane): Easy to fit, but effective only at higher frequencies unless thick enough (at least 10 cm).
- Bass trap (corner absorber): Specially designed for low frequencies. Filled with glass wool or rock wool and placed in corners where bass accumulates.
- Wood diffusers (QRD or skyline): No absorption, but diffuse sound in a controlled manner. Ideal for rear walls.
- Combination panels: Absorption at the front with a diffuser at the back. Efficient for smaller spaces.
Pro-tip: For your first treatment, use 10 cm thick glass wool as the core for your absorption panels. This will give you much wider frequency coverage than standard foam, for a similar price.
When choosing best products for acoustics in a home studio, it’s smart to start with the reflection points on the side walls and ceiling. Then tackle the corners with bass trap absorbers. Want to design your acoustics studio from the ground up? Then it pays to make a plan before ordering materials.
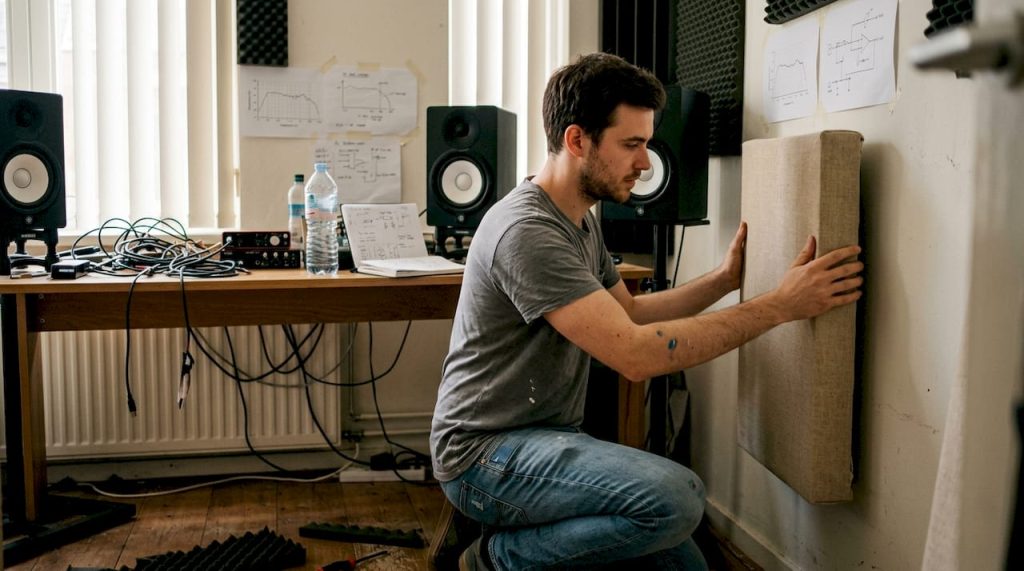
The placement of materials is at least as important as their selection. Acoustic panels for studio work best if they are mounted at the right height, level with your ears at the listening position.
Using absorption strategically: here’s how to improve sound quality
Strategically placed absorption panels directly improve the listening experience and the quality of your mix. It’s not about hanging as much material as possible; it’s about placing the right panels in the right places.
Follow this step-by-step plan for effective treatment:
- Measure the room: Use a measurement microphone and software such as REW (Room EQ Wizard) to map the acoustics of your space. This will show where problems are.
- Identify reflection points: Use the mirror method: sit at your listening position and have someone slide a mirror along the side wall. Where you see the monitor in the mirror is a reflection point.
- Treat the side walls: Hang absorption panels on the identified reflection points, at the level of your ears.
- Treat the ceiling: Mount an absorption panel above your listening position for vertical reflections.
- Address the corners: Place bass trap absorbers in all four vertical corners of the room.
- Add diffusion: Hang diffusers on the back wall behind your listening position.
- Measure again and evaluate: Compare measurements before and after treatment and listen critically to reference material.
Pro-tip: After each step, listen to a song you know well on your monitors. That way you can hear the effect of each adjustment immediately and make targeted adjustments without using too much material.
For fine-tuning your space, good sound reflection reduction tips are essential. Also consider the furnishings studio acoustics as a whole: furniture, bookcases and soft materials all contribute to the acoustic treatment of your space.
A common mistake is stopping after the first treatment without measuring. Acoustics is an iterative process. Small adjustments in panel position can make a big difference in measurement results and listening comfort.
Optimize your studio: solutions and products
You now know how absorption works, what materials you need and how to strategically place them. The next step is finding the right products for your specific space and budget. Not every studio is the same, and customization makes the difference between a good and excellent acoustic treatment.

At i4studio you will find a carefully curated selection of home studio acoustics products, from absorption panels and bass trap absorbers to complete treatment packages. Not only do we help you choose the right product, but we also help you think about the optimal placement for your space. Whether you are treating a small home studio or setting up a professional recording room, we have the knowledge and products to help you move forward. Contact us for personalized advice tailored to your needs.
Frequently asked questions about absorption in studios
How do I determine how much absorption is ideal for my studio?
First, measure the room acoustics with a tool such as REW and place absorption at the reflection points. Absorption should be strategically placed and evaluated so that you can gradually fine-tune to an optimal balance without “killing” the room.
What is the difference between absorption and diffusion?
Absorption reduces reflections and echo by converting sound waves into heat. Balancing absorption and diffusion is crucial to the character of the studio: diffusion disperses sound and keeps the room alive.
What materials are most suitable as absorption panels?
Glass wool, acoustic foam and special combination panels are popular because of their effectiveness. Different materials absorb frequencies differently, so the choice depends on the room and the frequency range you want to address.
Can you put too much absorption in a studio?
Yes, absolutely. Too much absorption makes a studio “dead” and unpleasant to work in. Balance with diffusion is essential for a space that sounds both neutral and pleasant.
How can I attach absorption panels correctly?
Place panels at the level of the reflection points at your listening position and attach them with special acoustic glue or wall brackets. Strategic placement of absorption panels improves sound quality immediately and measurably.
Recommendation
- Studio Acoustics Improvement: Practical Guide For Professional Sound Spaces – https://i4studio.nl/
- Sound attenuation in Studio: Complete Guide For Optimal Acoustic Management – https://i4studio.nl/
- Basics of Acoustics: A Practical Guide for Studios – https://i4studio.nl/
- Studio acoustics: improve sound quality at home in 2026