TL;DR:
- Audio routing is essential to a professional sound setup and determines how signals flow from input to output. Using buses, sends and serial or parallel processing provides control, saves CPU and improves sound quality. Correct routing inside and outside the DAW prevents many technical problems and optimizes your audio production.
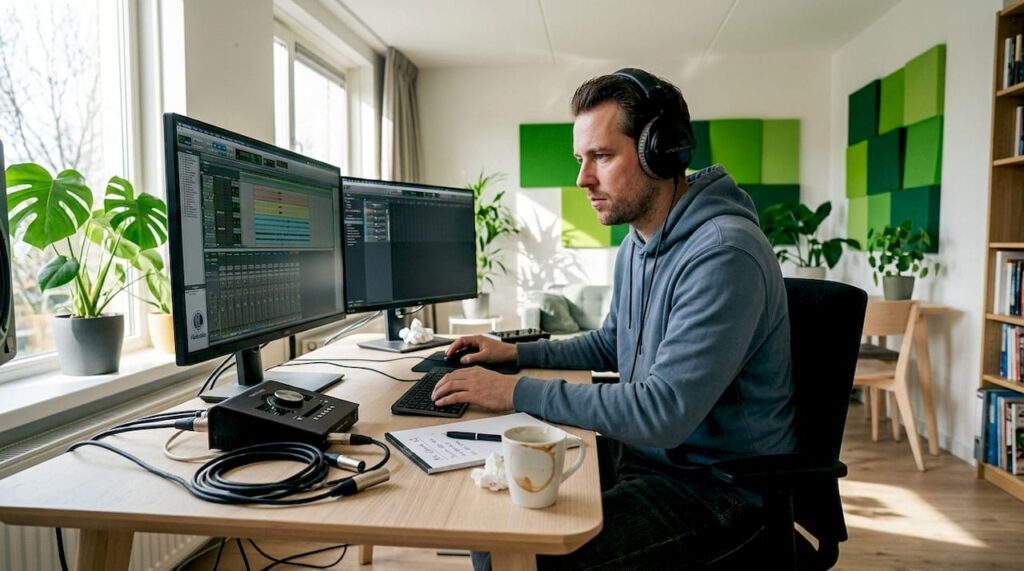
Audio routing is the foundation of any professional sound setup, but also one of the most underrated topics within sound production. Many engineers and creators struggle with questions like: why doesn’t my microphone come through in OBS while it works in the DAW? Or: how do I send my monitoring to a different output than my mix? This explanation of audio routing will give you a step-by-step insight into how signal flows work, which techniques you can apply and how to avoid common mistakes.
Table of contents
- Key insights
- Basics of audio routing in a DAW
- Audio routing techniques: serial, parallel and sends
- Hardware and software tools for audio routing
- Practical applications of audio routing
- My take on audio routing after years of practice
- Studio gear that supports your routing
- Frequently Asked Questions
Key insights
| Item | Details |
|---|---|
| Routing is signal orchestration | Every audio signal needs a defined path, from input to output via buses or sends. |
| Serial vs. parallel makes all the difference | Choose serial routing for effect chains and parallel routing to combine dry and wet signal. |
| Pre- and post-fader sends | Pre-fader sends are ideal for monitor mixes, post-fader sends for reverb and delay on your mix. |
| Software and hardware work together | Tools such as Voicemeeter and ASIO drivers determine how signals flow through your system. |
| Good routing improves sound quality | A structured routing setup saves CPU, reduces latency and gives more control over your sound. |
Basics of audio routing in a DAW
Audio routing refers to determining the path an audio signal takes within a setup. Routing determines where each signal goes: from a track to the master, to an effects bus, or to a subgroup. Think of it as a traffic control system for sound. Without proper routing, you may hear sound, but you have no control over where it goes or how it sounds.
Understanding signal currents
In a DAW such as Ableton Live, Logic Pro or Reaper, every signal follows a set route. A microphone comes in through an audio interface, appears as an input on an audio track and then goes to the master output. Simple in theory, but the power is in what is possible in between.
The three basic concepts you need to know:
- Direct output: The signal goes directly from the track to the master or a physical output. No detours, full control of volume via the fader.
- Buses (buses): A bus is a shared signal path. You send multiple tracks to one bus to manage them together, apply effects together, or mix as a group.
- Sends: A send copies a portion of the signal to another channel, usually an effects channel. Using a reverb through an Aux bus instead of a plug-in on each individual track saves considerable CPU power and provides more consistency in the mix.
Pro-tip: Always create a separate bus for your drum percussion, your vocals and your synths. That way you can quickly control the volume and dynamics for each group without adjusting each track individually.
Good routing also gives you overview. In a project with twenty or more tracks, without buses it is impossible to react quickly during a session. With a clear structure, you always know exactly where your adjustments will have an effect.

Audio routing techniques: serial, parallel and sends
Once you understand the basics, things get interesting when choosing between serial and parallel routing. Both techniques have a specific application and combining them is what distinguishes professional mixing from amateur work.
Serial versus parallel routing
In serial routing, the signal passes through a chain of effects one after the other. Effect A processes the signal, passes it to effect B, then to effect C. This is the standard way to build a signal path. Think EQ followed by compression followed by a saturator on a vocal track.

Parallel routing works differently. You split the audio signal so that the original, unprocessed signal remains intact while a copy is processed. You then mix the two versions together. Parallel compression on drums is the best-known example: you keep the dynamics of the original and add the slap and density of highly compressed drums.
Pre-fader and post-fader sends
This distinction is crucial and overlooked by many beginners:
- Post-fader send: The send follows the fader level of the track. If you turn down the track, then less signal goes to the effects channel as well. This is the standard for reverb and delay in a mix kit, because it preserves relative proportions.
- Pre-fader send: The original signal goes to the effects bus regardless of the fader position. This is ideal for creating a separate headphone mix for a musician. Even if you, the engineer, turn down the track in the FOH mix, the musician can still hear themselves.
- Effect routing via subgroups: Group related tracks on a subbus and add effects at the group level. Routing tracks to a submixbus allows you to process and mix them as a whole.
- Parallel effect routing: send a send from multiple tracks to one shared reverb. This way the room sounds consistent for all elements and you only have to manage one plug-in instance.
- Monitor routing: send the monitor mix via a pre-fader send to a separate output to give the artist a custom mix separate from the master output.
Pro-tip: Use pre-fader sends for monitor purposes only and post-fader sends for mix effects. Applying this consistently avoids confusion during sessions and unexpected level differences.
Hardware and software tools for audio routing
Routing doesn’t just take place within your DAW. Once you involve multiple applications, hardware units or a Windows environment, managing audio signals becomes a lot more complex.
Voicemeeter as a virtual mixer
Voicemeeter is one of the best-known software routing solutions for Windows users. It works as a virtual audio mixer that can take both hardware and software sources and send them to various outputs.
| Function | Description | Application |
|---|---|---|
| BUS A1 | Physical output via selected audio driver | Studio monitors or headphone amplifier |
| BUS A2 / A3 | Additional physical outputs for other devices | Second monitor pair or recording device |
| BUS B1 / B2 | Virtual outputs to other software | OBS, Discord, browser at the same time |
| ASIO routing | Up to 64 ASIO I/O channels as output A1 | Professional audio interface integration |
| Strip routing buttons | Select A and B buttons per input | Determine exactly which signal goes to which bus |
A common mistake in Voicemeeter is the overlapping of ASIO channels. When two inputs or outputs use the same ASIO channel, one signal replaces the other. The Voicemeeter manual explicitly warns about this problem. Always check which channels your ASIO driver assigns before configuring multiple inputs.
ASIO drivers and Windows exclusive mode
ASIO drivers give direct access to your audio hardware with low latency. The downside: by default, ASIO works in exclusive mode, which means only one application can control the device at a time. Exclusive mode in Windows gives one program full control, blocking simultaneous use by other apps.
The practical solution for this is FlexASIO. FlexASIO allows multiple applications to use the same audio device simultaneously through a virtual layer. This is particularly useful if you want to simultaneously record in your DAW and transmit audio to a streaming program such as OBS.
Another common routing problem in Windows is missing sound from Bluetooth devices. This is almost always due to an incorrect output selection in the operating system, not a hardware defect.
Practical applications of audio routing
Now that the theory is clear, let’s look at what routing looks like in practice in three common scenarios.
Studio recording
In a typical studio session, the signal path is as follows:
- Microphone to preamp or audio interface input
- Interface sends via ASIO to DAW audio track
- Track is routed to a vocal bus with compression and EQ
- Vocal bus goes to a send to the reverb return track
- Everything flows together to the master bus for final processing
For more control over this process, including tips on microphone placement and recording, it’s smart to approach routing and recording as one.
Multi-application environments
This is where many creators get stuck. You want to simultaneously record in Ableton, stream via OBS and communicate via Discord. Without proper routing, you won’t hear yourself in Discord or your stream will sound devoid of music.
| Scenario | Problem without routing | Solution with routing |
|---|---|---|
| Ableton + OBS + Discord | No sound separation between apps | Voicemeeter with virtual outputs per app |
| Studio recording + monitoring | Latency and feedback | Pre-fader send to separate monitor output |
| Multiple DAW instances | ASIO conflict, only one app has control | FlexASIO as a shared ASIO layer |
| Live sound + IEM mix | Artist does not hear proper balance | Pre-fader send to separate IEM bus |
Live setup and monitoring
In live sound, routing is literally the difference between a good show and a disastrous one. A typical live routing setup completely separates the FOH mix from the monitor mix. By connecting the audio interface correctly and configuring pre-fader sends for the monitor mix, you as the FOH engineer can mix completely independently of what the performers hear on stage.
My take on audio routing after years of practice
If I’m being honest, bad routing is the cause of seventy percent of the production problems I see past. Not bad mics, not a weak DAW, nor a slow computer. Just sloppy, thoughtless signal flow.
What I see over and over again: people who put effects directly on tracks instead of using sends. So they load ten instances of the same reverb, the CPU fills up, and they don’t understand why their project crashes. Had you just created one reverb return track via a bus, you would have reduced CPU usage by more than half.
What I always do myself: I start a new project by setting up the routing structure before even one note has been recorded. Buses for drums, buses for synths, a separate bus for vocals. Create sends for reverb and delay. Only then do I start recording. This takes five minutes at the beginning and saves hours of frustration later.
My advice to sound engineers and creators: get to know your DAW routing like you know your own instrument. Know exactly what pre- and post-fader does. Understand why you use a bus instead of a track. And always test your routing before a session begins. Good routing is invisible when it works well. Bad routing is very visible when it goes wrong.
– harold
Studio gear that supports your routing
A good routing setup hinges on the quality of your hardware. Do you have an interface that supports ASIO well, a monitoring controller that manages multiple outputs and a PC that can handle the processing? Then your routing will work smoothly.

At I4studio you will find the hardware that fits the scenarios in this article. The Mackie Big Knob is a monitoring controller that controls multiple outputs, greatly simplifying your monitor routing. Ideal if you want to manage both monitors and a headphone mix from one central point. Not sure what you need yet? Check out the overview of studio gear for beginners to find out which hardware fits your setup and how to set it up right the first time.
Frequently Asked Questions
What exactly is audio routing?
Audio routing is determining the path an audio signal takes within a setup. It goes from input via buses, sends or direct connections to an output.
What is the difference between a bus and a send?
A bus groups multiple tracks to a single signal path. A send copies a portion of a signal to a separate channel, such as an effect return.
When do you use a pre-fader send?
Use a pre-fader send if you want to create a monitor mix that is independent of your mix faders. This way, the artist always has their own balance, regardless of what you adjust in the main mix.
How do you solve routing problems in Windows?
First, check the selected output in Windows sound settings. If it is on the wrong device, nothing will sound through the correct speakers or interface. In case of ASIO conflicts between multiple apps, FlexASIO offers a practical solution.
How do I save CPU power when using effects?
Load effects like reverb and delay on a return track via sends instead of directly on each track. This way, one plug-in instance runs serving multiple tracks.


