TL;DR:
- Choosing the right studio monitor is crucial for accurate sound reproduction and depends on space, listening distance and production goals. Nearfield monitors are ideal for home studios because of their little dependence on room reflections and compact size. Proper tuning for acoustics and familiarity with your monitors are more important than purchasing more expensive, larger systems.
Choosing the right studio monitor speakers is one of the most defining decisions for your sound quality. Many producers and video editors reach for the most popular models without considering what their specific space and workflow requires. The result? Mixes that sound great in the studio, but disappoint on other systems. In this article you will learn what types of monitors there are, how to compare them on technical specifications and when exactly which type is right for your home studio or professional work environment.
Table of contents
- What should you look for when choosing studio monitor speakers?
- The main types of studio monitor speakers explained
- Driver configurations: 2-way versus 3-way monitors
- Frequency response, distortion and technical specifications
- The painful truth: why the most expensive monitor is not necessarily the best choice
- Getting more out of your studio? Here are your next steps
- Frequently asked questions about studio monitor speakers
Key Insights
| Item | Details |
|---|---|
| Choose type based on room | The listening distance and room size determine which type of monitor speaker fits best. |
| Pay attention to the driver configuration. | A 3-way monitor gives more detail; a 2-way is often sufficient for compact studios. |
| Specifications are important but not everything | Frequency response and distortion are important, but acoustics and setup make the difference. |
| Budget and workflow determine your choice | An expensive monitor is not always better; tailoring it to your situation is crucial. |
What should you look for when choosing studio monitor speakers?
Studio monitors are fundamentally different from ordinary speakers. They are designed for the flattest, most uncolored sound possible, so you hear exactly what’s in your mix. No amplified bass, no extra bright high frequencies. Just reality. That sounds simple, but the practice is more complex.
Before looking at specific types, there are a few basic questions to answer about your own situation:
Criteria that determine your choice:
- Listening distance: How far are you sitting from your monitors? This is perhaps the most decisive criterion.
- Room acoustics: Does your room have many reverberant surfaces, or have you already applied acoustic treatment?
- Room size: A small bedroom studio has very different requirements than a 40-square-meter professional control room.
- Production goals: Are you producing light pop or electronic music, or working on film scores with lots of bass frequencies?
- Budget: How do you best allocate your budget? Sometimes cheaper and compact is better for your situation than expensive and large.
Monitors are classified by listening distance. Nearfield monitors are designed for a distance of 3 to 5 feet (about 90 to 150 cm), are ideal for home studios, while midfield monitors are suitable for larger rooms and farfield monitors belong in professional control rooms. That layout immediately determines how the monitor projects its sound and how sensitive it is to room reflections.
Another critical issue is room acoustics. Even the best monitor sounds bad in an untreated room with lots of reflections. Be sure to review the available monitor setups to understand how positioning affects what you hear. And if you want to know more about the overall layout of your workspace, a review of the features of a professional studio provides a useful reference.
Pro-tip: In a small home studio of less than 20 square feet, nearfield monitors are almost always the best choice. They’re less susceptible to room reflections because you’re close to them, which means you hear the direct sound of the monitor rather than the reverberant sound of your space.
The main types of studio monitor speakers explained
With the selection criteria in mind, we now discuss the main types of studio monitors you can expect. Each type has its own character, scope and limitations.
Nearfield monitors
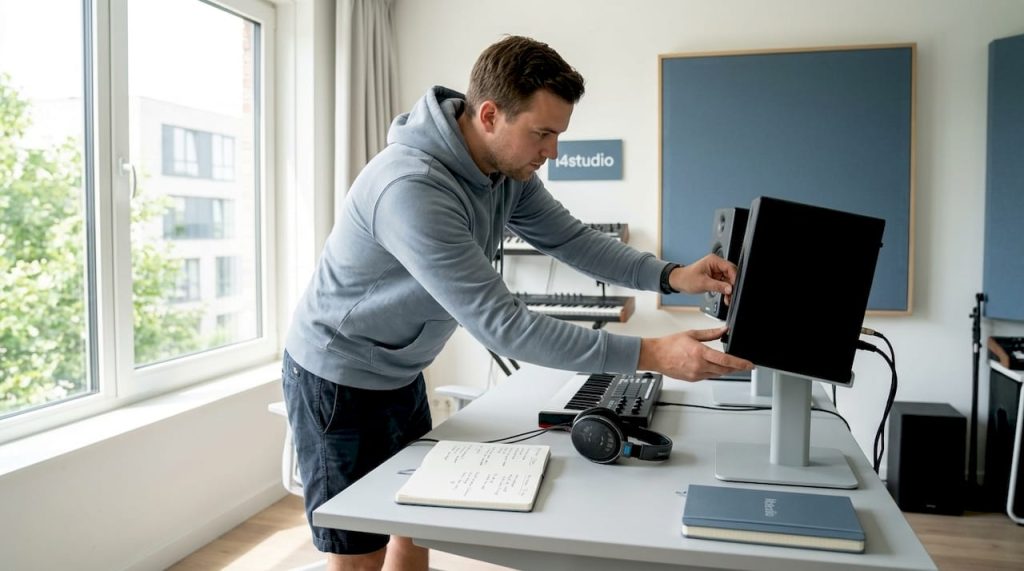
Nearfield monitors are the most commonly used monitors in home studios. They are compact, relatively affordable and sound best at close range. The woofer size usually ranges from 5 to 8 inches, which makes them suitable for a wide frequency range without requiring huge cabinet space.
Advantages of nearfield monitors:
- Less reliance on room acoustics due to short listening distance
- Compact size, ideal for small spaces
- Wide choice in price ranges
- Suitable for most production genres
Disadvantages of nearfield monitors:
- Less powerful bass response compared to larger systems
- Less suitable for assessing how sound sounds in large rooms
Midfield monitors
Midfield monitors are larger and are placed at a greater distance, typically 1.5 to 3 meters. They offer a fuller view of the frequency spectrum and are suitable for producers working in a larger, well-covered space.
Advantages of midfield monitors:
- Richer and fuller bass reproduction
- Larger sweet spot (the ideal listening point)
- More dynamic range
Disadvantages of midfield monitors:
- Require a well-treated room for accurate display
- Higher purchase price
- Less suitable for small spaces
Farfield monitors
Farfield monitors are the big players. You find them in professional recording studios where the listening distance exceeds 3 meters. They are heavy, expensive and require a specifically designed space. For the average home producer they are irrelevant, but for those working in a professional environment they are indispensable for reference in large productions.
Nearfield monitors are for a distance of 3 to 5 feet and ideal for home studios, midfield monitors are for larger spaces and farfield monitors belong in professional control rooms.
Active versus passive monitors
Besides listening distance, there is another important distinction: active or passive. Active monitors have a built-in amplifier, passive monitors do not. For home studios, active monitors are almost always the better choice. They are easier to use, sound good right away and do not require a separate amplifier.
For your studio setup setup, it’s smart to start with active nearfield monitors. They are plug-and-play and require no additional investment in an external amplifier.
Subwoofers as a complement
You add a subwoofer when you want to control a lot of low frequencies, such as with electronic music, hip-hop or movie sound. Adding a subwoofer to your monitor setup gives you more insight into the sub-bass range from 20 to 80 Hz.
For home studios with limited acoustic treatment, however, a subwoofer is a risk. Low frequencies easily pile up in small spaces and give you a distorted picture. Rather, invest in studio acoustics improvement before adding a subwoofer.
For home studios, the preference is for active nearfield monitors with 5- or 6-inch woofers and a front-ported or enclosed design to minimize room interactions, with a possible subwoofer for bass-heavy production.
Driver configurations: 2-way versus 3-way monitors
In addition to the physical types of monitors, the internal configuration is also important. The driver configuration determines how the frequency spectrum is distributed among the various speaker components.
What is a 2-way monitor?
A 2-way monitor consists of two drivers: a woofer for the low and mid-high frequencies, and a tweeter for the high frequencies. This is the most common configuration in nearfield monitors. They are compact, affordable and sound excellent in most production situations.

The transition between woofer and tweeter is called the crossover point. In a 2-way monitor, this is usually between 2 and 5 kHz. In that frequency range, which is crucial for the clarity of vocals and instruments, both drivers operate simultaneously, which can lead to a little color contamination.
What is a 3-way monitor?
A 3-way monitor adds a midrange driver between the woofer and tweeter. 2-way monitors have a woofer and tweeter, while 3-way monitors have a woofer, midrange and tweeter for better frequency separation and clarity. That extra driver ensures that each frequency range is reproduced by a specialized driver, resulting in more detail and less distortion in the critical midrange.
Comparison chart: 2-way versus 3-way
| Feature | 2-way monitor | 3-way monitor |
|---|---|---|
| Drivers | Woofer + tweeter | Woofer + midrange + tweeter |
| Frequency separation | Less precise in the center | More accurate across entire spectrum |
| Compactness | Compact and lightweight | Larger and heavier |
| Price | More affordable | Higher investment |
| Ideal for | Home studio, smaller spaces | Professional environment, complex mixing |
| Crossover problems | Possible color contamination at crossover point | Less color contamination by additional driver |
When do you choose a 2-way monitor?
- You will work in a small home studio
- You produce pop, singer-songwriter or podcast audio
- You have a limited budget
- Compactness is important for your workspace
When do you choose a 3-way monitor?
- You will work on complex mixes with many instruments
- You produce film scores, orchestral compositions or detailed electronic music
- You have a larger, well-treated space at your disposal
- Quality and detail are more important than price
If you’re looking for concrete models to compare, check out the EVE SC207 monitor as an example of a high-quality 2-way nearfield monitor. For something more compact with excellent value for money, the Adam T7V studio monitor is a popular choice among home producers.
Frequency response, distortion and technical specifications
Now that we’ve discussed structures, let’s zoom in on technical details that really make a difference. Because choosing a monitor based on type and configuration is only half the story. Technical specifications tell you how much you can trust what you hear.
Understanding frequency response
Frequency response indicates how flat a monitor reproduces sound across the entire audible spectrum from 20 Hz to 20 kHz. An ideal monitor has a completely flat response, meaning that all frequencies are reproduced with the same intensity. In practice, every monitor has deviations.
That deviation is expressed in decibels (dB). A deviation of plus or minus 3 dB is acceptable for professional use. A deviation of plus or minus 5 dB or more indicates a more strongly colored monitor that is less suitable for accurate mixing.
See more background on frequency response understanding if you want to know how to use this information in your daily workflow.
Distortion and THD
In addition to frequency response, distortion is another critical specification. Total Harmonic Distortion (THD) indicates how much unwanted harmonic background noise a monitor produces. The lower the percentage, the purer the sound. Professional monitors are typically below 0.5% THD at normal volume.
Measurement data from two popular models
The Kali IN-5 V2 shows frequency response deviation of minus 5.08 and plus 3.64 dB between 80 Hz and 16 kHz, with distortion below 0.3% above 300 Hz. The JBL 305P MkII has a flat response from 43 Hz to 10 kHz.
What do these numbers say for your mixes?
| Monitor | Frequency Range Flat | Deviation | Distortion above 300 Hz |
|---|---|---|---|
| Kali IN-5 V2 | 80 Hz to 16 kHz | -5.08 / +3.64 dB | Less than 0.3% |
| JBL 305P MkII | 43 Hz to 10 kHz | Minimum | Not specified |
The JBL 305P MkII has an impressive low frequency range of 43 Hz, which means you can control more of the sub-bass without a subwoofer. The Kali IN-5 V2 has a little more deviation, but excels in low distortion, providing clear and detailed midrange reproduction.
What do these numbers mean to you?
- A flat response deep into the bass means you’re less likely to be surprised by low frequencies you didn’t hear while mixing.
- Low distortion above 300 Hz is crucial for vocals, guitar and piano because you want to hear every detail clearly.
- A monitor with strong high-frequency anomalies can cause you to use too many or too few high frequencies in your mix, resulting in mixes that sound dull or too bright elsewhere.
Pro-tip: Never look only at the specs on paper. Measure how your monitor sounds in your space with a tool such as Room EQ Wizard (free software). Manufacturers’ metrics are measured in an acoustically neutral environment; your room rarely is. Always calibrate based on your specific setup and space.
The painful truth: why the most expensive monitor is not necessarily the best choice
There is a persistent myth in the audio world: the more you pay, the better your mixes become. We understand where that thought comes from. Expensive monitors sound impressive, have great specifications and are used by professional studios worldwide. But for your home studio, that reasoning is dangerous.
Imagine spending 3,000 euros on a pair of farfield monitors and placing them in an untreated 12-square-meter room. The result is chaos of reflections, standing waves and bass build-up. Those expensive monitors then sound worse than an affordable nearfield monitor in a properly treated room of the same size. That’s not a hypothetical scenario. It’s what we see time and again with producers making their first major studio investment.
The real key lies in tuning. Your monitor must fit your space, your listening distance and your production goals. A producer making lounge music in a compact room will have more than enough with a good 5-inch nearfield monitor with low distortion and flat response. Only when your space becomes larger and acoustically treated does upgrading to larger monitors make sense.
Also, always consider the order of investment. Acoustic treatment, proper positioning via the right setup monitors and calibrating your monitors to your space are investment that will immediately improve your mixes no matter what monitor you have. Only after that does a more expensive monitor add value.
Another underrated factor is familiarity. Many professional mix engineers work on the same pair of monitors for years, not because they are objectively the best, but because they know exactly how those monitors sound. They know the weak spots, they know which frequencies the monitors are slightly boosting, and they compensate for that in their mixes. That familiarity is more valuable than perfect specs on paper.
Our honest conclusion: start compact, invest in acoustics, get to know your monitors and upgrade only when your space and production goals warrant it. Not the other way around.
Getting more out of your studio? Here are your next steps
Now that you’re clear on what type of monitor suits you, you can focus on the next step for your studio.

Whether you’re just starting out or have been working as a producer or video editor for a while, a good foundation is everything. Check out our beginner studio gear guide for a complete overview of what you need to get started professionally. From monitors to interfaces to acoustic panels. Everything in one place. Are you looking for a complete monitor solution that instantly fits your space and setup? Then the ARC Studio monitor solution is an excellent starting point to refine your monitor selection based on your specific situation. We’d be happy to help.
Frequently asked questions about studio monitor speakers
What is the difference between nearfield, midfield and farfield monitors?
Nearfield monitors are for close listening at 3 to 5 feet and ideal for home studios, midfield monitors are suitable for larger treated areas and farfield monitors belong in professional control rooms with large listening distances.
Why would I choose a 3-way monitor over a 2-way?
A 3-way monitor has an extra midrange driver for more frequency separation and detail, which is useful in complex mixes with many instruments where clarity in the midrange is crucial.
How important is the frequency response of a studio monitor?
A flat frequency response ensures that you hear all the details of your mix as they really sound. The Kali IN-5 V2 shows a deviation of minus 5.08 and plus 3.64 dB, while the JBL 305P MkII runs flat from 43 Hz to 10 kHz. The flatter, the more reliable your mixes become.
In a small studio, do I really need a subwoofer?
A subwoofer can be useful for bass-heavy production, but is not necessary in small rooms. Priority goes to active nearfield monitors with 5- to 6-inch woofers and a front-ported or enclosed design to minimize room interactions, with a subwoofer only as an addition when your space can handle it acoustically.


