TL;DR:
- Sound insulation is essential for reliable recordings and requires both insulation and acoustic treatment.
- Key materials include Rockwool, wooden frames, diffusers and sealants, combined with measurement and listening tests.
- Successful isolation requires a structured approach, avoidance of common mistakes and continuous optimization.
A noisy air conditioner, reverberation from bare walls or the drone of traffic outside. Those sounds are all too familiar to most studio owners, and they cost you precious recording time. Good soundproofing is not a luxury; it’s the basis for reliable recordings and honest mixes. In this guide, we explain exactly what materials you need, how to proceed step by step, what mistakes to avoid and how to make the end result measurable. Whether you’re running a home studio or optimizing a professional recording room, you’ll find concrete answers here.
Table of contents
- What do you need for good soundproofing?
- Step-by-step approach: do studio soundproofing yourself
- Common mistakes and how to avoid them
- Measuring and optimizing results
- Our vision: what professionals too often forget
- Is your studio ready for the next step?
- Frequently asked questions about studio soundproofing
Key Insights
| Item | Details |
|---|---|
| Essential materials | Rockwool panels, double walls and diffusers form the basis for effective sound insulation. |
| Combination is crucial | Absorption and diffusion together ensure optimal results in your studio. |
| Do-it-yourself savings | Making your own panels is affordable and provides immediate noticeable improvement. |
| Software as a complement | Acoustic software supports but never replaces physical work. |
What do you need for good soundproofing?
Now that you know why soundproofing is important, let’s look at what you need to do to achieve it. The first step is to understand that there are two different principles: insulation and acoustic treatment. Insulation keeps sound outside or inside the room. Treatment improves the sound within the room. You need both.
The main materials
- Rockwool or stone wool (minimum 60 kg/m³): the core of any acoustic panel. It absorbs broadband frequencies effectively and is budget-friendly.
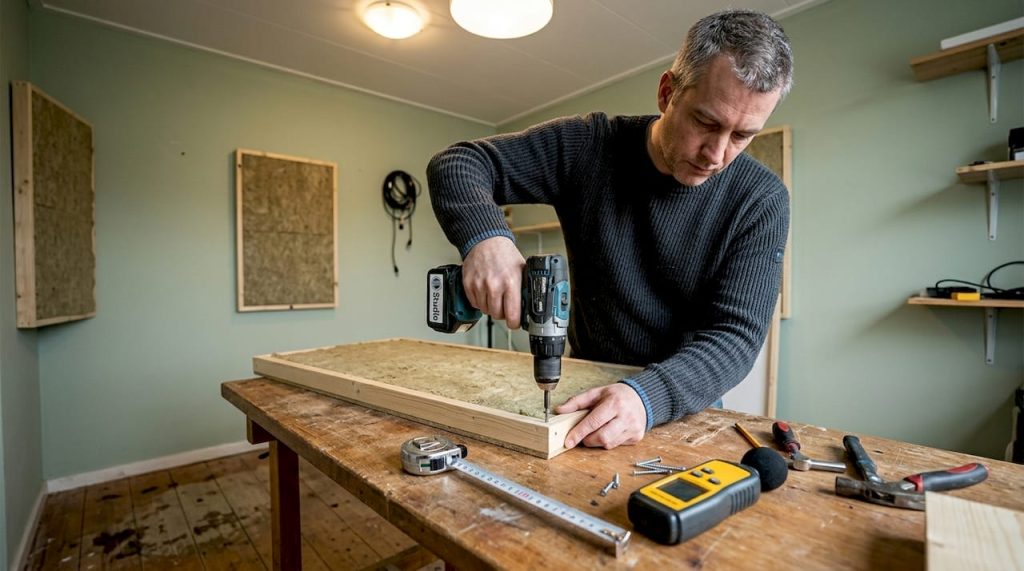
- Wooden frames (plywood or pine): the supporting structure for your DIY panels. Use 45 x 70 mm slats for strength.
- Fabric or acoustic fleece: the finishing touch for your panels. Make sure the fabric is breathable, or the absorption will not work.
- Rubbers and decoupling material: for walls and floors to structurally block sound.
- Acoustic sealant and neoprene tape: to seal seams and cracks. Even a small 1% area gap reduces your insulation value by as much as 10 dB.
- Diffusers: wooden structures of varying depth that spread sound waves so that your space lives without reverberating.
In addition to materials, you’ll need tools: tape measure, a good screwdriver, a decibel meter or smartphone app for initial measurements, and dowels for heavy fixing to concrete walls.
| Material | Function | Application |
|---|---|---|
| Rockwool 60 kg/m³ | Broadband frequency absorption | Panels, walls, ceiling |
| Timber frame | Support structure panel | DIY absorbers |
| Rubber strip | Decoupling, vibration damping | Floor, wall connections |
| Diffuser (wood) | Sound wave dispersion | Back wall, side walls |
| Acoustic sealant | Sealing seams and cracks | Window frames, walls |
| Bassstrap (triangle) | Low-frequency absorption | Corners of the room |
A combination of absorption and diffusion is essential. If you use only soft materials, the room will sound dead and unnatural. That’s just as annoying as too much reverb. DIY panels with rockwool frames are effective, and modular systems such as Studiobricks Double Wall achieve as much as 44.5 dB of insulation according to ISO 717-1.

Pro-tip: Start with a set of DIY rockwool panels in wooden frames. You build them for 30 to 60 euros each and they perform similarly to commercial versions. For inspiration, check out the best products for studio acoustics and learn how to install acoustic panels without major renovations.
Step-by-step approach: do studio soundproofing yourself
With the materials and tools ready, it’s time to get practical. A structured approach prevents you from discovering halfway through that you’ve overlooked something.
- Measure the space and identify problem areas. Walk through the studio and clap your hands once. Do you hear a sharp echo? Those are the primary reflection points. Also note where you hear disturbing low, because those are the corners.
- Create a floor plan. Draw the room to scale and indicate where absorbers, diffusers and bass traps will be located. This avoids unnecessary purchases and ensures balanced treatment.
- Construct and hang the first set of absorbers. Make custom wooden frames, fill them with rock wool and cover them with acoustic fabric. Hang them at the first reflection points next to and behind the listener.
- Placement of bassstraps in the corners. Low frequencies accumulate in corners. Triangular rockwool blocks at least 30 cm deep effectively address this energy accumulation.
- Add diffusers to the back wall. Panels for studio insulation and diffusers work together: absorbers dampen, diffusers diffuse. This gives the room air without creating reverberation.
- Seal all seams. Use acoustic sealant around window frames, doors and cable penetrations. This is the step most beginners skip, while making the biggest difference in soundproofing.
- Listen critically and adjust. Play a familiar reference track and listen to how the room responds. Add or shift panels until the sound feels neutral and clear.
Pro-tip: Overdamping is a real pitfall. A room that sounds completely dead is unpleasant to work in and distorts your mix. Aim for an RT60 (reverberation time) of 0.3 to 0.5 seconds for an average studio.
Absorption and diffusion combine for optimal results. Software such as Sonarworks corrects minor irregularities, but never replaces physical work. Check out acoustics tips to further refine your approach.
Common mistakes and how to avoid them
After performing the steps, many people encounter these problems, but they are preventable. The most costly mistakes have nothing to do with the budget, but with the approach.
Common mistakes in a row:
- Only place soft materials such as foam or curtains, without adding diffusers.
- Fail to seal seams and gaps, causing sound leaks to undermine all insulation efforts.
- Hang panels only behind the listener and forget about the side walls.
- Leaving out bass traps because they are great, when in fact low-frequency problems distort the mix the most.
- Measuring everything with software without critical listening first.
Absorption and diffusion should always be combined for optimal effect. If you don’t, your space will either sound dead or it will still reverberate at specific frequencies.
| Error | Effect | Solution |
|---|---|---|
| Absorbers only, no diffusers | Dead, unpleasant space | Add diffusers to back wall |
| Seams not sealing | Sound leakage, poor insulation | Acoustic sealant on all joints |
| No bass traps in corners | Low-frequency accumulation, poor bass | Triangular rockwool in all corners |
| Too much attenuation everywhere | Over-damped, non-workable space | Find balance, place fewer panels |
| Measuring without listening | Wrong conclusions | Combine measurements with listening test |
Good preparation is half the battle. Draw out your space, calculate how much absorptive surface area you need, and buy materials only after you have a plan. Also understand why panels are indispensable before you opt for insulation alone. And if you already have a space but the sound is disappointing, improving studio acoustics is the next logical step.
Measuring and optimizing results
Now you want to know if your work is actually making a difference and where you can still make adjustments. Measuring gives you objective data, but always do it in conjunction with your ears.
How do you measure effectiveness?
- Clap test: clap your hands once and listen to how quickly the sound dies away. A shorter aftertone means better absorption.
- Reverberation time (RT60): measures how long it takes for a sound to decrease by 60 dB. Free apps like REW (Room EQ Wizard) give you reliable results.
- Frequency response: check for peaks or valleys at specific frequencies. This indicates standing waves that you can address with bass straps and placement.
- Detect sound leaks: have someone outside the studio play a loud tone while you listen inside. Hear something? Then find the leak.
Statistical callout: A double wall structure like the Studiobricks Double Wall achieves 44.5 dB of insulation according to ISO 717-1. That’s the difference between street noise ruining your recording and a studio that delivers professional silence.
| Insulation value (dB) | Practical experience | Suitable for |
|---|---|---|
| Up to 20 dB | Noticeably less noise pollution | Soft recordings, podcasts |
| 20 to 35 dB | Comfortable working environment | Home studio, voiceover |
| 35 to 44 dB | Professional silence | Vocals, drums, live instruments |
| 44.5 dB (ISO 717-1) | Studio quality | Commercial recordings |
After the initial measurements, it’s time to make adjustments. Often it helps just to move one or two panels. Hang an absorber on a primary reflection point that you had missed, or add an extra bassstage in the corner that gives the most trouble. Use studio acoustics measurement and adjustment as a guide to interpret your results.

Pro-tip: Make a reference measurement right after the first installation. That way you have a baseline measurement to which you can compare each subsequent adjustment. This makes optimization objective and efficient.
Our vision: what professionals too often forget
Besides measurement and optimization, there are other real-world insights that many studio owners overlook. Most attention goes to materials, and rightly so. But the biggest gains often lie elsewhere.
We frequently see studios that have excellent insulation, but where the listening position is completely wrong. The monitor is right at an angle, or the chair is at a point where two standing waves meet. No panel solves that.
In addition, workflow is a determining factor. A room that is acoustically perfect but too packed with equipment to work comfortably will produce worse results than a slightly less perfect room in which you work smoothly. What a professional studio approach looks like goes beyond square footage and decibels.
Our advice: don’t buy more panels until you’ve optimized your listening position and room layout. Sometimes shifting is cheaper and more effective than additional materials.
Is your studio ready for the next step?
If you want to get more out of your studio right away, you’ll find everything for your next step at i4studio. Whether you’re looking for quality studio diffusers for a balanced sound or a ready-to-use complete room kit to get started quickly, the selection matches what you need as a producer or studio owner.

In addition to acoustic products, at i4studio you will also find powerful studio computers put together for audio and video work. From custom built studio PCs to complete acoustic solutions, everything is ready to take your studio to the next level. Feel free to orient yourself and discover what best suits your space and workflow.
Frequently asked questions about studio soundproofing
What is the difference between soundproofing and acoustic treatment?
Sound insulation prevents sounds from entering or leaving the room, while acoustic treatment improves the sound within the room itself. Absorption and insulation are different principles that work together to produce the best results.
Can software alone solve my space?
No, software only complements but never replaces physical insulation and acoustical treatments. Software such as Sonarworks is complementary but never a replacement for panels and insulation.
How much soundproofing do I really need for a home studio?
It depends on space, requirements and budget, but a mix of absorption and diffusion gives the best start. Absorption and diffusion combined gives the most complete results, according to experts.
Are modular solutions reliable for sound insulation?
Yes, definitely. Studiobricks modular studios achieve 44.5 dB isolation according to ISO 717-1, representing professional studio quality in a flexible setup.
Recommendation
- Sound attenuation in Studio: Complete Guide For Optimal Acoustic Management – https://i4studio.nl/
- Choosing Sound Absorbing Materials: Complete Guide For Studios And Recordings – https://i4studio.nl/
- Home Studio Sound Recording Tips: From Space to Mix – https://i4studio.nl/
- Improving studio acoustics: The best home solutions


