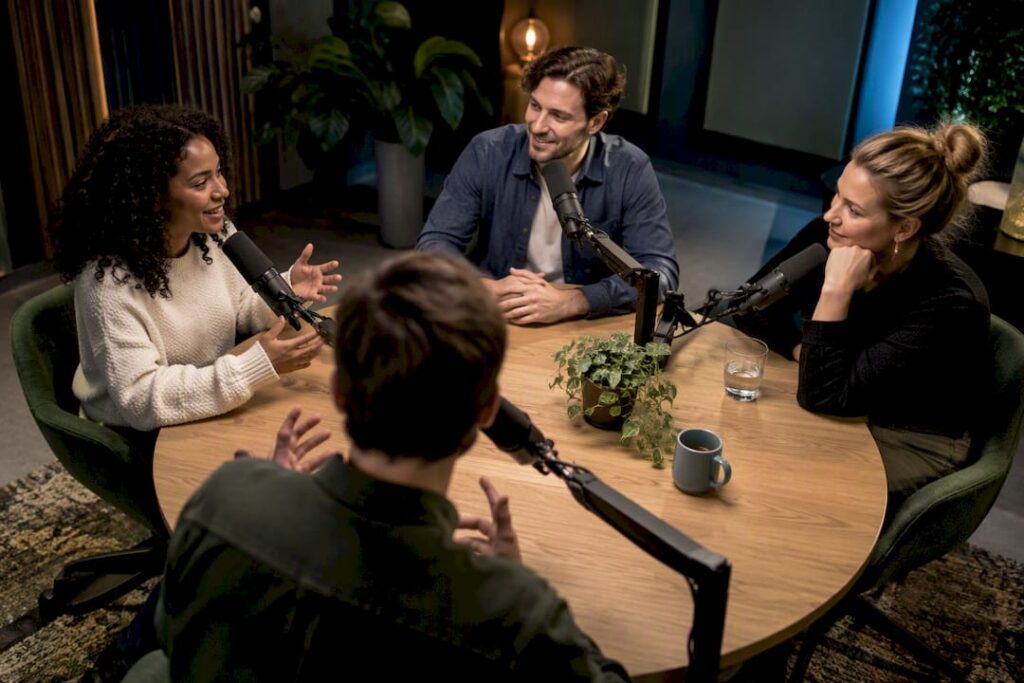
For a multi-person studio, you’ll need a microphone and headphones for each participant, plus a multichannel interface or mixer, a computer or recorder, and careful consideration of the space. The space and acoustics ultimately determine your final sound—even more so than the brands you choose. With two or more speakers, it’s all about signal routing. Each microphone must have its own channel, and each participant must have their own headphone mix; otherwise, you’ll hear feedback and noise on the recording. With two or more speakers, it’s all about signal routing: each microphone must have its own channel, and each participant must have their own headphone mix; otherwise, you’ll hear feedback and noise on the recording.
In short:
- Placing cardioid microphones at fist’s distance reduces crosstalk and improves sound quality when multiple speakers are present.
- An interface or mixer with at least one preamp and dedicated headphone outputs for each participant is essential for clear signal routing.
- Acoustic treatment, especially at reflection points, has a greater impact on recording quality than more expensive microphones or high-end equipment.
- For videocasts, one camera per participant and an overview camera are usually sufficient, with 2K or 1080p resolution as the standard.
- Invest first in basic audio and acoustic solutions before purchasing more extensive camera and lighting systems for a professional setup.
Table of contents
- Complete Equipment Checklist for a Multi-Person Studio
- Microphones and placement for multiple people
- Audio interface, mixer, and signal routing for multiple microphones and headphones
- Monitoring: Headphones, mixes, and leakage prevention
- Space, soundproofing, and acoustic treatment for multiple people
- Videocast essentials: cameras, capture, lighting, and framing
- Cables, power, ergonomics, and studio setup for multiple people
- Recording Workflow, Software, and Remote Guests: A Practical Step-by-Step Guide
- Budget and phased purchases: entry-level, semi-pro, and pro setups
- Practical installation tips and common mistakes
- Build it yourself or rent a studio: when to choose which option
- How I4studio helps you set up your studio
- Resources
- Frequently Asked Questions
Complete Equipment Checklist for a Studio with Multiple People
Setting up a multi-person studio requires more than just “buying extra microphones.” Every component must be suited to the number of participants and the way you record—whether it’s audio, video, or both. According to iZotope, for a multi-person podcast studio, you’ll need at least several microphones, mic cables, an audio interface with enough inputs, headphones, a computer or recorder, and acoustic treatment for the room.
Plan on one microphone, one pair of headphones, and one set of cables per participant. For the basic equipment, you can use this list as a guide:
- One microphone per person, preferably a dynamic microphone for speech in a shared space.
- An audio interface or mixer with at least as many inputs as there are participants, plus a separate headphone output for each person.
- Microphone cables (XLR) and headphone cables, with at least one spare cable of each type.
- A computer or standalone recorder capable of recording all channels separately (multitrack).
- Microphone arms or stands, pop filters, and shock mounts for each workstation.
- Basic acoustic treatment: absorption panels at the first reflection points and soft floor covering.
- For video: cameras, adequate lighting, and a way to synchronize video and audio.
One decision you’ll need to make early on is whether to use USB or XLR. USB microphones are easier to connect, but with more than two participants, you’ll quickly run into limitations with the number of available USB ports and the limited gain control. XLR microphones connected through an interface with multiple preamps scale better and give you more control over each individual signal.
Another option is a dedicated caster unit versus a traditional combination of an audio interface and a digital audio workstation. A caster unit, as described in the RØDECaster Video datasheet, combines audio and video switching into a single device, with multiple headphone outputs and multitrack recording. This simplifies setup, especially for live recordings with multiple sources. An interface plus a DAW offers more flexibility in terms of plug-ins and routing, but requires more technical knowledge on the part of the operator.
For a computer or recorder, keep in mind: plan for at least as many recording tracks as there are participants—and preferably more if you also want separate tracks for music or sound effects. A stable, fast hard drive is more important for this than a fast processor alone.
Microphones and Placement for Multiple People
Your choice of microphone largely determines how professional your recording sounds, especially when multiple voices are speaking at the same time. According to Podcast District, dynamic microphones are often the best choice for podcasts in multi-person settings because they pick up less background noise and deliver consistent voice reproduction. That’s exactly what you need when multiple people are talking in the same room: less sensitivity to the person next to you means less crosstalk on each track.
For a practical setup with multiple participants, this order is helpful:
- For each participant, choose a dynamic microphone with a cardioid polar pattern, so that sound is picked up primarily from the front.
- Place each microphone at “fist’s distance”—about one fist’s length from the mouth—for consistent volume without excessive bass boost.
- Mount microphones on boom arms instead of table stands so they remain out of view during video broadcasts and don’t shift during the conversation.
- Use shock mounts to dampen vibrations from the table and pop filters to reduce plosive sounds.
- Keep microphones at least 60 to 90 centimeters apart when space allows, to minimize crosstalk between channels.
For videocasts, placement plays a dual role: both acoustic and visual. A microphone that sounds great but is only partially in frame looks sloppy on camera. Boom arms with a black or neutral finish are less noticeable than table stands and allow you to position the microphone just outside the frame without compromising sound quality.
You can prevent handling noise—the sound of hands moving along the stand—by mounting the microphone on an arm that isolates it from vibrations, rather than attaching it directly to the table. You can minimize cross-bleed—where one microphone picks up the voice of another participant—by increasing the distance between microphones, using cardioid patterns instead of omnidirectional patterns, and applying gate or ducking settings to each track during mixing.
Audio interface, mixer, and signal routing for multiple microphones and headphones
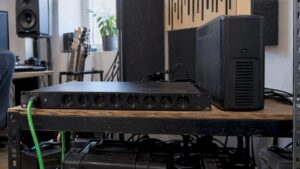
The interface or mixer is the heart of your setup: this is where all the microphone signals come together and where all the headphone mixes are sent out. For two to four participants, an interface with at least as many XLR inputs as there are speakers and at least as many independent headphone outputs is the practical minimum requirement.
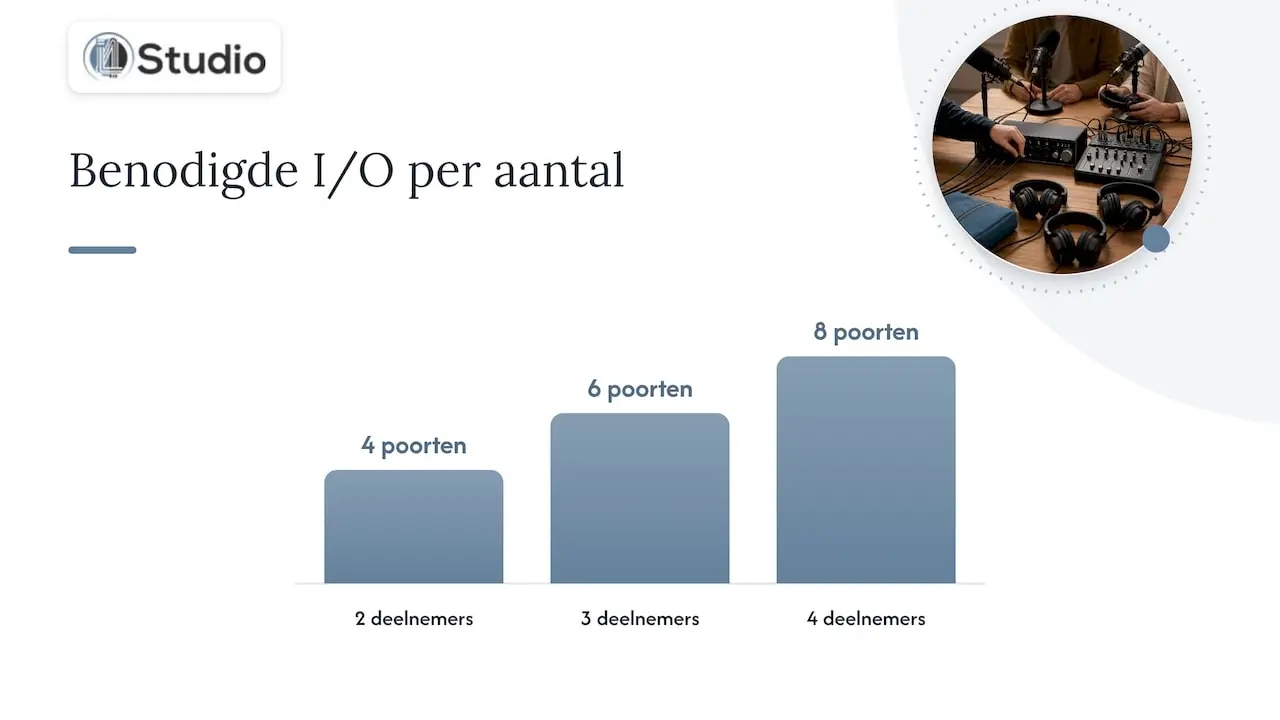
The signal flow is basically as follows: microphone to preamp, preamp to interface input, interface to the computer for recording, and simultaneously back to each headphone output as a monitor mix. For gain-hungry microphones, such as some dynamic models with low output, sufficient preamp gain (preferably 60 dB or more) is essential to obtain a clean signal without increased noise. Condenser microphones also require phantom power (48V), while dynamic microphones generally do not.
Here’s what you’ll need:
- An interface or mixer with at least one preamp input per participant.
- As many independent headphone outputs as there are participants, preferably with individual volume controls for each output.
- Sufficient phantom power if the setup includes condenser microphones.
- Direct monitoring with low latency, so that speakers can hear themselves without delay.
A dedicated caster unit addresses many of these issues in a single device, while an interface plus DAW setup offers more flexibility in routing and plug-ins but requires more setup work beforehand.
Pro tip: Test the entire routing setup a day before recording with all participants present, including headphones, to catch any latency issues or misassigned channels in time.
Monitoring: Headphones, Mixes, and Leakage Prevention
Without proper monitoring, everyone hears themselves with a delay, or the neighbor’s microphone picks up their sound, resulting in a messy recording. Closed-back headphones are the better choice in virtually any multi-person setting because they isolate sound and prevent the headphone signal from being picked up by a nearby microphone.
Practical steps for a clean monitoring setup:
- Give each participant their own headphone output so that volumes can be adjusted individually.
- Set the headphone volume just high enough to hear yourself and others, without the sound from the headphones leaking audibly into the microphone.
- Test for leakage during a soundcheck by removing a pair of headphones from your head while audio is playing: if you can clearly hear the sound from half a meter away, lower the volume.
- For remote guests, use a mix-minus so that each participant hears all voices except their own, which prevents echoes.
According to Descript, a mix-minus is essential for preventing echo and delay with remote guests, and many hardware and software solutions—from caster units to DAW routings—support this by default. For a studio with only in-person guests in the same room, a simple individual headphone send is usually sufficient, as long as each send mutes or lowers the listener’s own channel.
Space, sound insulation, and acoustic treatment for multiple people
The room has a greater impact on your final sound than any microphone upgrade. According to Descript, the recording space—particularly the early reflection points and soft surfaces—has a greater effect on the final result than a more expensive microphone, so it makes sense to address reflection points first.
Sound insulation and acoustic treatment are two different things. Insulation keeps sound out of or inside a room using heavy materials, door strips, and double-paned glass. Acoustic treatment controls how sound reflects within a room using absorption panels, diffusers, and bass traps. For most home studios, acoustic treatment is more important than complete soundproofing, unless noise from neighbors or the street is a problem.
A practical, step-by-step approach:
- Determine the initial reflection points by moving a mirror along the wall while speaking: wherever you see the microphone, that’s where you should install an absorption panel.
- According to Descript, you should first address these reflection issues with absorption panels before investing in other equipment, because an inexpensive rug or curtain can yield greater benefits than a microphone upgrade.
- Add diffusers to the back wall if the room already has sufficient absorption, so the sound doesn’t feel too dead.
- Place bass traps in the corners of the room if low frequencies are rumbling or building up, which tends to happen especially in smaller rooms.
- Opt for budget-friendly solutions such as foam panels and fabric when your budget is limited, and switch to MDF-based panels or professional wall solutions when you’re willing to invest more in sound quality.
For most multi-person studios, a combination of sound absorption on the walls surrounding each speaking position and soft flooring is sufficient. A detailed overview of panels and bass traps helps determine the type and placement for each room layout.
Videocast essentials: cameras, capture, lighting, and framing
As soon as you add video to your recordings, you’re introducing an extra layer of technical complexity that must be synchronized with the audio. For a table setup with two to four participants, one camera per person is usually the practical minimum, supplemented by a wide-angle camera for a broader shot. Some teams work with just two cameras that switch between close-ups and a group shot, which is more budget-friendly but offers less flexibility during editing.
The following points should be kept in mind regarding capture and synchronization:
- Use a capture card or USB cameras that your software recognizes directly, without an intermediate conversion step.
- Record audio and video separately whenever possible, so you can precisely synchronize them to the audio waveform during editing.
- Opt for an all-in-one caster unit if you want to switch audio and video simultaneously during a live recording; according to the RØDECaster Video datasheet, this simplifies the setup and can minimize operational errors during live recordings.
- Make sure you have sufficient storage space; video takes up significantly more disk space than audio alone.
Resolution doesn’t have to be excessive: according to FWD, 2K or 1080p is often more than sufficient for video streams, while 4K mainly results in additional storage and bandwidth requirements without a proportional benefit for the viewer in many shows.
For lighting, a three-point setup is usually sufficient: a softbox as the main light positioned at an angle in front of each speaker, a fill light to soften harsh shadows, and, if necessary, a backlight to create depth. Make sure the lighting is consistent for each person; otherwise, noticeable differences will appear between the camera shots when switching between them. Framing works best when each camera is positioned at eye level and leaves enough space above the head without making the speaker appear small in the frame.
Cables, power, ergonomics, and studio setups for multiple people
A studio with multiple workstations can easily end up with ten to twenty cables running through it, and without a structured setup, this becomes a source of malfunctions and a tripping hazard. Label each cable at both ends so that, in the event of a malfunction, you can quickly locate the correct channel without having to disconnect everything.
Practical tips for a safe and tidy setup:
- Use cable trays or Velcro to secure floor cables and prevent tripping hazards.
- Keep at least one spare cable of each type (XLR, headphone, power) within easy reach for use during recordings.
- Connect all equipment through a surge protector, especially when multiple interfaces, cameras, and computers are on the same circuit.
- Choose tables with cable grates and enough space per workstation so that arms and stands can be securely mounted without overloading the table.
- Attach microphone arms to a stable table edge or a separate clamp, not to loose or lightweight furniture that could bend.
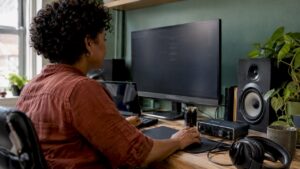
A well-designed, compact workspace like the Studio Desk Spirit provides space for equipment and cable management without making the setup look cluttered.
Recording Workflow, Software, and Remote Guests: A Practical Step-by-Step Guide
A good workflow prevents you from discovering later that a track wasn’t recorded or that the levels were too low; for advice on efficiently publishing and distributing recorded content, you can use WordPress Publishing Automation for Content Teams.
- Set the recording settings to at least 44.1 kHz and 24-bit in advance so that you have sufficient dynamic range for later editing.
- Do a sound check with all participants at the same time: have everyone speak briefly and check that each channel is at a healthy level without clipping.
- Set up a mix-minus for remote guests so that everyone can hear each other without hearing their own voice, which prevents echoes.
- Record in multitrack mode—that is, each channel separately—so that during editing you can make adjustments for each speaker without affecting the rest.
- As a backup, have a separate recorder or a second recording on a phone running at the same time, so that a technical problem with the main recording doesn’t immediately mean a missed session.
- After recording, be sure to back up all your files before you start editing.
- In post-production, perform the following basic steps: noise reduction, leveling the audio between speakers, and, if necessary, light compression to ensure a consistent listening experience.
For remote guests using VoIP solutions, the quality of the connection depends heavily on a stable internet connection on both ends. Whenever possible, record the guest’s local audio separately using your own recorder, so that if the connection falters, you’ll still have a clean track to work with.
Pro tip: Set up a consistent naming convention for recording files based on the session and speaker; this will save you a significant amount of time searching for files once you start recording multiple episodes per week.
Budget and phased purchases: entry-level, semi-pro, and pro setups
Not everyone needs to buy everything at once. The order in which you make your investments determines how quickly you’ll see results. Acoustic treatment and microphones typically offer the greatest improvement per euro spent, because they directly impact the fundamental quality of every recording, regardless of which camera or interface you add later.
A logical phasing:
- Phase 1, entry-level: one dynamic microphone per participant, a simple interface with sufficient inputs, closed-back headphones, and basic absorption panels at the first reflection points.
- Phase 2, semi-pro: expansion with boom arms, a dedicated caster unit or larger interface, additional acoustic panels including bass traps, and an initial camera setup for video.
- Phase 3, professional: multiple cameras per workstation, professional lighting, a fully treated room with diffusers, and a stable studio PC that seamlessly handles multitrack audio and video.
Save money where possible on furniture and general accessories, but not on microphones or acoustics: a cheap table won’t stand out in the recording, but a room with too much reverberation will. Secondhand audio interfaces from reputable brands are often a safe way to save money, provided they offer enough inputs and phantom power for your setup.
Practical Installation Tips and Common Mistakes
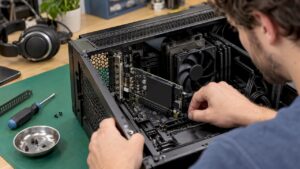
A stable studio PC is just as important as the microphones themselves, especially when recording multitrack sessions with multiple audio and video tracks at the same time. Sufficient CPU power, fast SSD storage, and enough RAM prevent glitches during recording—which, in a live session with multiple guests, would be impossible to recover from. Our top 5 studio PCs for podcasting provides a practical overview of configurations that can handle this workload.
Common installation mistakes you can prevent in advance:
- The gain setting on the preamp is too low, which means you’ll have to boost the noise later instead of recording a clean signal.
- Ground loops caused by improperly grounded power connections, recognizable by a constant humming sound on the recording.
- Insufficient ventilation around the studio PC, which causes fan noise in the recording room.
- Placing acoustic panels too far from the first reflection points, so they have virtually no effect.
If you’re unsure about panel placement or are experiencing acoustic problems that you can’t solve on your own, professional advice is often more worthwhile than continuing to experiment on your own.
Build It Yourself or Hire a Studio: When to Choose Which Option
Doing it yourself makes sense if you regularly record several times a week and the investment pays for itself over time. For a one-time production or a short run, renting a studio is often cheaper and faster, without the hassle of acoustics and equipment.
The decision comes down mainly to time and repetition: if you record an episode every month, it’s better to have your own setup; if you’re working on a one-time project, it’s better to rent. A professional setup primarily adds expertise in acoustics and routing—two areas where DIY experiments often take the longest and are most prone to errors.
– harold
How I4studio Can Help You Set Up Your Studio
Once you know what equipment you need, the next step is to find the right components that work well together. There are suppliers that sell studio equipment, acoustic panels, and accessories, and offer custom-built studio PCs designed for stable, low-latency multitrack recording.
For audio equipment, we offer audio interfaces and microphones from various brands, and for the room itself, acoustic panels with personalized advice on placement. If you’d rather not build your own computer, you can choose directly from our Studio PCs, starting at €1,099 (one-time fee), configured for stable multitrack recording without any hassle afterward. Check out our selection and ask any questions about your specific setup via I4studio.
Sources
- How to Set Up a Podcast Studio — iZotope
- Podcast Studio Setup: How to Build One That Works — Descript
- RØDECaster Video Datasheet — RØDE
- What equipment does a good podcast studio need? — Podcast District
Frequently Asked Questions
What do you need to create a podcast?
You’ll need at least one microphone per speaker, an audio interface with enough inputs, headphones, a computer or recorder, and acoustic treatment for the room. According to iZotope, mic cables, room treatment, and reliable recording software are essential for achieving consistent results.
What equipment do I need to record with multiple people?
For multiple participants, you’ll need a separate microphone and pair of headphones for each person, connected to an interface or mixer with as many inputs and headphone outputs as there are speakers. Dynamic microphones are often the practical choice here because they pick up less background noise, according to Podcast District.
Can you just make a podcast without an expensive studio?
You can start with a simple entry-level setup consisting of one microphone, a basic audio interface, and a pair of headphones per person, without having to invest in professional equipment right away. The room itself—particularly the treatment of harsh reflections—often has a greater impact on sound quality than an expensive microphone, as Descript points out.
What software do I need to record a podcast?
You’ll need a digital audio workstation that supports multitrack recording, so that each microphone channel is recorded separately for later editing. For remote guests, you’ll also need a solution that can set up a mix-minus, so that speakers can hear each other without hearing their own voices.
How many cameras do I need for a video broadcast with multiple guests?
For a table setup with multiple guests, one camera per person plus a wide-angle camera is a practical baseline, although some productions also use two cameras that alternate between close-ups and group shots. According to FWD, a resolution of 2K or 1080p is more than sufficient for most video broadcasts.