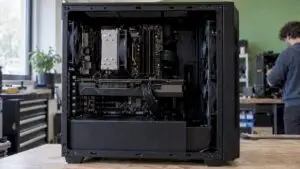
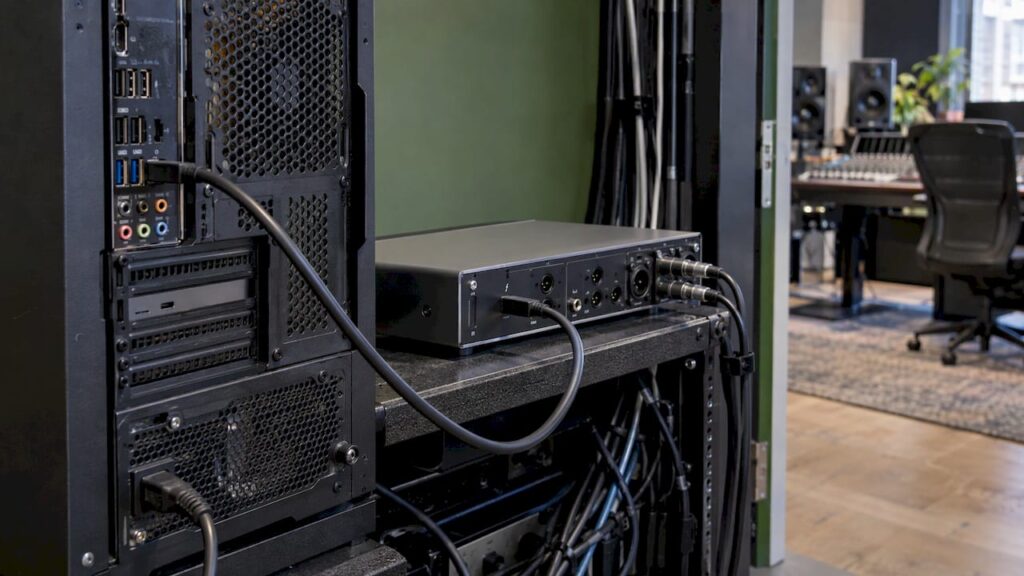
Thunderbolt audio works on Windows if three conditions are met. Your PC has a genuine Thunderbolt port (on the motherboard or via a certified Thunderbolt expansion card). Your audio interface has a Windows driver from the manufacturer. And Windows, the BIOS, and the firmware are properly configured. If any one of these three isn’t right, you’ll run into the usual issues: the interface isn’t recognized, you hear clicks in your mix, or the connection drops after waking from sleep mode. In this guide, you’ll learn what your PC needs and what the difference between Thunderbolt 3 and 4 means for audio. Then you’ll set everything up step by step.
In a nutshell
- First, the hardware: A Windows PC needs a Thunderbolt controller on the motherboard or a Thunderbolt card. A standard USB-C port is not the same thing.
- Manufacturer’s driver: A Thunderbolt audio interface works on Windows with the manufacturer’s own driver. Install it before connecting the interface.
- TB3 or TB4: Both reach 40 Gbps via USB-C. In practice, you won’t notice much difference with a single audio interface. Thunderbolt 4 does, however, impose stricter minimum requirements on the port.
- Set the following settings: Disable the Thunderbolt controller’s power management, select a performance power plan, and keep the BIOS and firmware up to date. This will prevent most outages.
- The smartest approach: a desktop PC built from the ground up with Thunderbolt audio will save you hours of searching.
Table of contents
- What Your Windows PC Needs for Thunderbolt Audio
- Thunderbolt 3 or Thunderbolt 4: What’s the Difference for Audio?
- Check compatibility before connecting
- How to install a Thunderbolt audio interface on Windows
- Windows, BIOS, and driver settings for stable audio
- Cables, adapters, and multiple devices
- Interface Not Recognized or Connection Is Lost: Here’s How to Fix It
- Our take on Thunderbolt audio on Windows
- A Thunderbolt-ready studio PC
- Frequently Asked Questions
- Sources
What Your Windows PC Needs for Thunderbolt Audio
Thunderbolt has been a standard feature on Macs for years. On Windows, it depends on the motherboard and how the manufacturer has implemented Thunderbolt. That’s why some Windows PCs work seamlessly with a Thunderbolt interface, while others don’t.
Here’s what you’ll need, at a minimum:
- A Thunderbolt controller. It’s located on the motherboard (often in laptops and on some desktop motherboards) or on a separate Thunderbolt expansion card. Note: Such a card only works on motherboards that are designed to support it, usually with a special connector (header) on the board.
- A port with the Thunderbolt logo. USB-C refers only to the shape of the connector. In many cases, a USB-C port without the lightning bolt logo is simply USB and does not transmit a Thunderbolt signal.
- An up-to-date Windows installation. Use a recent, fully updated version of Windows 10 or Windows 11. This ensures that the system’s Thunderbolt drivers are also up to date.
- The driver for your interface. The manufacturer of your audio interface provides its own Windows driver, often including an ASIO driver for your DAW. Without that driver, Windows may recognize the device, but you won’t be able to record with it.
- Plenty of processing power and fast storage. Thunderbolt gives you a fast, direct connection. The PC also needs to have enough processing power to run all your plugins with a small buffer.
Laptop or desktop?
On a laptop, Thunderbolt is usually built-in and tested by the manufacturer. That’s convenient, but you’re limited by that model’s cooling and power management. With a desktop, you have more control. You choose a motherboard with Thunderbolt, a powerful processor, and good cooling, and you tailor the entire system to audio. For a permanent studio, a desktop is therefore often the more stable foundation.
Thunderbolt 3 or Thunderbolt 4: What’s the difference when it comes to audio?
Thunderbolt 3 and Thunderbolt 4 both use a USB-C port and both support speeds of up to 40 Gbps. According to Dell’s overview of Thunderbolt ports, Thunderbolt 4 also guarantees 32 Gbps for PCIe data transfer. It also supports USB4 and has stricter requirements for displays and security.
| Feature | Thunderbolt 3 | Thunderbolt 4 |
|---|---|---|
| Connection | USB-C | USB-C |
| Maximum speed | 40 Gbps | 40 Gbps |
| PCIe Bandwidth | Depends on the PC | Guaranteed 32 Gbps |
| USB4 Support | No | Yes |
| Requirements for Screens and Security | Basic | Stricter |
| What This Means for Audio | More than enough for an audio interface | More than enough, with greater certainty about the port’s minimum performance |
What does this mean in practice?
An audio interface uses only a small fraction of those 40 Gbps. Even an interface with many channels and built-in DSP doesn’t come close to that limit. So the advantage of Thunderbolt for audio isn’t in its raw speed. It’s in the direct PCIe connection: that allows an interface to operate with a small buffer and low latency.
The main difference between TB3 and TB4 is reliability. With Thunderbolt 4, you know the port meets specific minimum requirements. That’s helpful when you’re connecting multiple devices, such as an audio interface, a fast external SSD, and an additional monitor.
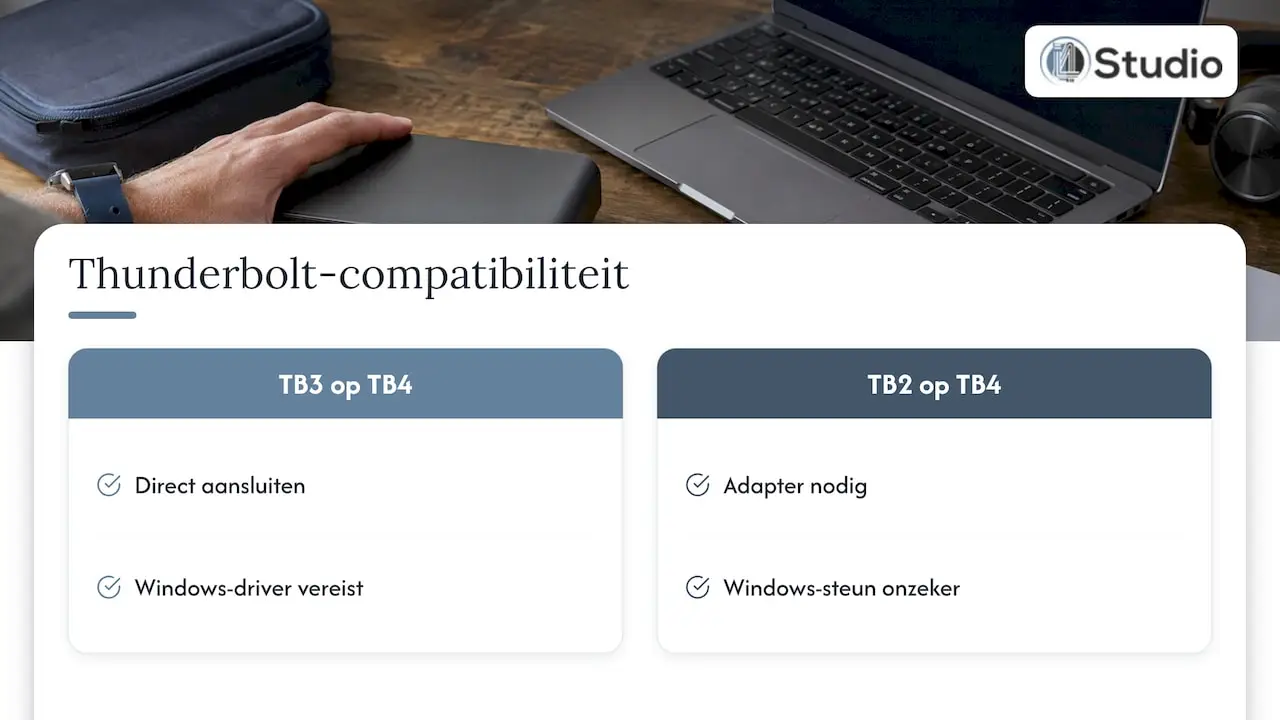
Will a Thunderbolt 3 interface work on a Thunderbolt 4 PC?
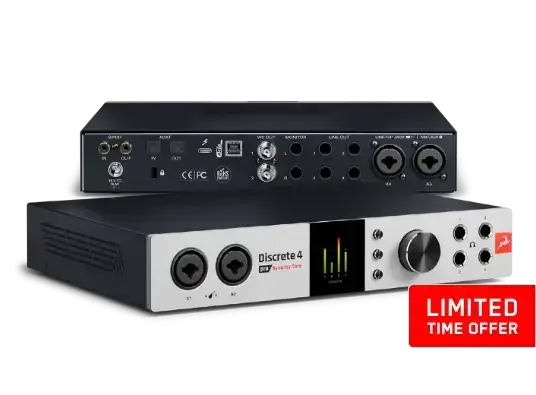
Yes, generally speaking. A Thunderbolt 4 port is backward compatible with Thunderbolt 3, so you can simply connect a TB3 audio interface to a TB4 port. It’s important, however, that the interface manufacturer provides a Windows driver that works with the Thunderbolt controller in your PC. This means you can also connect an interface like the Audient Horizon 8P (Thunderbolt 3, 24×32) or the Antelope Audio Discrete 4 Pro (Thunderbolt 3 and USB 2.0, with DSP) to a modern Thunderbolt 4 studio PC.
An interface with an older Thunderbolt 2 port is a different story. It has a different connector, and you’ll need an adapter. On Windows, this is often the trickiest situation, because not every manufacturer supports that combination.
Check compatibility before connecting
This check will help you avoid most surprises. Go through it carefully before choosing an interface or a PC.
- Check the port. Look for the Thunderbolt logo next to the USB-C port, or check the specifications for your PC or motherboard.
- Check the Windows driver. Go to your interface’s download page and see if there’s a Thunderbolt driver for Windows 10 or 11. Not every brand provides one for all of its interfaces.
- Check which systems are supported. Many manufacturers publish a list of tested Thunderbolt controllers or motherboards. If your combination is on the list, you know the manufacturer has tested it.
- Check the Thunderbolt software in Windows. On many PCs, you can manage connected Thunderbolt devices through a Thunderbolt Control Center. If you don’t see it, you may need to install the software from the PC manufacturer first.
- Check the BIOS settings. On desktop motherboards, you may need to enable Thunderbolt in the BIOS first. There, you’ll also find the security levels and options for detecting devices during startup.
If you choose a ready-to-use studio PC, this check has already been done for you. We build our Thunderbolt studio computers specifically for this type of setup.
How to install a Thunderbolt audio interface on Windows
The order in which you install the components matters more than you might think. Follow these steps:
- Update Windows. Install all available updates and restart the PC.
- Update the BIOS and Thunderbolt firmware. To do this, use the tools provided by your PC or motherboard manufacturer. Read the instructions carefully: on some systems, you’ll need to temporarily disable a BIOS option before the Thunderbolt controller firmware update will succeed.
- Install the interface driver. Download the latest Windows driver from the manufacturer and install it before connecting the interface. Then restart your computer.
- Connect the interface. Use a certified Thunderbolt cable and connect the interface directly to the PC, not through a hub.
- Grant permission. Windows or the Thunderbolt Control Center will often ask if you want to allow the new device. Select “Always connect.” Then, after a restart, the interface will reconnect automatically.
- Update the interface’s firmware. Many interfaces receive firmware updates through their own software. Run the update when the software prompts you to do so.
- Set up your DAW. In your DAW, select the interface’s ASIO driver and set the sample rate. Start with a buffer size of, say, 128 samples. If it runs stably, you can reduce the buffer size further.
Windows, BIOS, and driver settings for stable audio
A Thunderbolt interface is only as stable as the system it’s connected to. These settings make the biggest difference.
Energy Management
- Do not allow the Thunderbolt controller to be turned off. Open Device Manager, double-click the Thunderbolt controller, and go to the Power Management tab. There, uncheck the option that allows the computer to turn off the device to save power. This prevents the connection from dropping during a session.
- Choose a power plan optimized for performance. In power-saving mode, the processor throttles down. If the buffer is low, this can cause clicking noises.
- Sleep mode and USB interrupts. Turn off selective USB interrupts and do not use sleep mode while you’re working.
BIOS Settings
- Make sure Thunderbolt is enabled and that devices are recognized at startup.
- Set the security level so that your interface is automatically granted access after you give your permission.
- Keep the BIOS up to date. Manufacturers regularly improve Thunderbolt support through updates.
Driver and buffer
- Always use the manufacturer’s ASIO driver in your DAW, not a generic Windows driver.
- Use a fixed sample rate for each project and do not change it while recording.
- Use a small buffer when recording and a larger one when mixing.
Want to optimize your system even further? Then read our article on Windows settings for low latency. In it, we also cover background processes, networking, and graphics drivers.
Cables, adapters, and multiple devices
Many Thunderbolt issues are caused by the cable. Keep the following in mind:
- Use a certified Thunderbolt cable. A standard USB-C cable will work, but it often doesn’t transmit the full Thunderbolt signal. A Thunderbolt 4 cable also works with Thunderbolt 3 devices.
- Keep the cable short. Passive cables only reach their full speed over a limited length. If the interface is right next to your desk, a short cable is the safest choice.
- Thunderbolt 2 Adapter. If you have an older interface with Thunderbolt 2, you’ll need an official Thunderbolt 3 to Thunderbolt 2 adapter. Check to see if the interface manufacturer supports this combination on Windows.
- No cheap hubs. Connect your interface directly. A hub or dock is an extra link that can cause latency or outages.
Daisy chain
With Thunderbolt, you can daisy-chain devices—interfaces, storage, and other devices—into a single chain. This works well if you choose the order wisely and ensure that power and cables are set up properly. You can read about how to do this in our guide to Thunderbolt daisy chaining for audio. If you work with a lot of separate devices, be sure to check out our Thunderbolt interface solutions.
Interface not recognized or connection drops out: here’s how to fix it
Is something going wrong? If so, work through this list from top to bottom:
- Cable and port. Try a different certified Thunderbolt cable and a different Thunderbolt port.
- Is the device allowed? Check the Thunderbolt Control Center to see if the interface is allowed.
- Startup order. Some combinations work best if you turn on the interface first and then start up the PC. Try both orders.
- Device Manager. Is there an exclamation mark next to the interface or the Thunderbolt controller? Uninstall the device, reinstall the driver, and restart your computer.
- Firmware and BIOS. Check to make sure the BIOS, Thunderbolt firmware, and interface firmware are up to date.
- Power Management. Check to see if power management for the Thunderbolt controller is still disabled. A Windows update may reset these settings.
- Stuttering and dropouts. Increase the buffer size, close background programs, and make sure the processor isn’t throttling.
You can find more practical solutions in our article on troubleshooting audio interface issues.
Our Take on Thunderbolt Audio on Windows
At i4studio, we build custom studio PCs for producers, musicians, and video editors. What we see time and time again: Thunderbolt on Windows isn’t a gamble if the system is built for it from the start. Problems almost always arise with PCs that were originally built for something else and had Thunderbolt added later.
That’s why, when building a studio PC, we don’t just look at the processor and memory. We fine-tune the motherboard, Thunderbolt controller, BIOS, firmware, and Windows settings to work together, with a focus on stability and low latency. That way, a Thunderbolt interface works exactly as you want it to from the very first session.
Not sure which interface or computer is right for your studio? Our experts are happy to help you figure out the best hardware and acoustics for your space. A good interface and a reliable PC really shine in a space that sounds great.
Harold
A studio PC that’s Thunderbolt-ready
Don’t want to figure out BIOS settings, drivers, and controllers on your own? We build custom studio PCs for audio and video, with a focus on stability, low latency, and personalized support. The Thunderbolt 4 Turbo Studio / DAW PC is designed for producers and editors who need maximum performance and a fast Thunderbolt connection. Our studio PCs start at €1,099.
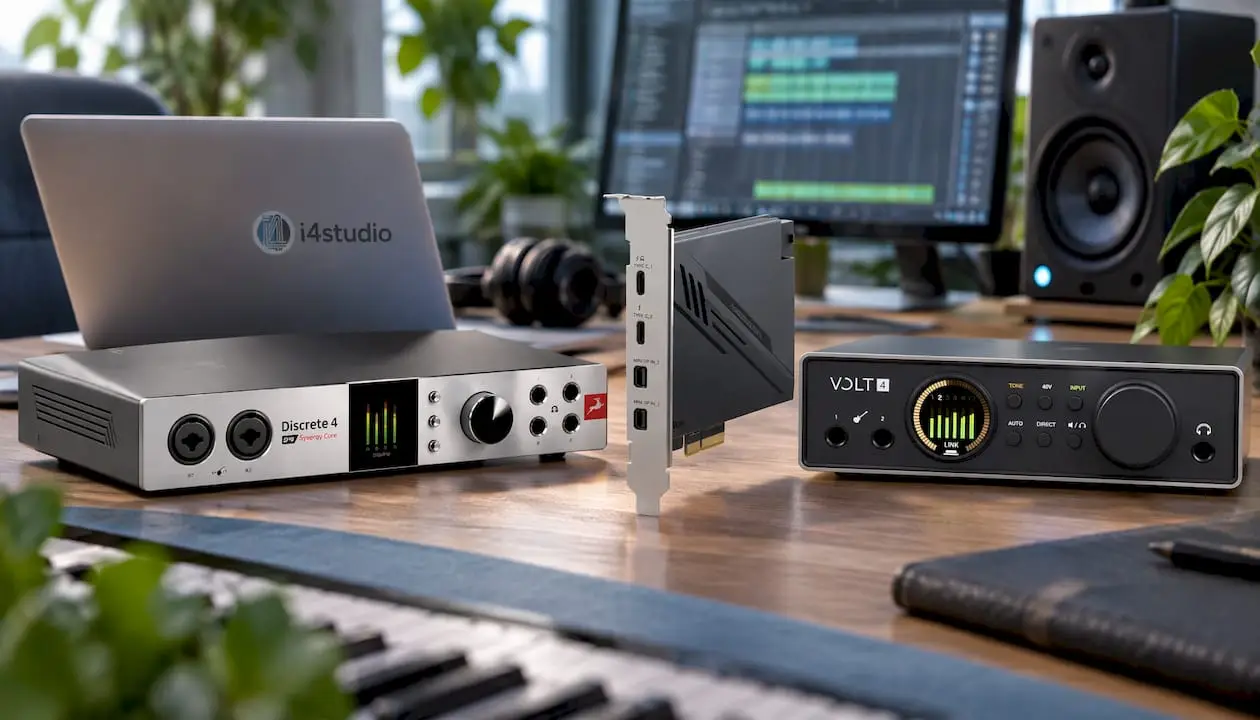
Looking for an interface that fits your needs? Check out our full selection of audio interfaces. Complete your studio with studio monitors, microphones, and acoustic panels. Do you mainly work in Ableton? Then our guide to the best computers for Ableton will help you out.
Frequently Asked Questions
Does every Thunderbolt audio interface work on Windows?
Not automatically. The interface requires a Windows driver from the manufacturer that supports Thunderbolt. Check the brand’s download page for this before connecting the interface.
Can I connect a Thunderbolt interface to a standard USB-C port?
Only if the port supports Thunderbolt. You can tell by the lightning bolt logo or by checking your PC’s specifications. Some interfaces, such as the Antelope Discrete 4 Pro, also have a USB connection.
Is Thunderbolt 4 better for audio than Thunderbolt 3?
Both reach 40 Gbps, which is much more than an audio interface needs. Thunderbolt 4 primarily provides greater certainty about the port’s minimum performance and supports USB4. A Thunderbolt 3 interface also works on a Thunderbolt 4 port.
Why does my Thunderbolt interface stop working after waking from sleep?
Windows often disables the Thunderbolt controller to save power. Disable this setting in Device Manager, on the Power Management tab for the controller. Also, avoid using sleep mode while you’re working.
Do I need a special cable?
Yes, use a certified Thunderbolt cable. A standard USB-C cable will fit into the port, but it often doesn’t transmit the full Thunderbolt signal. Also, keep the cable as short as practical.