TL;DR:
- Acoustics are crucial for realistic and consistent sound reproduction.
- Enhancing RT60, C80 and D50 with targeted treatment significantly optimizes the space.
- Balance between absorption and diffusion creates a pleasant, effective studio environment.
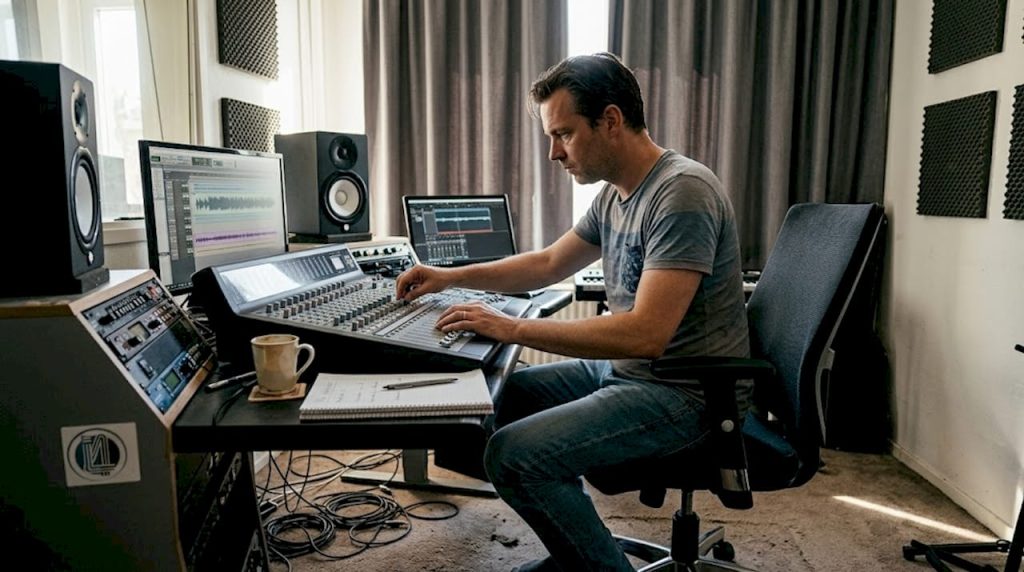
Many producers invest thousands of dollars in microphones, preamps and monitors, but forget the most important link: the room itself. The acoustics of your studio largely determine how your mix sounds and whether your decisions during mixing match reality. Reflections, room modes and reverb time have a great influence on recording and mixing. In this article, we explain the basics, discuss the metrics that matter, and provide concrete steps to optimize your studio acoustically, from bedroom to professional recording room.
Table of contents
- What is room acoustics and why is it so important?
- The main parameters explained
- Typical problems and common mistakes
- Practical steps for optimal studio acoustics
- The forgotten factor in room acoustics: the human ear and creativity
- Getting started with better acoustics in your studio
- Frequently asked questions about room acoustics
Key Insights
| Item | Details |
|---|---|
| Acoustics determine studio quality | Good acoustics are crucial for clean and reliable reproduction of music during recording and mixing. |
| Measured values offer direction | RT60, C80 and D50 are practical tools for the targeted optimization of a room. |
| Avoid common mistakes | Beware of over-absorption and misplacement; use both absorption and diffusion. |
| The ear remains leading | Trust technology, but above all, listen to the result: inspiration and perception are just as important. |
What is room acoustics and why is it so important?
Room acoustics describes how sound behaves in an enclosed space. When a speaker produces sound, some of that sound reaches your ears directly. But much of it bounces back from walls, ceiling and floor before it reaches your ears. Those reflected waves arrive a little later and color the original signal in ways that can cloud your mix.
This may sound abstract, but the practical implications are huge. Imagine mixing a bass line that sounds perfect in your studio but is way too thin or heavy on other systems. That’s almost always an acoustic problem, not a matter of bad monitors.
The basic acoustics explanation helps you understand the forces at play in your space. The main concepts are:
- Direct sound waves: The sound that goes directly from the source to your ears, without reflections.
- Early reflections: Initial reflections from nearby surfaces that interfere with stereo imaging.
- Room modes (standing waves): Frequencies that are amplified or attenuated as the wavelength matches the dimensions of the room.
- Flutter echo: Rapid, repeating echoes between two parallel walls that reduce the clarity of recordings.
- RT60 (reverberation time): The time it takes for the sound to decrease 60 dB after the sound source stops.
“Control over reflections, room modes and reverberation time are key to realistic sound reproduction.”
Studio setup from acoustics plays a direct role in how well your mix translates to other playback devices. An untreated room almost always has problems with bass piling up in the corners, and high frequencies reflecting too loudly. Even small deviations in acoustics create major errors in your mix.
The good news: You don’t have to be an architect to tackle this. With the right knowledge and the right materials, you can greatly improve the acoustics of almost any room.
The main parameters explained
To improve acoustics in a targeted way, you need measured values. Here are the parameters that really matter in a studio environment.
1. RT60 (reverberation time)
The RT60 measures how long it takes for sound to drop 60 dB after the source stops. For a studio, you want a short, controlled reverberation time. Too long means reflections color your recording; too short means the room sounds unnatural and tiresome.
2. C80 (clarity)
The C80 measures the ratio of early to late arriving sound. A high C80 value means more clarity, which is essential for speech and instruments with fast transients.
3. D50 (definition)
D50 measures what percentage of the total energy arrives within the first 50 milliseconds. This says something about the intelligibility and sharpness of the sound in the room.
Below is an overview of empirical guideline values for studios:
| Parameter | Untreated room | Treated studio | Ideal value |
|---|---|---|---|
| RT60 (500 Hz) | 0.6 to 1.2 s | 0.2 to 0.4 s | 0.2 to 0.5 s |
| C80 | Low (negative) | High (positive) | > 0 dB |
| D50 | < 40% | > 60% | > 60% |
| Bass symmetry | Poor | Good | Uniform |

A treated room scores significantly better on all parameters than an untreated room. The difference in RT60 alone is striking: an untreated room often has more than twice as long reverberation times.
The steps to improve this are concrete:
- Measure the current RT60 with a measurement app or professional tool.
- Identify which frequencies deviate the most.
- Choose the appropriate treatment based on the measurement.
- Check again after treatment using the same method.
The Practical Guide to Studio Absorption explains which materials are most effective by frequency range. Absorption works well for mid and high frequencies; for low frequencies, you need bass traps.
Statistics to remember: An untreated small chamber has an average RT60 of more than 0.8 seconds at 500 Hz. After treatment with absorption panels and bass traps, this drops to 0.2 to 0.4 second, an improvement of more than 50%.
Typical problems and common mistakes
Even experienced producers make mistakes when setting up their studio. Here are the most common problems and how to recognize them.
Standing waves and SBIR
In small and rectangular rooms, low frequencies accumulate in the corners and along walls. SBIR (Speaker Boundary Interference Response) occurs when the monitor is too close to a wall. The result is a dip in the bass that you don’t hear in your studio, but can hear on other systems.

Over-absorption
More panels is not always better. A room with too much absorption sounds “dead”: dry, lifeless and tiring to work in for a long time. The RT60 then drops below 0.2 seconds, which is just as problematic as an overly long reverberation time.
Comparison of common mistakes:
| Error | Effect | Solution |
|---|---|---|
| Monitor flat against wall | SBIR, bass dipping | At least 50 cm from the wall |
| Absorption only, no diffusion | Dead, lifeless space | Combine absorption with diffusers |
| No bass traps in corners | Stacked low frequencies | Basstraps in all corners |
| Mixing in the center of the room | Strong axial modes | Mix at 38% of the chamber length |
Studio acoustics solutions vary widely by space. What works in a large control room will not automatically work in a small home studio.
Key points of interest:
- Always use bass traps in the corners, as that is where the concentration of low frequencies is greatest.
- Diffusers belong on the back wall and side walls, not on the front of the room.
- The best acoustics products combine absorption and diffusion in one design.
- Always check the basic theory of sound detection if you also work with recordings of sound sources.
Pro-tip: Are you using multiple subwoofers? Place them symmetrically with respect to the listening position. Two subwoofers in the front corners of the room equalize bass response significantly better than one central subwoofer.
Practical steps for optimal studio acoustics
A good approach starts with measuring, not buying. Here’s a step-by-step approach that works for any studio environment.
Measure the space. Use a free measurement app such as Room EQ Wizard (REW) in conjunction with a calibrated measurement microphone. Play a test signal through your monitors and analyze the frequency response and RT60 per octave band.
Identify problem areas. Look for where peaks and valleys are in the frequency response. Peaks in the low frequencies indicate room modes; a long RT60 in the mid and high frequencies indicates too little absorption.
Determine the Schroeder frequency. The Schroeder frequency is the boundary between modal problems (low frequencies) and diffuse problems (high frequencies). In small studios, this is often between 200 and 400 Hz. Below this limit, you need bass traps; above it, absorption panels work.
Choose the right treatment. Select effective acoustic panels based on your measurement. Thick bass traps (at least 10 cm) for the corners, broadband absorbers for the side walls and diffusers for the back wall.
Place strategically. Hang absorbers at the first reflection points on the side walls (use a mirror to find them). Basstraps go in all corners, including the corners between wall and ceiling.
Measure again and adjust. After placement, measure again. Compare the new RT60 and frequency response to the baseline. Fine-tuning is normal; you rarely achieve perfection overnight.
Pro-tip: Also, listen to reference tracks you know well on your new setup. Technical measurements are valuable, but your ears ultimately tell you if the room sounds right for music production.
The practical acoustics guide provides additional information on specific room types and budget-friendly solutions.
The forgotten factor in room acoustics: the human ear and creativity
Technical measurements are indispensable. But there’s something no measurement tells you: whether the space inspires you to make music.
We see it regularly: producers who make their studio so technically perfect that they are no longer comfortable working in it. A space that is too dry, too tight can inhibit the creative process. The ear is more sensitive than any measuring instrument, and it also responds to atmosphere, feeling and comfort.
The characteristics of a professional studio go beyond RT60 and C80. Professional studios are designed with both technical precision and human experience in mind. A good mix between absorption and diffusion creates a space that is technically correct and feels comfortable.
Our advice: use measurements as a starting point and guide, but also trust your ears. Play reference tracks that you know thoroughly. If you hear details after the treatment that you missed before, you’re on the right track. Acoustics are a means, not an end in themselves. The music you make is the goal.
Getting started with better acoustics in your studio
Do you now know where you stand with the acoustics of your studio? Then the next step is to take concrete action. At i4studio you will find a wide range of acoustics solutions, tailored to both home studios and professional recording spaces.

Whether you’re looking for a studio acoustic diffuser for the back wall, a complete Primacoustic London kit for full room treatment, or a powerful PC for music production that keeps your DAW running smoothly: we’ll help you out. Unsure which solution is best for your space? Contact us for personal advice. Customization is what we do.
Frequently asked questions about room acoustics
What is the ideal reverberation time (RT60) for a home studio?
The ideal RT60 for a home studio is between 0.2 and 0.5 seconds in the midrange (500 to 1000 Hz). Shorter values sound too dry; longer values add too much color to your recordings and mix.
Why does my studio sometimes sound “dead” after installing additional panels?
This is a sign of over-absorption: an RT60 below 0.2 second makes the room lifeless and fatiguing. Add diffusers to better distribute sound and make the room more lively.
Which is better: absorption or diffusion for acoustics?
A combination of absorption and diffusion is always best. Absorption reduces unwanted reflections, while diffusion spreads sound evenly and prevents a lifeless room.
Is there a difference between small and large studios in terms of acoustical problems?
Yes. Small rooms have more modal problems due to standing waves at low frequencies. Basstraps in the corners are therefore not an option but a necessity in small studios.