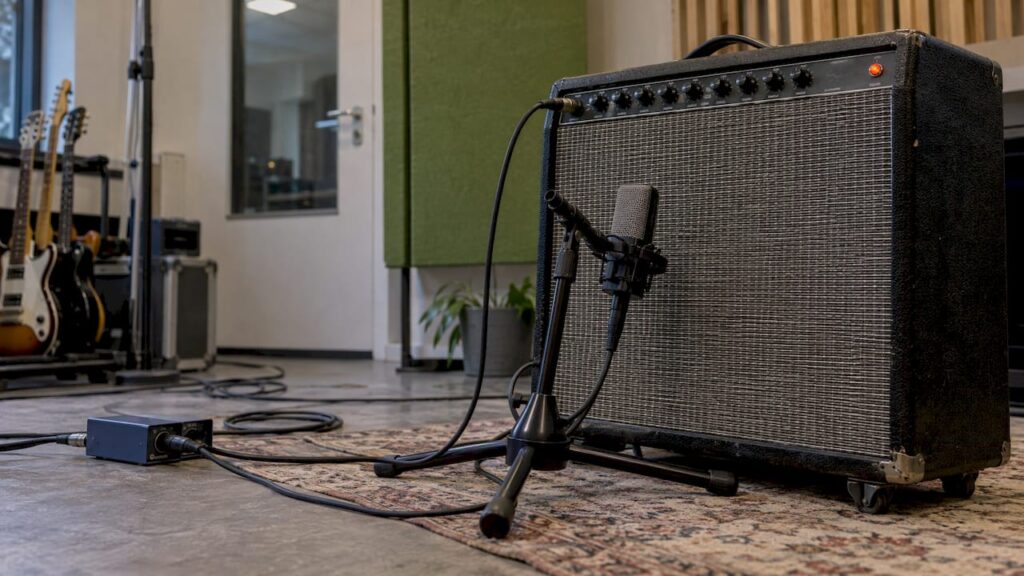
Reamping involves first recording a guitar or bass part “dry” via a DI signal and then later routing that recording through a real amplifier, pedals, or effects to capture the sound again. This way, you choose the sound during the mixing phase, without the musician having to play it again. Whether it sounds good depends on your setup: an audio interface with a Hi-Z input and a free output, a reamp box, a good microphone, a stable computer, and a room that accurately reflects the amplifier’s response. In this guide, you’ll learn what reamping is, what equipment you need, and how to do it step by step—including the pitfalls related to level, hum, and timing.
In a nutshell
- Reamping involves taking a dry DI recording, running it through an amplifier or effects chain, and recording the result on a new track.
- You’ll need an audio interface with a Hi-Z input and at least one available line output, a reamp box, an amplifier or effects pedals, and a microphone.
- The reamp box converts the line-level signal from your interface to instrument level, so the amplifier responds as if a guitar were plugged into it.
- The biggest pitfalls are a signal that’s too hot, hum caused by ground loops, and a delay of a few milliseconds, which results in a thin sound when mixed with the DI.
- A stable studio PC with low latency and an acoustically treated room make the difference between a usable recording and a top-notch recording.
Table of contents
- What exactly is reamping?
- Why reamp? The practical benefits
- What equipment do you need for reamping?
- Reamping Step by Step
- Preventing hum and feedback
- Reamping for Bass, Synths, and Drums
- Ready for your first reamping session?
- Our take on reamping
- Frequently Asked Questions About Reamping
- Resources
What exactly is reamping?
In a typical guitar recording session, the sound is set right away: the amplifier, the effects pedals, the microphone placement, and the room all work together to determine what ends up on your track. If you don’t like that sound later in the mix, the guitarist will have to come back and re-record the part.
With reamping, you reverse that order. You record the raw signal from the guitar, without an amplifier or effects. This is called the DI signal (DI stands for direct input: the signal comes directly from the guitar’s pickups). That dry track sounds bare and isn’t meant to be used as-is in the mix. It’s the raw material.
Later, you send that DI track out from your DAW, through a reamp box to an amplifier or pedal chain. The amplifier responds to that signal as if the guitarist were playing live. You place a microphone in front of the speaker, press play, and record the amplified sound onto a new track. The performance remains exactly the same; only the sound changes.
You can think of it as the opposite of a DI box. A DI box converts an instrument signal into a balanced signal that your mixing console or interface can process properly. A reamp box converts a line-level signal from your interface back into an instrument-level signal—the level for which guitar amplifiers and pedals are designed. Premier Guitar explains the four signal levels—microphone, instrument, line, and speaker—and why you shouldn’t just mix them up.
Why Reamp? The Practical Benefits
Reamping has become a standard practice in professional studios. It also offers many benefits in home studios:
- Postpone the sound selection. During the recording, focus on getting a tight take. You’ll design the sound in the mix, once you hear what the song needs.
- Record quietly. In the evening, record only the DI—possibly with a plugin for monitoring—and play the part through a loud amplifier during the day.
- Layering without extra takes. According to Guitar World, running the same performance through multiple amplifiers and pedals produces a tighter result than separate takes, because the timing of all the layers is identical.
- Solving mixing problems. If a guitar clashes with the vocals or synths and EQ doesn’t fix it, choose a different amplifier or a setting with less gain.
- Options after a studio session. If you recorded in a rented space, take the DI with you and continue working on the sound at home.
- Creative experimentation. Running synths, drums, or vocals through a guitar amp or a reverb pedal gives your mix character and a unique sound.
Reamping is especially useful for bass. Many engineers mix the DI for the low end with a reamped amp track for the midrange and high end. This way, you maintain a tight foundation while still retaining the growl of a real amp.
If you want to dive deeper into techniques like parallel reamping and combining multiple amps, check out this guide on reamping techniques for producers.
What equipment do you need for reamping?
The chain is simple, but each part must fit together properly with the next. Here is an overview:
| Component | Role in the supply chain | What to look for |
|---|---|---|
| Audio interface | Records the DI and sends it back out | Hi-Z or instrument input, at least one available line output in addition to your monitor outputs, and an available input for the amp microphone |
| DI box | Converts the guitar signal to a balanced signal | Only necessary if your interface doesn’t have a Hi-Z input or if you want to record an amp at the same time |
| Reamp box | Converts line level to instrument level | Output level control and a ground-lift switch |
| Amp and Pedals | Create a new sound | Any guitar or bass amplifier, and pedals between the reamp box and the amp |
| Microphone | Records the amplified sound | A dynamic or condenser microphone that suits the amp and the genre |
| Studio PC and DAW | Plays back the DI and records the result | Stable, low latency, sufficient processing power with a small buffer |
| Studio Monitors and Acoustics | Show off what you’re recording | A neutral sound image and an acoustically treated room |
A few points deserve further explanation.
The Hi-Z input. An electric guitar has a high-impedance output (the electrical resistance of an output or input). If you connect it to a standard line input, you’ll lose high frequencies and sustain. Sound On Sound therefore recommends a Hi-Z or instrument input, or alternatively a DI box that converts the signal for a microphone input. Almost all modern audio interfaces have at least one instrument input.
Enough outputs. This is often overlooked. Your monitors are usually connected to outputs 1 and 2. For reamping, you need an extra output to which you send only the DI track. If your interface only has two outputs, you’ll have to disconnect your monitors, which is inconvenient. So, for reamping, choose an interface with four or more outputs.
The reamp box. According to Sound On Sound, a reamp box lowers the level, increases the impedance, and makes the signal unbalanced. As a result, the amplifier responds just as it would to a real guitar, with the same touch sensitivity. You’ll find reamp boxes and DI boxes in our studio equipment category. To learn exactly how to use one of these boxes, read our article on using a reamp box.
Reamping Step by Step
Step 1: Take a clean DI reading
It all starts with a good DI track. Plug the guitar into the Hi-Z input on your interface, or use a DI box with athru output if the guitarist wants to hear the amp while playing. In that case, record the DI and the microphone on two separate tracks.
Where it goes wrong:
- Effects on the DI track. The DI track must be completely dry. You can use a plugin or amp simulation to monitor your sound while playing, but don’t record it onto the track.
- Recording too low or too high. Aim for peaks that stay well below 0 dBFS. Our article on gain staging in your DAW shows you how to keep levels consistent throughout your session.
- Poor-quality cables. A crackling instrument cable will leave a permanent distortion on your DI track.
Label the track clearly—for example, “Guitar L DI”—so that when you’re reamping, you’ll know right away what you’re sending.
Step 2: Connect the chain
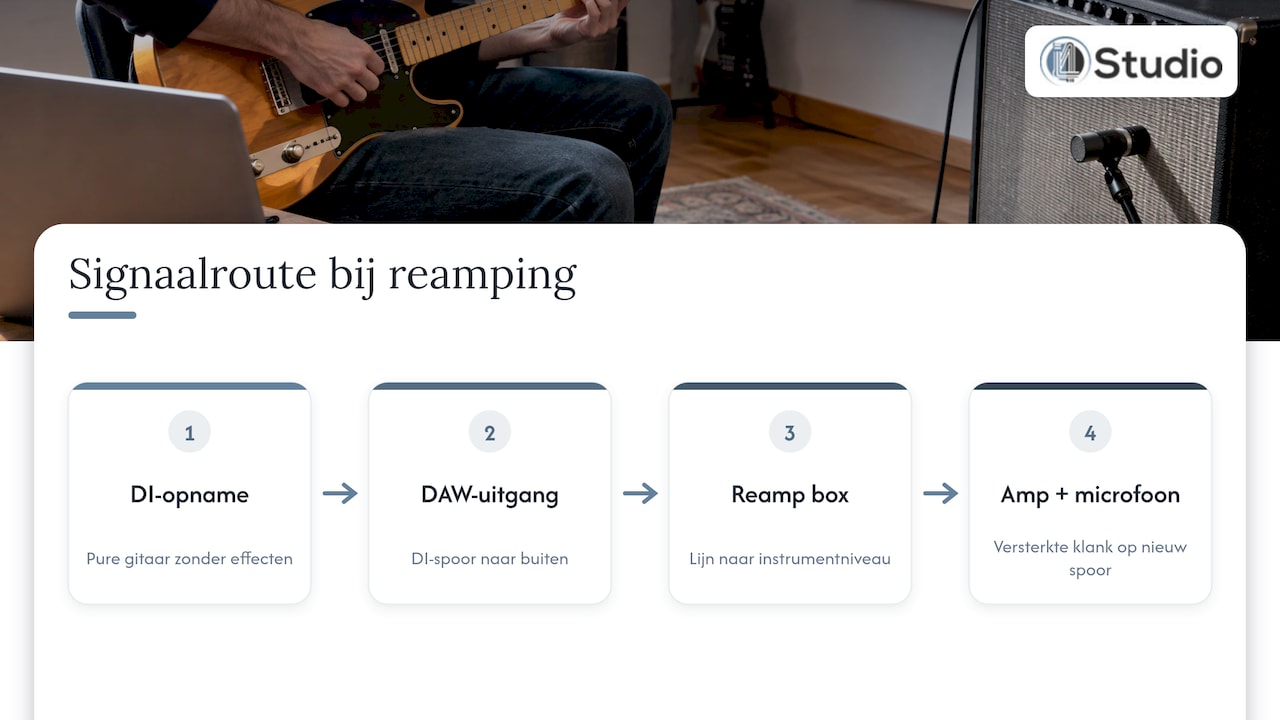
The signal path for reamping looks like this:
- DAW track connected to the DI → the free line output of your interface (for example, output 3).
- Output 3 → input of the reamp box, using a balanced XLR or TRS cable.
- Output of the reamp box → any effects pedals → input of the amplifier, using instrument cables.
- Microphone in front of the speaker → microphone input of your interface.
- Input of your interface → new recording track in your DAW.
Premier Guitar recommends using a balanced cable between the interface and the reamp box, followed by standard instrument cables through the pedal chain to the amplifier. In your DAW, route the output of the DI track to that available output and make sure the track isn’t also sent to your monitors.
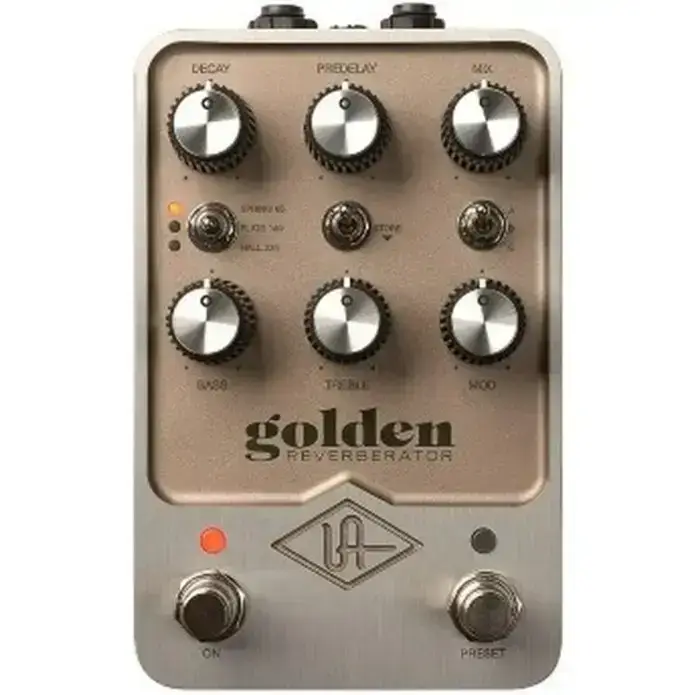
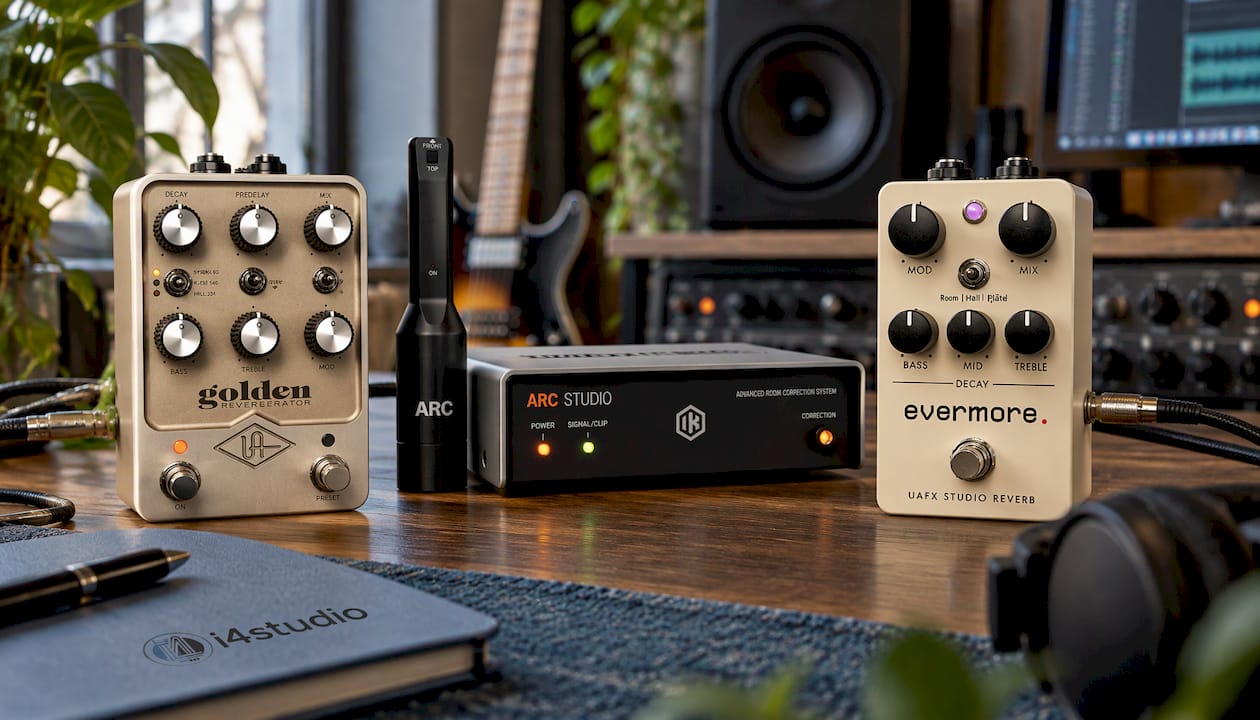
You can plug any pedal you want between the reamp box and the amplifier. A reverb pedal like the Universal Audio Golden Reverberator or the Universal Audio Evermore Studio Reverb gives a reamped track the same sense of space as if it were going directly through the amp, just like when playing live.
Step 3: Adjust the level properly
This is the step that most often goes wrong. A line output produces a much stronger signal than a guitar. Without a reamp box, or with the output control turned up too high, the amplifier’s input will overdrive: the sound becomes shrill, brittle, and overly distorted.
- Start with the reamp box’s output control set low, and gradually turn it up.
- Compare it to the guitar itself: briefly plug the guitar directly into the amp, note how loud and how distorted it sounds, and adjust the reamp box so that the DI track reproduces that same behavior. ProSoundWeb mentions exactly this: match the output level to a live guitar input.
- It’s better to lower the level on the reamp box than in your DAW. According to Sound On Sound, digital re-amping reduces the dynamic range and can introduce noise.
Step 4: Set up the amplifier and the microphone
Now comes the fun part. Play the DI track in a loop and adjust the amplifier until the sound fits into the mix. Listen to it along with the rest of the song, not on its own.
The same rules apply to the microphone as with a regular recording. Moving the microphone just a few centimeters between the center of the cone and the edge significantly changes the sound. Since the performance is being recorded, you can take your time trying out different positions and microphones and recording them one by one. If the amplifier is in a room with a lot of reflections, a reflection filter can help. The sE Electronics GuitaRF is designed for this purpose: a reflection filter that fits around the microphone on your guitar amplifier.
Step 5: Record and align
Create a new track, start the DAW from the beginning, and record the reamped part. If you want a second sound, repeat this process with different settings on a new track.
Next comes the step that makes all the difference: alignment. The signal travels a round trip through your interface, the reamp box, the amplifier, and the air between the speaker and the microphone. As a result, the new track arrives a few milliseconds late. If you use only the reamped track, you’ll hardly notice it. But if you mix it with the DI or a second amp, comb filtering occurs: a hollow, thin sound, especially in the low end. Sound On Sound shows that a delay of around 9 milliseconds already clearly falls into that range.
Here’s how to align:
- Zoom in on a sharp spike at the beginning of the game.
- Compare the start of the waveform of the DI track and the reamped track.
- Slide the reamped track forward until the first peaks align.
- Check the polarity: if the waveform is pointing the other way, reverse the phase and select the setting with the fullest bass.
A stable computer helps right away. The smaller the buffer on which your DAW runs reliably, the less latency you’ll need to correct. Most DAWs can also automatically compensate for a fixed amount of latency on an external output.
Preventing Hum and Feedback
With reamping, you connect devices that aren’t normally part of the same signal chain. That’s a classic situation that can cause hum.
Hum caused by a ground loop. A ground loop occurs when devices are grounded through multiple paths—for example, through the power outlet and the audio cable. The result is a low, constant hum. Here’s how to fix it:
- Turn on the ground-lift switch on the reamp box. Sound On Sound refers to this switch as one that can significantly reduce noise and interference.
- Plug the amplifier, interface, and computer into the same power strip.
- Keep audio cables away from power cables, and if you can’t avoid it, have them cross at right angles.
- Troubleshoot systematically: start with just the interface, add devices one by one, and listen for when the hum appears.
Our step-by-step guide to hum-free cables covers this topic in detail.
Feedback and monitoring. If the amplifier is in the same room as your monitors, the microphone may pick up the sound from the monitors and feed it back. While recording, mute the recording track in your monitor mix, listen through headphones, and make sure the DI track goes only to the reamp output.
An honest listening environment. What you hear while adjusting the amplifier will guide your decisions. If your listening spot sounds hollow or boomy, you’re adjusting the amp incorrectly. Read our tips for reducing sound reflections or check out our more general tips for recording in a home studio.
Reamping for bass, synths, and drums
Reamping isn’t just for guitar.
- Bass. Keep the DI in the mix for a tight low end, and blend in a reamped amp or an overdrive pedal for the midrange. Alignment is especially important here, because comb filtering in the low end is most noticeable.
- Synths. Running a synth line through a guitar amp or a tube pedal adds warmth and a slightly raw character that works well in rock and electronic music. Especially when usinghardware synthesizers and studio PCs in the same session, this is a quick way to make a line stand out.
- Drums and vocals. Running a snare drum or a vocal track through an amplifier or a reverb pedal creates lo-fi and spatial effects that you can mix in as a parallel track beneath the original.
With these sources, pay special attention to the level: synths and drum tracks often come in loud, so start with the reamp box set low.
Ready for your first reamp session?
Reamping requires a setup where everything works together seamlessly: an interface with enough inputs and outputs, a reamp box, the right microphone, a computer that remains stable even with a small buffer, and a space that gives you an accurate representation of what you’re doing. At i4studio, you’ll find all these components in one place: audio interfaces, studio equipment, microphones, studio monitors, and acoustic panels—all backed by expert advice.
Our custom-built studio PCs start at €1,099 and are built with a focus on stability and low latency—exactly what you need when sending audio out and recording it back in. If you’re just starting to record, be sure to check out one of our studio recording bundles.
Our Perspective on Reamping
Reamping demonstrates just how important the entire chain is. A DI track is only as good as the interface that records it, the reamp box that sends it back, and the computer that keeps everything perfectly in sync.
That’s why we don’t view reamping as a one-off trick, but as a workflow that requires your studio to be set up properly. Enough outputs on your interface, a stable computer with low latency, and acoustics that let you hear the amp clearly—these factors determine whether you can choose or have to fix things in the mix.
We build our custom studio PCs with a focus on stability and low latency. When it comes to acoustics and hardware, our experts work closely with you to ensure your setup functions as a cohesive whole. That’s when reamping becomes what it’s meant to be: the freedom to choose your sound only after you hear what the song needs.
Harold
Frequently Asked Questions About Reamping
Can I use reamping without a reamp box?
You can connect a line output directly to an amplifier, but the level and impedance won’t be right: the amp will overdrive and sound harsh and brittle. A reamp box converts the signal to instrument level, so the amp responds as it would to a real guitar. For a reliable result, a reamp box is therefore the right choice.
How many outputs should my audio interface have for reamping?
At least one free line output in addition to the outputs for your monitors—so, in practice, four or more. You’ll also need a free input to connect the microphone to the amplifier. With an interface that has more inputs and outputs, you can also reamp multiple amplifiers at the same time.
Why does my reamped guitar sound thin when I mix it with the DI?
This is almost always caused by a slight delay. The re-amped track arrives a few milliseconds later than the DI, causing comb filtering. Move the re-amped track forward until the waveforms align, and check the polarity.
Can I also use an amp simulation instead of a real amplifier?
Yes. Reamping works with any effect: you can also route the dry DI track through software such as amp plugins. The principle remains the same: as long as you have a clean DI, you can choose the sound later and always have the option of going through a real amplifier.
Sources
- Sound On Sound: Studio One: Re-amping Explained
- Sound On Sound: Matching the Phase of Mic and DI Signals
- Premier Guitar: Using Guitar Pedals with Other Instruments
- Guitar World: What Is Reamping?
- ProSoundWeb: In the Studio: Understanding and Applying Reamping