TL;DR:
- Digital audio converts analog sound into digital values that you can store, edit and play back. It uses sampling and bit depth to capture the quality and dynamics of the sound. A good workflow, consistent settings and lossless files ensure high-quality recordings and minimal loss of quality.
Digital audio is the digital reproduction of sound, converting analog sound waves into a series of numeric values that you can store, edit and reproduce. This process is the basis of modern music production, from home studio recordings to professional streaming distribution. Those who understand how digital audio technology works make better choices about settings, formats and equipment. In this article, you’ll get a clear explanation digital audio: from sampling and bit depth to proper file formats and the most common beginner mistakes.
How digital audio works: sampling, bit depth and ADC
Digital audio works by measuring analog sound at fixed intervals and storing those measurements as numbers. This principle is called sampling. In CD quality, 44,100 samples per second are taken, meaning the sound is measured 44,100 times per second. The more samples per second, the more accurate the digital copy of the original sound.

The Nyquist theorem in practice
The Nyquist theorem states that your sampling frequency should be at least twice the highest frequency you want to capture. Human hearing goes up to about 20,000 Hz, so a sampling frequency of 44,100 Hz is more than adequate for music. This explains why 44.1 kHz has become the standard for music and streaming, while 48 kHz is the standard for video and broadcast. So the choice depends on your end goal: music or video.
Bit depth and dynamic range
In addition to sampling frequency, bit depth determines how accurately each measurement is captured. 16-bit gives a dynamic range of about 96 dB, while 24-bit offers about 144 dB. More dynamic range means more space between the softest and loudest sound in your recording. For production, this difference is crucial: 24-bit gives you more headroom during mixing, making you less likely to run into digital noise.

From analog to digital: the ADC
The conversion from analog to digital is done via an Analog-to-Digital Converter, ADC for short. The audio interface performs this ADC conversion and saves the result as a file, such as WAV, MP3 or FLAC. Without a good ADC, you lose quality before you’ve even edited a single note. This is why the choice of your audio interface directly affects the quality of your recordings.
The most commonly used sampling frequencies in a row:
- 44.1 kHz: standard for music, streaming and CD
- 48 kHz: standard for video, film and broadcast
- 96 kHz and above: useful for intensive plug-in treatment in the mix phase, but generally offers no audible benefit to the end listener
Pro-tip: Always set your project and audio interface to the same sample rate. A mismatch causes synchronization problems and quality loss that you can’t fix afterwards.
What digital audio formats are there and when do you use them?
Digital audio formats divide into two main categories: lossless and lossy. WAV and AIFF are virtually uncompressed formats for maximum quality, but produce large files. MP3 and AAC are lossy formats that make files smaller by removing perceptually less important data. For a novice producer, the difference is simple: lossless for your work files, lossy for distribution.
Lossless versus lossy: a comparison
| Format | Type | Quality | File size | Usage |
|---|---|---|---|---|
| WAV | Lossless | Maximum | Large | Recording, archiving, mixing |
| AIFF | Lossless | Maximum | Large | Recording, archive (Mac) |
| FLAC | Lossless compressed | Maximum | Medium | Archive, distribution audiophile |
| MP3 | Lossy | Good to moderate | Small | Streaming, distribution |
| AAC | Lossy | Good | Small | Streaming, Apple platforms |
What exactly does a codec do?
A codec stands for coder/decoder and determines how audio is compressed and played back. Lossy codecs perceptually remove minor data, meaning they discard audio information that the human ear is less able to hear. The result sounds fine to most listeners, but for production work, this loss is permanent and problematic. Codecs and compression levels directly affect the final sound, so choosing your codec is not a technical detail but a creative decision.
The right workflow: lossless archiving, lossy distribution
The best approach is to always record and edit in WAV or AIFF, and only export to MP3 or AAC at the last step. Converting WAV to MP3 and then converting back to WAV does not restore the loss. The loss of quality is permanent. Always save your master files in lossless format so that you will always have the best source quality in future edits or reissues.
- Always work in WAV or AIFF within your DAW
- Export to MP3 or AAC only for the final product
- Save the lossless master separately as an archive
- Use FLAC if you want to distribute lossless with smaller files
Pro-tip: Create a separate export folder for your lossy files and name them clearly, so you never accidentally use an MP3 as the source file in a new project.
How to get started with digital audio recording: settings and tools
Recommended starting settings for beginners are 44.1 kHz or 48 kHz sampling frequency combined with 24-bit bit depth as a practical standard for music production. Higher settings such as 96 kHz or 32-bit provide larger files with no audible benefit to most listeners. Start simple and scalable: these settings work for home audio recording, streaming and professional distribution.
Starting your first recording step by step
- Choose your input device: a USB microphone or an audio interface with XLR microphone
- Set up your DAW: choose sampling frequency 44.1 or 48 kHz and bit depth 24-bit
- Check your acoustics: hang curtains, lay down rugs or use acoustic panels
- Position your microphone: about 15 to 30 cm from your mouth, slightly off axis for less plosives
- Adjust your input level: target peaks around -12 to -6 dBFS to avoid clipping
- Make a test recording: listen back on headphones for noise, echo or clipping
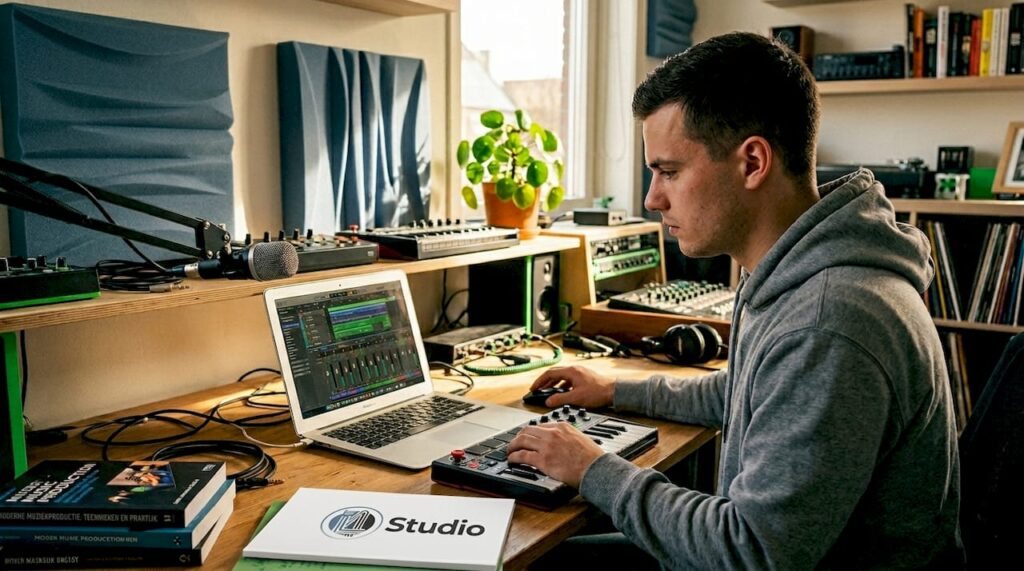
USB microphone or audio interface?
A USB microphone is fine for beginners on a limited budget, but an audio interface offers more features and better quality as you grow. With an audio interface, you connect professional XLR microphones, have more control over input levels and can record multiple sources simultaneously. For a first home studio, a USB microphone is a logical start. Once you get more serious, an audio interface for recording is the next step.
Acoustics and microphone placement
Acoustics and microphone placement are more important than the price of your microphone. A cheap microphone in a well-treated room sounds better than an expensive microphone in a bare room with lots of echo. Soft surfaces such as curtains, sofas and carpets absorb reflections. Place your microphone strategically: not directly in front of your mouth but slightly off axis, and use a pop filter to dampen plosives.
Pro-tip: Take a test recording in your room and listen with headphones at high volume. You’ll immediately hear what reflections or background noise are contaminating your recording, so you can target your treatment.
Browser-based DAWs such as Amped Studio are an approachable way to get started without a large software investment. For more advanced workflows and a digital audio workstation, programs such as Ableton Live, Logic Pro and Reaper offer more options.
What mistakes do beginners make most often with digital audio?
The most common mistake made by beginners is using sample frequencies interchangeably. When the audio interface and the DAW project use different sample frequencies, metadata conflicts and synchronization problems arise. The sound then sounds too fast, too slow or distorted. Always set both project and interface to the same frequency before you start recording.
Other common mistakes:
- Choosing too high settings for no reason: 96 kHz or 32-bit does not sound better for the end listener, but slows down your computer and enlarges your files unnecessarily.
- Lossy export and then further editing: reimporting an MP3 as a source file for a new project is a guarantee of quality loss that you cannot reverse
- Ignore clipping: when your input level is too high, the signal distorts digitally. This sounds harsh and unpleasant, and is not fixable in the mix
- Ignoring acoustics: most beginners invest in equipment but forget about the room. An untreated room sabotages any recording, regardless of the quality of your microphone
- No lossless archive retention: always keep the original WAV files, even after distribution. You need them for remixes, reissues or licensing
At the heart of good digital audio production is discipline in your workflow. Consistent settings, lossless source files and a well-treated recording space yield more results than expensive equipment with bad habits.
Key insights
Digital audio requires consistent settings, lossless work files and a well-treated recording space to achieve quality results.
| Item | Details |
|---|---|
| Sample frequency and bit depth. | Use 44.1 or 48 kHz with 24-bit as the standard for music production. |
| Lossless work files | Always record and edit in WAV or AIFF; export only to MP3 or AAC for distribution. |
| ADC quality matters | The audio interface determines the quality of the analog-to-digital conversion. |
| Acoustics over equipment | A well-treated room delivers more than a more expensive microphone in a bad room. |
| Consistent settings | Ensure that project and interface always use the same sample rate to avoid synchronization problems. |
What I’ve learned from years of working with digital audio
When I started producing, I thought higher settings automatically sounded better. I recorded in 96 kHz, used 32-bit and wondered why my computer crashed and my mixes didn’t sound better than others’. It took me a while to understand that 24-bit bit depth mainly helps you during mixing, not playback. The effect on pure listening quality is minimal, but for production workflows it is indispensable because of the extra headroom.
Another thing I’ve learned: simplicity works. A stable workflow with 44.1 kHz, 24-bit and a reliable audio interface produces more consistent results than experimenting with the highest settings. Most professional producers work in exactly these settings, not because they don’t have better equipment, but simply because it works.
The biggest difference in my recordings came not from new equipment, but from attention to the space. Curtains closed, a blanket behind me, microphone light from the shaft. It cost nothing and made more difference than any upgrade. If you start now, invest in your knowledge and your space first. The equipment comes next.
Also, actively experiment with your DAW and listen back critically. Use good headphones, compare your recordings with reference material and be honest about what you hear. Technical knowledge about analog versus digital recording will help you understand why certain choices sound the way they do.
– harold
Start today with the right studio gear from I4studio
Want to get started with digital audio recording right away? Then you need the right basic equipment. I4studio helps beginning producers and musicians with affordable, quality studio gear that fits your skill level and budget.

Whether you’re starting your first home studio or looking to improve your existing setup, you’ll find everything you need at I4studio. From audio interfaces and microphones to complete bundles. Check out the studio gear for beginners for an overview of what you really need to get started. Or go straight for a complete kit like the sE Electronics X1 S Studio Bundle, a popular choice for beginners who want to get serious about recording right away. Also check out essential recording gear for a complete overview of what a home studio needs.
FAQ
What exactly is digital audio?
Digital audio is the digital reproduction of sound, where analog sound waves are converted into numeric values via sampling and bit depth. These values are stored as files such as WAV, MP3 or FLAC.
What is the difference between 44.1 kHz and 48 kHz?
44.1 kHz is the standard sampling frequency for music and streaming, while 48 kHz is the standard for video and broadcast. Choose your frequency based on your end goal: music or video.
Why is 24-bit better than 16-bit for recording?
24-bit offers a dynamic range of about 144 dB versus about 96 dB at 16-bit, giving more headroom during mixing. This makes your recordings technically easier to edit and less susceptible to digital noise.
What is the difference between WAV and MP3?
WAV is a lossless format that preserves all audio information and is suitable for recording and editing. MP3 is a lossy format that makes files smaller by deleting data, resulting in quality loss that cannot be reversed.
Do I need an audio interface as a beginner?
A USB microphone is fine to start with on a limited budget. An audio interface offers more connections, better ADC quality and more control over your input levels, which is worthwhile once you start producing more seriously.


