Reducing audio latency is one of the most requested optimizations in studios and on live stages. A long delay between playing and hearing audio ruins timing, performance and concentration. This article offers concrete, technical as well as practical steps to significantly reduce latency – with examples, measurement methods and hardware and workflow recommendations. Written with audio professionals, musicians and content creators in mind, the content also includes relevant comments on custom audio and video computers provided by I4studio.
What Is Audio Latency and Why Does It Matter?
Audio latency refers to the time delay between when an audio signal is created (for example, a string being struck) and when that signal becomes audible through the monitor or headphone output. Latency is often expressed in milliseconds (ms). For recording and live monitoring, many professionals aim for round-trip latency (RTT) below 10 ms; at 10-20 ms it becomes noticeable but still usually manageable; above ~20-30 ms it often becomes distracting.
Different types of latency
- Input latency: from microphone/line to computer.
- Processing latency: due to plug-ins, DAW and driver buffers.
- Output latency: from computer to headphones/monitors.
- Round-Trip Latency (RTL): total from input to output and back (most important measurement value for monitoring).
Common Causes of Latency
Reducing audio latency starts with understanding what causes it. Usually it’s a combination of hardware, drivers and settings.
- Buffer Size: Larger buffers reduce CPU load but increase latency; small buffers reduce latency but require more CPU power.
- Sample Rate: Higher sample rates lower the time per sample, which can reduce latency, but consume more system resources.
- Audio Driver Type: ASIO drivers on Windows usually offer lower latency than generic drivers such as MME or DirectSound. On macOS, Core Audio is optimized for low latency.
- Plug-ins and DSP: Some plug-ins (especially linear-phase or oversampling effects) introduce significant delay.
- CPU or I/O limitations: Slow storage (HDD), insufficient RAM or CPU-throttling increase processing latency.
- Wireless connections: Bluetooth and Wi-Fi audio often provide high and unpredictable latency and are therefore unsuitable for monitoring.
- Routing and sample conversions: Internal sample conversions, resampling or network audio (Dante, AVB) also contribute to delay.
How to Measure Latency: Practical Methods
Measuring is knowing. A quick and reliable test is essential before tinkering with settings.
Loopback test (the most commonly used method)
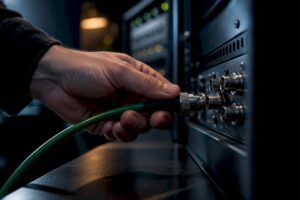
- Connect a short cable between output (e.g. headphone output) and an input channel of the audio interface.
- In the DAW, create a click or pulse signal on a track and route it to the output.
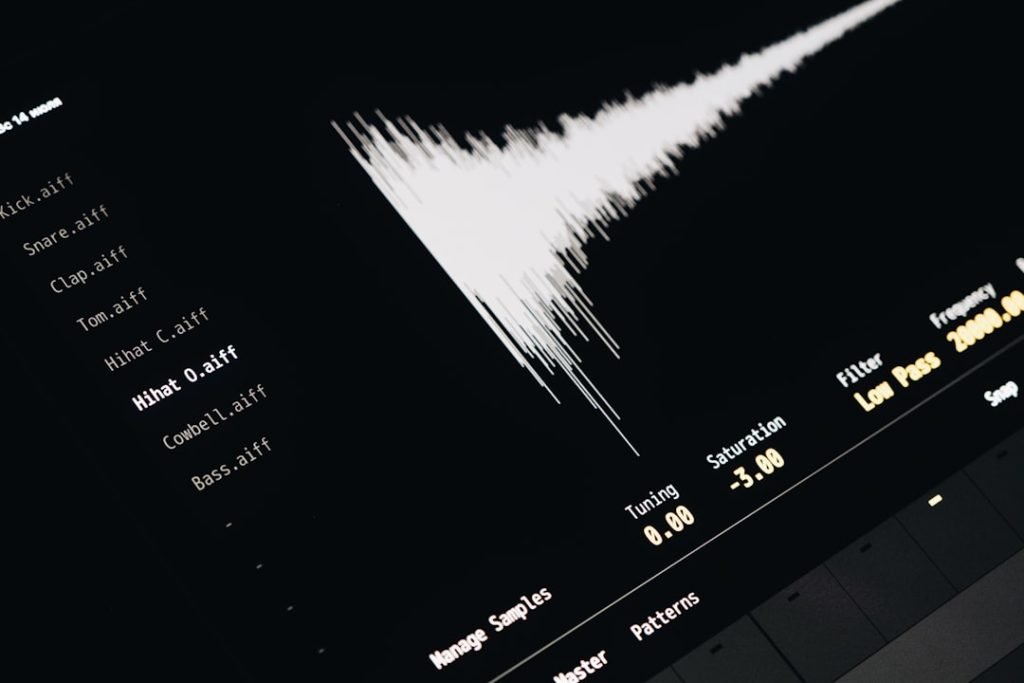
- Record the signal through the input channel and analyze the timing differences between the original signal and the recording.
Many DAWs and tools offer built-in latency meters; otherwise, it is possible to visually compare audio waves and calculate the sample-gap (samples/sample rate = latency in seconds).
DAW-specific tools
- Pro Tools: Hardware Buffer and H/W Buffer Size settings show latency.
- Reaper: built-in latency meter and easy loopback instructions.
- Logic Pro / Cubase: display plug-in latencies and total RTL.
Direct Steps To Reduce Audio Latency
Here are concrete, step-by-step adjustments that one can make immediately. One can combine several steps at once for best results.
1. Choose the right driver and interface
- Use ASIO (Windows): choose a high-quality ASIO driver for the audio interface. ASIO4ALL is an intermediate solution but true manufacturer-driven ASIO drivers often perform better.
- macOS: Core Audio is usually already optimized; choose tested audio interfaces with good Core Audio support.
- Interface quality: a modern USB-C/Thunderbolt interface with native ASIO/Core Audio support typically delivers lower latency than older USB 2.0 devices.
2. Reduce buffer size (but measure CPU load).
Buffer setting is the most direct way to lower latency. Try settings like 64 or 128 samples and see what the DAW and CPU can handle. At 48 kHz sample rate means a buffer of 128 samples approximately:
128 samples / 48000 samples/sec ≈ 2.67 ms (per richting)Round-trip then amounts to about 5-6 ms plus any plug-in latency.
3. Use direct monitoring for recording
Many audio interfaces offer hardware direct monitoring – the signal is sent directly to the headphones without going through the computer, making latency effectively zero. This is crucial in vocal and instrumental recordings when small delays are distracting.
4. Keep plug-in loads under control
- Deactivate or turn off latency-intensive plug-ins (such as linear-phase EQs and some mastering plug-ins) during recording.
- Use latency-friendly alternatives: simple EQs, comp and non-linear reverb presets.
- In the mix, you can apply plug-ins with additional latency after recording is complete; some DAWs offer plug-in delay compensation so timing is correct.
5. Optimize sample rate
Unique trade-off: higher sample rates theoretically lower latency per buffer, but increase CPU load. For many projects, 44.1-48 kHz is sufficient; for live tracking, 88.2-96 kHz can be valuable if system resources are adequate.
6. System optimizations
- Use SSDs for OS and project files; slow HDDs can cause I/O latency.
- Make sure you have enough RAM: 16 GB is minimum for heavier sessions; 32 GB or more for large sample libraries.
- Disable power management that causes CPU-throttling and turn on performance profiles (on desktop and laptop).
- On Windows: update chipset and USB drivers; avoid background processes that cause CPU load (antivirus, updates, synchronization).
7. Choose appropriate connections: Thunderbolt over USB where possible
Thunderbolt offers lower latency and higher bandwidth than standard USB 2.0. For large track counts and low buffer settings, a Thunderbolt interface or connection is often preferable.
8. Avoid wireless monitoring
Bluetooth is fine for casual listening, but not for monitoring during recording. Wireless systems typically introduce tens to hundreds of milliseconds of delay. For live or studio monitoring, wired IEMs (in-ear monitors) or wired headphones are recommended.
Advanced Troubleshooting
Plug-in Delay Compensation and Latency reports.
DAWs often list plug-in-induced delay by channel. If a particular plug-in causes large delay, one can:
- Freeze/print (freeze) the plug-in to resolve CPU and latency issues.
- Use a latency-free monitoring channel route for recording and add the effect later.
MIDI Latency
MIDI usually has low latency in itself, but it depends on the interface and synth/plug-in latencies. For live instruments, a hardware synth or a properly configured sampler with low audio latency may be essential.
Network audio and external conversion
Network audio solutions (Dante, AVB) are powerful for large setups, but require special switches and configuration to minimize jitter and extra latency. At I4studio, such systems are often pre-tested and configured for optimal performance.
Hardware Recommendations For Low Latency Setups
A properly optimized studio PC significantly reduces latency. I4studio builds and delivers systems configured specifically for audio and video production: fast storage, cooling that guarantees heat management, and motherboards with reliable I/O. Some hardware selection guidelines:
- CPU: preference for modern multi-core processors with high single-core clock (for example, recent Intel or AMD Ryzen series). For low buffer settings, single-core performance is often decisive.
- RAM: 16 GB minimum; 32 GB is recommended for sample-heavy projects.
- Storage: NVMe SSD for OS and DAW projects; additional SSD/HDD for archive and samples.
- I/O: Thunderbolt or USB-C/3.1 ports for high-speed audio interfaces. Dedicated PCIe cards can offer advantages in professional rack-mount setups.
- Cooling and power supply: stable power and good cooling prevent throttling under load, benefiting latency stability.
I4studio provides customized workstations and can advise which configuration best suits a specific workflow – from singer-songwriter setups to broad post-production and broadcast environments.
Workflow Tips For Live Recording and Home Studio
The way one records and monitors has a big impact on how disruptive latency is perceived. Here are some practical workflows:
- Recording with Headphone Mixes: create a dedicated headphone mix with minimal processing; use hardware direct monitoring for vocals/instruments and keep creative processing for after recording.
- Final Insert-FX only after recording: avoid latency-intensive inserts during tracking (e.g. true convolution reverbs or linear-phase EQ).
- Monitor in mono for latency checks: mono monitoring makes small timing differences more audible when testing settings.
- Use click/tracking channels: for drummer/beat producers, a stable click with no latency is essential; route it separately and make sure the drummer hears a latency-free click.
Case Study: Optimizing a Singer-Songwriter Setup
A singer-songwriter often works with a laptop, an audio interface and one microphone. A typical checklist to reduce audio latency:
- Choose a quality USB-C audio interface with native ASIO support.
- Set buffer size to
64or128samples and test if the CPU is loadable. - Use direct monitoring interface when tracking.
- Remove unnecessary background apps and put the system into performance mode.
- Use a fast NVMe SSD for the DAW and project file.
With these steps, round-trip latency often drops below 10 ms, which most vocalists will find pleasant and natural.
When Is Latency Inevitable?
Some workflows inevitably require additional latency. Mastering plug-ins, linear phase EQ, oversampling processing, large convolution reverb impulse responses and complex sample conversion can add a few milliseconds to tens of milliseconds. In these cases:
- Plan the monitoring portion such that recording occurs without those effects.
- For real-time live processing, dedicated hardware (e.g., external DSP or rack effects with low latency) may be a solution.
Why Professional Support Sometimes Makes the Difference
A studio can be technically advanced and require specific configuration and calibration. Companies like I4studio offer not only hardware, but also advice and support in setting up latency-sensitive environments: the right motherboard, specific Thunderbolt configurations, custom BIOS settings, and pre-optimized Windows/macOS images for audio. For larger projects or broadcast environments, this expertise can save a lot of time and deliver higher reliability.
Tip from an engineer: “A low buffer and a fast CPU are important, but without stable drivers and quality audio interface, the result remains unpredictable.”
Checklist: Quick Troubleshoot For Latency Problems
- Check driver type: use ASIO or Core Audio.
- Test with lower buffer setting; monitor CPU and drop-outs.
- Disable latency-intensive plug-ins.
- Use direct monitoring during tracking.
- Update firmware and drivers of audio interface.
- Avoid Bluetooth/wifi audio for monitoring.
- Measure round-trip latency with loopback test.
- Consider Thunderbolt interface for high track numbers or very low buffers.
Summary
Reducing audio latency requires a combination of good hardware, proper drivers, smart DAW settings and practical workflow strategies. Important knobs to turn are buffer size, driver selection (ASIO/Core Audio), direct monitoring and plug-in management. Larger or more complex setups may require network audio, Thunderbolt interfaces or specialized hardware. Custom workstations and professional configuration — such as that provided by I4studio — help many audio professionals create reliable, low-latency environments. Systematic measurement and step-by-step optimization can often reduce latency to invisible levels, directly improving recording and performance results.
Frequently Asked Questions
What is an acceptable latency for recording?
For vocals and guitar, a round-trip latency of less than 10 ms is often considered optimal. Between 10-20 ms is often still acceptable, but above 20-30 ms the delay becomes clearly felt and annoying.
Does a higher sample rate always help reduce latency?
Higher sample rates theoretically reduce sample time and can reduce latency, but also increase CPU and I/O load. The result depends on available system resources; sometimes buffer and driver optimization is more effective.
Are wireless headphones usable during recording?
Not recommended. Bluetooth and related wireless techniques introduce variable and often high latency – fine for listening, not for monitoring during recording or live performance.
When is direct monitoring the best choice?
When recording vocals or acoustic instruments where real-time feedback is critical. Direct monitoring minimizes latency by rerouting signals through hardware prior to computer processing.
Can I4studio help with latency optimization?
Yes. I4studio designs and delivers workstations specifically configured for audio and video production, offers advice on audio interfaces, network audio and studio architecture, and can pre-test systems with low-latency workflows to ensure compatibility and stability.