TL;DR:
- CPU spikes in Cubase are often caused by improper buffer settings, plugin management and process affinity. By increasing the buffer size, applying freeze strategies and optimizing process affinity, many spikes can be avoided. A full PC restart remains essential for long-term stability and smooth production.
You’re in the middle of a production session. The groove is finally in, everything sounds exactly the way you want it. Then: crackling audio, a frozen cursor and the infamous red CPU meter in Cubase. CPU spikes are the biggest creative killjoy for any musician or producer working with Cubase. They disrupt your flow at the worst possible time. Fortunately, most CPU spikes are preventable with the right settings, habits and tools. This guide tells you exactly how to do that, step by step.
Table of contents
- Key insights
- Preventing CPU spikes in Cubase: the basics
- Buffer and freeze: two powerful tools
- Process affinity and external causes
- Common mistakes and enduring stability
- Measuring and verifying performance
- My take on CPU management in Cubase
- Ready for a studio PC that can handle Cubase?
- Frequently Asked Questions
Key insights
| Item | Details |
|---|---|
| Buffer size adjustment. | Use 256 samples when recording and 512 to 1024 when mixing for stable performance. |
| Freeze as a strategy | Frozen tracks render CPU-intensive plugins to audio, which directly reduces CPU load. |
| Plugins deactivate, not bypass | Bypass still consumes CPU. Full deactivation is necessary to avoid spikes. |
| Managing process affinity. | Tools such as Process Lasso force stable CPU scheduling and reduce unexpected spikes. |
| PC restart, not Cubase restart | Restarting Cubase rarely solves structural performance problems. A full PC reboot does. |
Preventing CPU spikes in Cubase: the basics
Before you get started with solutions, it helps to understand what a CPU spike actually is. A spike is not an ordinary overload. It is a sudden peak load on one or more CPU cores, often for a fraction of a second. Enough to cause audio dropouts or crackling noises.
The hardware and software you use lay the foundation for everything that comes after. Look at your system first:
- Processor: A modern processor with at least 6 cores and high single-core speed works best in Cubase. Cubase is partly sensitive to single-core performance, not just the total number of cores.
- RAM: At least 16 GB, but 32 GB is the standard for larger projects with many software tools.
- Storage: An SSD for your project files and samples lowers load times and prevents bottlenecks when playing large audio files.
- Audio interface: A stable driver is crucial. ASIO drivers perform significantly better in Cubase than generic Windows drivers.
In addition to hardware, there are software preparations that protect your project. Always make sure Cubase is running at high priority in Windows Task Manager. Turn off unnecessary background programs when starting a session. Antivirus software, browsers and cloud storage are known CPU consumers that you can put on pause.
| Preparation | Low risk | High risk |
|---|---|---|
| Buffer size | 512 to 1024 samples when mixing | 64 to 128 samples the entire session |
| Background apps | Cubase only active | Browser, antivirus, cloud storage active |
| Drivers | Updated ASIO driver | Generic Windows driver |
| Project storage | SSD with sufficient space | HDD full or fragmented |
Use a default project template for each session with your preferred routing and basic tools already set up. Smart templates and preferences increase your productivity and prevent problems mid-session.
Buffer and freeze: two powerful tools
These are the two most effective measures that you can apply immediately. They cost nothing extra and work immediately.
Step 1: adjust your audio buffer
The buffer size determines how large a “piece” of audio your processor processes at a time. Higher buffer values (512 to 1024 samples) improve stability and reduce glitches when mixing. Lower values (128 to 256 samples) are recommended for live monitoring and recording because you want minimal delay.
The practice is simple:
- In Cubase, open the Studio menu and choose Studio Setup.
- Select your audio interface under VST Audio System.
- Open the driver settings and look for Buffer Size or Latency.
- Set to 256 samples during recording.
- Increase to 512 or 1024 samples once you switch to mixing and stop recording live signals.
This small adjustment point solves a surprisingly large portion of the CPU problems. Buffer setting is a safety margin that you must actively control based on what you are doing in Cubase at the time.
Pro-tip: Create a shortcut or note down your ideal buffer values by session type. This way you can quickly switch from recording to mixing mode without searching through the settings each time.
Step 2: use the freeze function strategically
Many producers see freeze as a stopgap measure. That’s a misconception. Freeze rendering substantially reduces CPU usage by rendering tracks as audio, eliminating the need for real-time processing.
This is how it works in practice:
- Right-click on a track in Cubase.
- Choose Freeze/Unfreeze Track.
- Choose the desired pre-render time (default 2 seconds is fine).
- Cubase renders the track including all plugins to audio.
Do this for all tracks that you do not actively edit. Strings, pads, background vocals and soundscapes lend themselves perfectly to this. Freeze is a strategic means of managing real-time CPU load, not a patch solution.
Step 3: bounce MIDI to audio
Bouncing MIDI to audio significantly reduces the CPU load, especially in the arranging phase. Once a software instrument is ready, select the MIDI track, go to Audio Mixdown or use the Export Audio function. Import the result as an audio track and mute or delete the original MIDI track.

The advantage: an audio track consumes minimal CPU compared to a MIDI track with an active instrument and multiple plugins.
Process affinity and external causes
Here is an insight that many producers completely miss. CPU spikes in Cubase are not always the result of too little processing power. CPU spikes are often scheduling issues due to the way Cubase dynamically manages processor affinity.
What is process affinity?
Affinity determines which CPU cores a program runs on. Cubase changes this automatically and frequently, which means your processor is constantly redistributing tasks. This can lead to stuttering even if the overall CPU load seems low.
The solution is Process Lasso, a free program available for Windows. Process Lasso can use forced mode to forcefully set Cubase’s affinity for CPU cores. This gives more stable real-time scheduling and significantly fewer unexpected spikes. In Process Lasso, set the affinity of the Cubase process to a fixed set of cores and activate forced mode. This means that the setting remains active even if Cubase itself tries to change it.
Pro-tip: Do not allocate all cores to Cubase. Leave one or two cores free for Windows system processes. This prevents the operating system itself from getting caught up.
External software as hidden culprit
This is a case that regularly surprises producers. Forgotten active plugins in UAD Console can consume DSP resources outside of Cubase, indirectly increasing CPU load. In one documented case, DSP usage dropped from about 64% to 9% after an auxiliary plugin outside of Cubase was disabled.
Also note the following:
- MIDI controllers that constantly send signals can put additional strain on Cubase.
- Background processes of DAW-related software such as control surfaces or remote apps are rarely visible but consume resources.
- Plug-in scanners from other DAWs running in the background.
Fully deactivating unused plugins saves more CPU than bypass alone. With bypass, the plugin remains active in the signal chain and consumes computing power. Deactivating cuts that connection completely. Right-click a plugin in Cubase and choose Deactivate instead of using the bypass button.
Common mistakes and enduring stability
One of the most common pieces of advice online is “restart Cubase.” That rarely works structurally. Cubase can exhibit stutters after a few minutes that disappear only after a complete PC restart. The cause lies in memory leaks, dormant processes and forgotten background apps that restarting only Cubase does not address.
Other pitfalls you want to avoid:
- Too many open tracks with active plugins. Every active plugin consumes CPU. If you are not working on a track, freeze it or deactivate the plugins.
- Automation on every track. Complex automation data increases the computational burden. Use it deliberately and bundle where possible.
- Forgotten audio interface driver updates. Manufacturers regularly release driver updates that fix stability issues. Check this at least once a quarter.
“Working efficiently in Cubase is not a matter of having the fastest computer. It’s about understanding how Cubase allocates resources and adjusting your workflow accordingly.”
Templates with built-in CPU management give you a structural edge with each new session. Schedule set times in your workflow for freezing and bouncing: after completing instrumentation, after inserting vocals, and before mixing. That discipline keeps your project light and your CPU free.
Also regularly check your routing in Cubase. Redundant sends, unnecessary group channels and duplicate effect chains cost more than you think. A clean session structure is a fast session.
Measuring and verifying performance
After making optimizations, you want to know if they work. Cubase offers a built-in CPU meter for this purpose, but it doesn’t tell the whole story.
| Monitor | What it shows | How to use it |
|---|---|---|
| Cubase Performance Meter | Realtime audio engine load | Monitor the peak value, not the average |
| Windows Task Manager | Total CPU load per core | Check if one core is overloaded |
| Process Lasso | Affinity and priority status | Verify that forced mode remains active |
| ASIO-Guard indicator | Buffering status of plugins. | Active is good, disabled gives higher direct load |
After each optimization, run a test scenario: load your heaviest project, play it in full and note if the peak value in the Cubase Performance Meter stays below 70%. Then go to the heaviest part of your arrangement and check again.
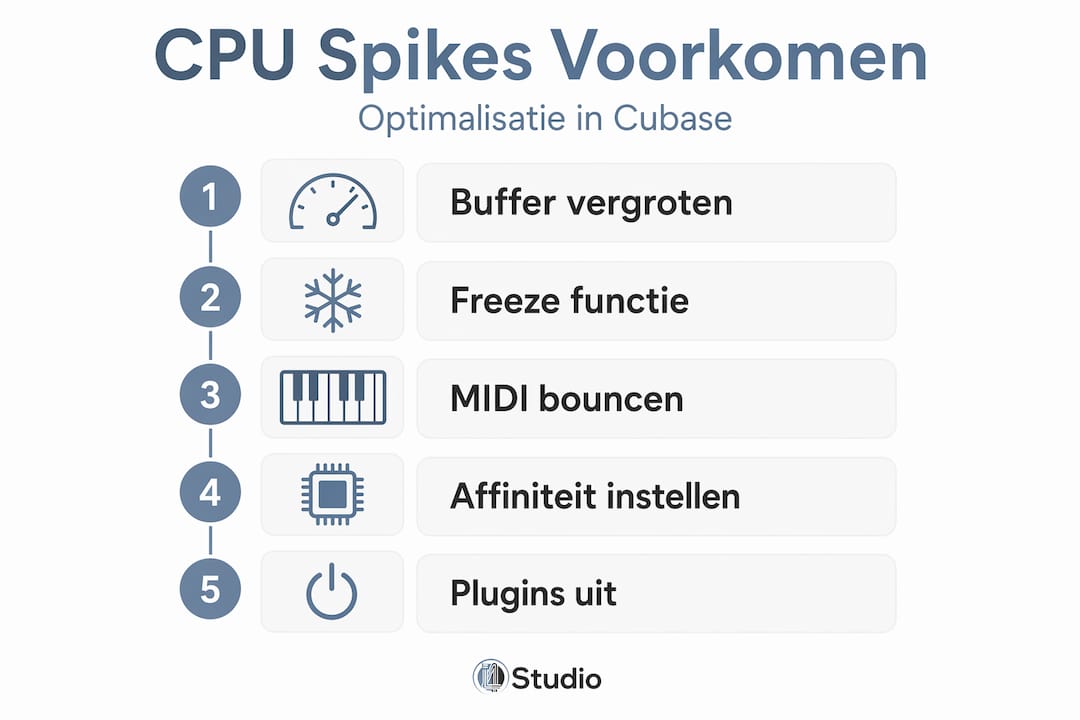
Cubase changes process affinity dynamically, so standard CPU monitoring can be misleading. Use Process Lasso in parallel with Task Manager for a more complete picture.
Do problems persist after all the optimizations? Then check one by one which plugin is the culprit by temporarily deactivating plugins. Work in batches: deactivate half, test, deactivate the other half. That way you’ll find the culprit quickly.
My take on CPU management in Cubase
I have been working for years with producers and musicians who struggle with CPU spikes and most of them look for the solution in the wrong place. They invest in a faster processor when the real cause is a wrong buffer setting or a forgotten plugin in UAD Console.
What I see time and again in practice: the biggest gains are not in hardware, but in discipline. Producers who plan their freeze moments, bounce MIDI on time and maintain their templates properly rarely suffer CPU problems. Even on systems that are less powerful on paper.
The insight most people miss is that Cubase is not a static program. It shifts CPU tasks dynamically, which means that you as the producer have to actively drive along. I’ve seen sessions where Process Lasso made the difference between a session that crashed every few minutes and one that ran flawlessly for hours, without any hardware upgrades.
My advice: treat CPU management as part of your creative workflow, not as a technical problem you solve once and forget about. Build it into your habits, just like saving your project.
– harold
Ready for a studio PC that can handle Cubase?
All the tips in this article will help you get the most out of your current hardware. But sometimes the cause of persistent CPU spikes lies deeper: a processor that is simply too old, insufficient RAM or a slow HDD acting as a system drive. I4studio specializes in building studio PCs tailored to the demands of modern music production in Cubase and other DAWs.

Want to know which configuration suits your production style and project size? Check out I4studio’s studio PC advice and find the setup that ensures stable performance, session after session. For a deeper understanding of the hardware that makes the difference, also read more about studio PC components for music production.
Frequently Asked Questions
What causes CPU spikes in Cubase?
CPU spikes arise from a combination of too many active plugins, low buffer settings and dynamic process affinity that Cubase automatically adjusts. External software such as UAD Console can also contribute unexpectedly to the load.
What buffer size is best for Cubase?
Use 256 samples during recording for minimal delay. Increase this to 512 or 1024 samples during mixing for stable performance and less chance of CPU spikes.
Does the freeze function really help with CPU problems?
Yes. Freeze renders a track including all plugins to audio, stopping real-time processing. This instantly lowers the CPU load without losing the mix or arrangement.
What does Process Lasso do for Cubase?
Process Lasso forces Cubase’s processor affinity onto a fixed set of CPU cores. This prevents constant reallocation of tasks by the operating system, which is one of the main causes of unexpected spikes.
Why doesn’t Cubase restart always help?
Restarting Cubase does not solve underlying system and memory problems. A complete PC reboot is required to clear dormant processes and memory leaks that contribute to performance problems.
Recommendation
- The Best Computer for Cubase – https://i4studio.nl/
- For Audio PC 2026: Intel or AMD for Music Production?
- Audio Interface Troubleshooting: Practical Tips For Studios (audio interface troubleshooting) – https://i4studio.nl/
- Optimizing DAW Performance: Practical Strategies For Fast, Stable Studio Workflows – https://i4studio.nl/