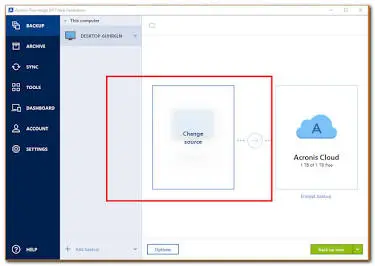
1. Create an image (backup) of the C drive
2. Preparation: Create Acronis Bootable Media
- In Acronis, go to Tools > Rescue Media Builder.
- Select ” Simple ” and choose an empty USB drive (at least 4 GB).
- Click Create. Store this USB drive in a safe place.
3. Restoring the C: Drive
Method A: Recovering from Windows (If the PC still boots)
- Open Acronis and navigate to the backup you want to restore.
- Click the ” Recovery ” button and select “Recover disks.”
- Check the C: drive / system drive.
- Click ” Recover Now.” The computer will restart and perform the recovery process outside of Windows.
Method B: Recovery Using the Bootable USB (If Windows No Longer Starts)
- Insert the Acronis Rescue USB drive and the external hard drive containing the image into the PC.
- Start the PC and press the key to open the Boot Menu (usually F12, F11, F8, or Del, depending on the PC brand).
- Select the USB drive to boot from. Acronis will now load from memory.
- On the Acronis screen, select “Recovery” > Browse to the backup and select the ”
.tib” or ”.tibx” file on your external drive. - Select the desired destination drive (the internal C: drive) and click Proceed.
- After the restore is complete, disconnect the USB drive and restart the PC as usual.
Here is a detailed guide on how to create the Acronis Rescue Media USB drive and how to boot your computer from this USB drive via the BIOS / Boot Menu.
Part 1: Creating the Acronis Rescue Media USB drive
Make sure you have an empty USB drive with at least 4 GB of storage on hand (note: all existing data on the USB drive will be erased).
Plug the USB flash drive into your computer.
Open Acronis Cyber Protect Home Office (or True Image).
In the left navigation menu, click Tools.
Select Rescue Media Builder.
Select the “Simple” option:
Acronis automatically selects the best settings (WinPE/WinRE) based on your specific Windows configuration.
Under “Storage Medium,” select your USB flash drive.
Click ” Create ” (Proceed).
Wait until the process is complete. Once the status “Successfully created” appears, you can safely eject the USB flash drive and store it.
Part 2: Booting from the USB flash drive via the Boot Menu or BIOS
If your PC no longer boots normally or if you want to repair the C: drive outside of Windows, follow these steps.
Method 1: Using the Quick Boot Menu (Recommended)
This is the easiest way because it doesn’t permanently change the PC’s default settings.
Make sure both the Rescue USB drive and the external drive containing the backup are connected.
Turn off the PC completely.
Turn on the PC and immediately press the Boot Menu hotkey for your PC brand repeatedly:
HP:
F9orEscDell:
F12Lenovo:
F12or the Fn+F12 / Novo buttonAsus:
F8orEscAcer:
F12orEscMSI / Gigabyte:
F11orF12DIY (Motherboards):
F11(ASRock/MSI) orF8(ASUS)
A screen will appear where you can choose which device to boot from.
Select your USB flash drive (if possible, choose the option labeled ” UEFI: “) and press Enter.
Method 2: Change the boot order through the BIOS/UEFI
If it doesn’t work through the Boot Menu, you can change the boot order directly in the BIOS.
Start up the PC and immediately press the BIOS key (usually F2, Delete, or F1) repeatedly.
Use the arrow keys or the mouse to navigate to the Boot or Boot Priority tab.
Find Boot Option #1 and change it to your USB drive (preferably the UEFI version).
If Secure Boot is enabled and the USB drive won’t boot, you can temporarily set Secure Boot to ” Disabled.”
Save the changes by pressing F10 (Save & Exit) and select Yes. The PC will now boot from the USB flash drive.
Part 3: Booting Acronis from the USB drive
Once the USB drive has loaded, you’ll see the blue/black Acronis startup screen.
Select Acronis Cyber Protect Home Office (or Acronis True Image).
After a brief startup, the familiar Acronis interface will open.
You can now use Recovery > > > Browse for backup to locate the image on your external drive and restore the C drive.