Properly tuned acoustics often make more of a difference in a mix than the most expensive plug-in or the most sophisticated monitor. This guide covers the basics of acoustics and helps audio professionals, musicians and content creators understand how sound behaves in a room, what problems are most common and what practical steps are needed to make a studio sound good.
Why knowledge of acoustics is essential
Most sound engineers know that good equipment is important, but underestimate how much space and acoustics determine the final results. A neutral listening room ensures that decisions about balance, EQ and dynamics are reliable. Without control over acoustics, this leads to mixes that sound unexpected on other systems: too little low, too much midrange or a sharp top. The reader – whether a project studio in an attic room or a professional control room – will achieve much better results with a few core principles.
Basic concepts: what is sound anyway?
Sound as a wave
Sound is a mechanical wave that propagates through air (or other medium). Important quantities are:
- Frequency (Hz) – the number of cycles per second. Low frequencies (20-250 Hz) often feel more than are clearly audible, high frequencies (above 5 kHz) give sharpness and detail.
- Amplitude – the strength of the pressure changes; is often measured in dB SPL (decibel Sound Pressure Level).
- Wavelength – the distance between two identical points in the wave (e.g. tops). At 100 Hz, the wavelength is about 3.4 meters (in air).
- Phase – the relative timing of two sound waves; phase differences can cause amplification or cancellation (interference).
Decibels and perception
Decibel (dB) is a logarithmic scale. An increase of 10 dB feels roughly twice as loud to the human ear. Critically for studios, small dB differences at certain frequencies produce large differences in perception.
Direct sound versus reflections
When a source produces sound in a room, that sound reaches the listener through two main pathways:
- Direct sound – the uninterrupted beam from source to ear (or microphone); this is the most reliable signal for timbre and transients.
- Reflected sound – sound that first hits one or more surfaces and then reaches the ear; this affects spatiality, clarity and sometimes ambiguity in stereo image.
Early reflections (within ~20-50 ms) directly affect what is perceived as bright or dull. Prolonged reflections (afterglow) liven up a room, but too much can muddy and mask it.
Space modes and standing waves
Standing waves occur when sound waves reflect between parallel surfaces and amplify each other at certain frequencies. These resonances – also called room modes – are especially problematic in the low frequency range (20-250 Hz). Characteristics:
- They occur at frequencies whose wavelength is equal to a simple ratio of the distance between walls (½, 1, 2 times).
- Causes uneven low frequency response: exaggerated bass in some places, gaps in others.
- Its location-specific: at different points in the room, the effect is different.
Practical example
In a room 3 meters wide and 4 meters long, a 57 Hz wave (wavelength ≈ 6 m) will be able to produce strong modal patterns because that wavelength fits several times in the room. Therefore, the musician standing in a particular listening position may hear too much 57 Hz, while a microphone elsewhere may actually register a low loss.
Afterlife: RT60 and relevant sizes
RT60 is the classic measure of afterglow time: the time it takes for a sound to decay 60 dB after the source stops. Interpretation:
- A tall RT60 gives a “lively” room (concert hall). For studio listening rooms, a shorter RT60 is desirable, depending on size and use.
- Average values for control rooms: 0.3-0.5 s in the middle of the frequency spectrum; shorter is often better in the low frequencies.
Practically, one often works with frequency-dependent RT measurements and aims for controlled absorption in the mid- and high-frequencies, with specific attention to low-frequency modes.
Acoustic treatment: absorption, diffusion and insulation
Absorption
Absorbent material alters acoustics by converting sound energy into heat. Materials and applications:
- Porous absorbers (foam, mineral wool) work mainly above 300-400 Hz; thicker material shifts the effect to lower frequencies.
- Panel absorbers (mass-spring, membrane) target low frequencies with specific resonances.
- Bass traps are specifically designed for low frequencies and are often placed in corners where layer energy is concentrated.
Diffusion
Diffusers break up reflections without taking away much energy. They are useful for maintaining a natural room feel without flutter echoes or excessive sharpness. Most commonly used in back wall of control rooms and live rooms.
Insulation (soundproofing)
Insulation prevents transmission of sound between rooms – important for use, legislation and neighbors. Key principles:
- Mass – heavier walls dampen bass better.
- Decoupling – separating structures (floating floors, detached walls) reduces transmission.
- Absorption and damping – prevents structural resonances.
Insulation is often the most expensive and invasive part of a studio improvement project. For many project studios, practical barriers such as solid doors, double glazing, and sealing gaps are already a good first step.
Practical approach: from problem identification to solution
A systematic approach helps reduce costs and maximize effectiveness. Readers can follow a simple workflow:
- Listen and observe – is the mix sharp or dull? Are basses uneven? Note places in the room where sound enlargement or disappearance occurs.
- Measure – use a measurement microphone and software such as REW (Room EQ Wizard) to capture frequency response and RT60. A sine sweep and pink noise provide insight into resonances and reflections.
- Prioritize problems – standing waves and layer problems usually have the greatest impact, followed by early reflections and afterglow.
- Plan treatments – bass traps in corners, first-reflection panels on walls, absorption for ceiling and back wall, diffusion in strategic places.
- Implement and remeasure – adjust based on results and listening tests.
Measurements: brief guide
A simple measurement setup includes a measurement microphone (omni), a laptop with measurement software, and the monitors at their normal position. Use a sine sweep to calculate the impulse response. Key outputs:
- Frequency Response – shows peaks and valleys.
- Impulse Response / Waterfall – shows energy in time and frequency; long “tail” indicates afterglow.
- RT60 per tire – helps determine where absorption is needed.
Monitoring: positioning and listening location
Even with perfect handling, incorrect positioning of monitors and listening position is disastrous. Some rules of thumb:
- Form an isosceles triangle between the two monitors and the listener; the distance between monitors is usually equal to the listening distance.
- Monitors should be aimed at ear level; the tweeter approximately at ear level.
- Listening position: often 38% of the room length from the front wall is recommended as a starting point to avoid modal problems.
- Symmetry is important: try to keep the listening position as symmetrical to the sides as possible.
The mirror trick for first reflections
A practical way to find first reflection points is the mirror method: have someone move along the side walls with a mirror while the listener sits in the chair; when the monitor is visible in the mirror, that is a first reflection point – these are ideal spots for absorbent panels.
Approach by studio type
Project studio / home studio
Budget and space are often limited. Priorities:
- Basstraps in corners (make them big and thick where possible).
- Absorbent panels at first-reflection points (less surface area, but strategically placed).
- Mobile solutions: freestanding panels and ceiling hangers.
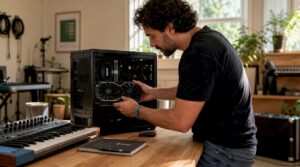
- Using good monitors and a reliable audio PC – this is where I4studio comes in: they provide powerful audio and rendering computers that work stably in smaller studio environments and can also advise on suitable sound cards and monitor setups.
Vocal booth / recording booth
Small booth requires anti-reflection and control of whistling sounds. Recommendations:
- Use of mid-spectrum absorption and thick materials for lower frequencies.
- Don’t forget ventilation and ergonomics – dry acoustics without enough air circulation is uncomfortable for artists.
Control room and mixing rooms
For critical monitoring:
- Strict control over early reflections and avoid asymmetry.
- Diffusion behind the listening position to maintain natural spaciousness.
- Professional measuring equipment and possibly an acoustic consultation process – this is where suppliers such as I4studio often offer advice and customized solutions.
Materials and products: what works WHAT?
There are numerous options; some practical categories and their uses:
Absorbent foam
Cheap, light and easy to assemble. Works mainly above 400 Hz. Not ideal as sole solution to bass problems because it has little effect on low frequencies unless very thick.
Glass or mineral wool
Thick 50-100 mm panels are affordable and effective over a wider frequency spectrum. Commonly used in custom absorber panels (with frame and fabric).
Massive panels and membranes
These are effective for low frequencies that porous materials do not grab. They work by resonance and require construction tailored to desired frequencies.
Diffusers (QRD, skyline)
Break up reflections. QRD (Quadratic Residue Diffuser) works frequency-oriented; skyline diffusers give broadband dispersion. Diffusers preserve energy and vibrancy without sharp reflections.
Monitor stands, isolation pucks and pads
Small accessories minimize transmission of vibration and improve coherence between direct and reflective sound.
Common mistakes and how to avoid them
- Too much high absorption without bass control – gives an unnatural “dead” room but leaves modal bass problems unresolved.
- Placing panels only aesthetically – treatment should be based on measurement and listening needs, not just because of design.
- Rely on software correction alone – EQ can mask some problems, but responds differently than physical treatment; it does not change the energy in the room.
- Insufficient symmetry – asymmetrical placement of monitors and panels distorts the stereo image.
Role of good hardware and support
A stable audio environment requires reliable hardware in addition to acoustic treatment. I4studio specializes in audio, video and broadcast computers optimized for low latency, high track-count and reliable rendering. Some of the ways good hardware contributes:
- A powerful DAW PC reduces dropouts during recording and playback so engineers can make correct decisions.
- Good audio interfaces and monitor controllers provide accurate metering and routing during measurement and treatment processes.
- I4studio offers advice on systems specifically tailored to audio production and can recommend equipment and solutions to suit the client’s acoustic situation.
Budget-friendly solutions and DIY tips
Not everyone has a big budget. Some effective low-cost steps:
- Use pedestals of books or risers as simple monitor stands to minimize resonances.
- Build DIY bass traps with wooden frames and thick glass wool or sheep wool; finishing with fabric makes them acceptable in any room.
- Place heavy bookcases and furniture along walls to reduce diffuse reflections and transmission (useful, but unpredictable).
- Use towels or blankets temporarily on reflective surfaces during recording of sensitive material.
Case Study: small project studio to reliable mixing space
A typical case study: a musician works in a 4×3 meter attic room with monitors against the front wall and a listening position close to the back wall. Problems: excessive low at listening position and sharp high frequency in vocals.
Approach:
- Measurement with REW showed peak at 60 Hz and long afterglow around 500-2000 Hz.
- Placement of two large corner bass traps (thickness 100 mm mineral wool) significantly reduced the 60 Hz peak in the listening position.
- First-reflection panels on side walls and ceiling dampened the 500-2000 Hz reverberation and made vocals clearer.
- Repositioning monitors and small parking area 0.5 m forward and symmetrical solved the stereo image.
- After remeasurement and listening sessions, the room proved much more reliable: mix decisions translated better to other systems.
Measurement and optimization scheme – checklist
- Take a thorough listening test and note specific problems.
- Measure frequency response and RT60 with measurement microphone and software.
- Identify standing waves and first-reflection points.
- Specify treatment points: corners (bass traps), first reflections, ceiling, back wall.
- Implement treatment in stages and measure each time.
- Fine tune by listening and comparing with reference tracks.
When to seek professional help?
For crucial control rooms, broadcast environments or complex insulation projects, professional help is recommended. Acoustic consultants use sophisticated models, CAD drawings and can design specific solutions such as diaphragm resonators or solid partitions. In such cases, I4studio can not only supply equipment but also work with acoustic specialists to provide an integrated approach: from hardware to room treatment.
Future trends and smart integration
Some developments affecting studio acoustics:
- Software-based room correction and convolution reverbs are becoming increasingly accessible, but remain complementary to physical treatment.
- Modular, aesthetic panels that work for both design and functional acoustics are gaining popularity – useful for commercial spaces and content creators with visible studios.
- Improved measurement devices and integration with DAW workflows make it easier for engineers to systematically address acoustics.
In summary, the core of the basic principles of acoustics
The essential ideas the reader needs to remember:
- Sound is wave behavior: frequency, amplitude and phase determine how sound is heard.
- Space affects sound tremendously: direct sound versus reflections, standing waves and afterglow determine what shows up in the mix.
- Measure and treat strategically: measuring reduces guesswork; treat low first (bass traps), then mid/high (absorbers & diffusers).
- Positioning is crucial: monitors and listening position largely determine listening truth.
- Hardware and support make the process reliable: stable audio PCs and interfaces (such as those provided by I4studio) help achieve consistent results.
Frequently Asked Questions
What are the first steps to improve the acoustics of a small studio?
The first steps are listening and measuring. Place bass traps in the corners, put absorbent panels at the first-reflection points and check monitor positioning. Use a measurement microphone and software like REW to quantify changes.
Does foam for walls always help?
Foam helps at high frequencies but barely tackles low frequencies unless it is very thick. A balanced solution requires combinations of porous absorption, bass traps and possibly diaphragms/diffusers.
Should a studio sound completely “dead”?
Not necessarily. A very dead space often loses natural vibrancy and can sound unpleasant. The ideal result is controlled reflection: sufficient absorption at critical points and diffusion where a natural space is desired.
When is professional insulation needed?
If there is serious noise transmission to neighbors, or if production operations reach such levels that legal or comfort problems arise, professional insulation is necessary. For amateur or hobby use, simple measures may sometimes be sufficient.
Can software replace acoustic treatment?
Software such as room correction can be useful to compensate for abnormalities, but cannot change the physical properties of the room (such as standing waves). The best results come from a combination of physical treatment and smart software correction.
A good sounding room is a combination of science, experience and often a little patience. The basics of acoustics provide direction, but listening remains the ultimate tool. If readers are looking for equipment, professional PCs or custom advice, I4studio can support with hardware and guidance for a variety of studio setups – from one-person project studios to larger broadcast environments.
With the right approach and a step-by-step plan, it is possible to create a reliable and inspiring workspace even with limited resources. In doing so, the basic principles of acoustics are the foundation for any serious audio or video production.