The Best Solutions to Improve Your Studio Acoustics (And Why Advice Is Half the Work)
Whether you run a professional recording studio, build a voice-over suite or want to take your home studio to the next level, studio acoustics are everything. You can buy the most expensive microphones and the most high-end studio monitors, but if your space sounds like a bathroom, your mix will never translate to the outside world.
Improving your studio acoustics is fortunately not black magic. With the right approach and materials, you can transform any room into a balanced listening and recording environment. In this blog post, we discuss the best solutions as well as explain why professional advice can save you hundreds of dollars in mis-selling.
Why just hanging panels doesn’t work
Many producers and content creators enthusiastically start by sticking cheap, thin foam bubble boards against the wall. The result? A room that sounds stale and “dead” in the highs, while the lows (the basses) still boom uncontrollably through the room. This is because sound waves of different frequencies require a specific approach.
The three main pillars of acoustic improvement are:
Absorption: attenuating harsh reflections to reduce reverberation (reverb) and early reflections.
Diffusion: The scattering of sound waves to keep the room sounding alive without distracting echoes (flutter echo).
Bass trapping: taming the accumulated low frequencies that collect especially in the corners of the room.
The best solutions in a row
To get a balanced sound, combine different elements. Here are the most effective solutions for your studio:
1. Basstraps in the corners (Priority #1).
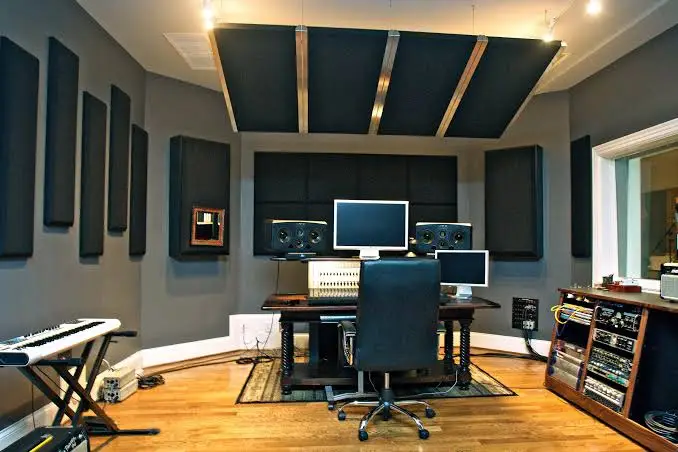
Low frequencies have an awful lot of energy and long sound waves. They accumulate in the corners of your room, creating muddy bass or just “holes” in your frequency response (phase extinction). Thick bass traps of rock wool or glass wool in the corners are essential to get the low end tight and fair.
2. Acoustic panels at first reflection points.
As you sit in your listening position, sound from your monitors not only travels directly to your ears, but also bounces off through the side walls and ceiling. We call this early reflections. By placing wideband absorption panels (at least 5 to 10 cm thick) at these specific points, you hear purely the sound from your speakers and not the room.
3. An “Acoustic Cloud” (Ceiling Panel).
Don’t forget the ceiling! A large absorption panel directly above your desk and listening position does wonders for the stereo image and quietness of the soundstage.
4. Diffusers on the back wall
If your studio is large enough, you’d rather not completely kill the back wall. A diffuser breaks up sound waves and disperses them throughout the room. This makes the room sound bigger and more natural, which is ideal while mixing or recording acoustic instruments.
Customization: why i4studio is your ideal partner
Every space is unique. An attic room with sloping roofs reacts completely differently to sound than a sleek, concrete basement. This is precisely why blindly ordering ready-made sets is often a gamble.
This is where i4studio comes in as the outspoken expert and partner. Whether you are looking for advice on the perfect synergy between your studio monitors and the room, or want a complete acoustic plan drawn up for your studio acoustics : i4studio looks beyond just selling products.
The i4studio advantage: Thanks to years of experience in the pro-audio world, the team at i4studio understands exactly how equipment and studio acoustics go hand in hand. Not only do they supply the best hardware and acoustic materials, they also provide you with clear, hands-on, customized advice. That way you invest directly in the right solution that fits your budget and space.
Checklist: Your roadmap to better sound
Before you start drilling, you can make your own first gains. Use this handy checklist:
| Step | Action | Target |
| 1 | Place your monitors symmetrically with respect to the side walls. | Ensures a balanced stereo image. |
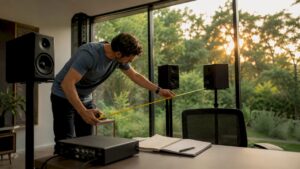
| 2 | Make an equilateral triangle with your head and the speakers. | Optimal “sweet spot” while listening. |
| 3 | Apply the mirror method for the side walls. | Find the exact locations for your absorption panels. |
| 4 | Engage i4studio for targeted advice. | Prevent over-damping and address problem frequencies directly. |
Conclusion
Improving your studio acoustics is the most cost-effective upgrade you can do for your productions. It lifts your recordings to a professional level and ensures that your choices during mixing and mastering sound good all around.
Avoid guesswork and costly mistakes. Contact i4studio for expert advice and discover the best studio acoustic solutions for your specific situation. Your ears (and your listeners) will thank you!